

Set up your site: the Brand your site checklist
Also called: setup checklist, first steps, branding, customise my site, change the logo, replace the Reign name, favicon, what do I do first.
What this does
Section titled “What this does”The Home screen of Reign Settings opens with a checklist called “Brand your site”. It has a counter such as “5 of 9 done”. It is the shortest path from a new theme to a site that looks like yours, not like a demo.
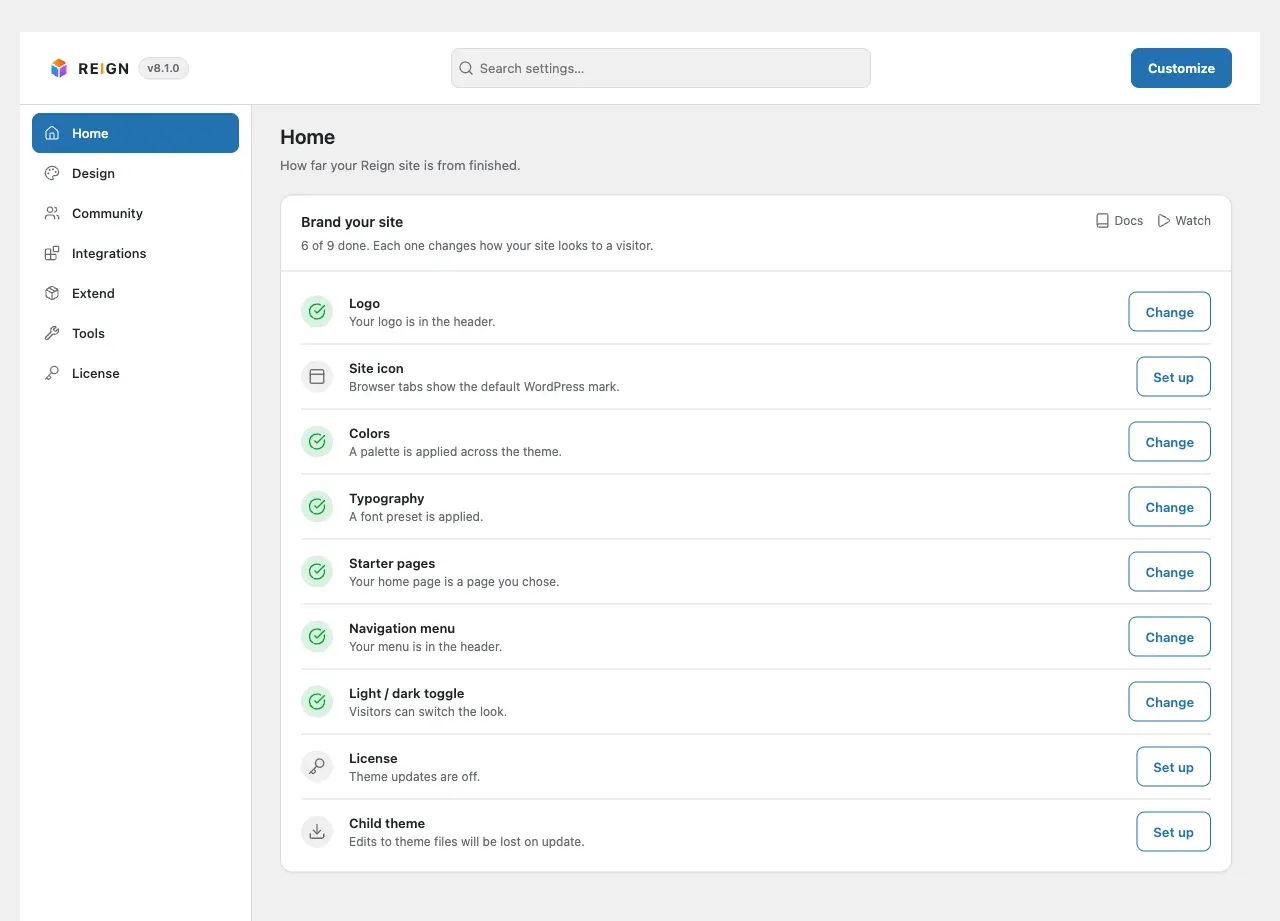
Each row says in plain words what is still to do. For example, “Your site name is showing as plain text”. Each row has a button that takes you to the setting. The checklist is a to-do list, not a settings screen.
Before you start
Section titled “Before you start”Have your logo file ready. A square image of at least 512 by 512 pixels also works as your site icon.
Work down the list in order. The first four items change what a visitor sees at once.
-
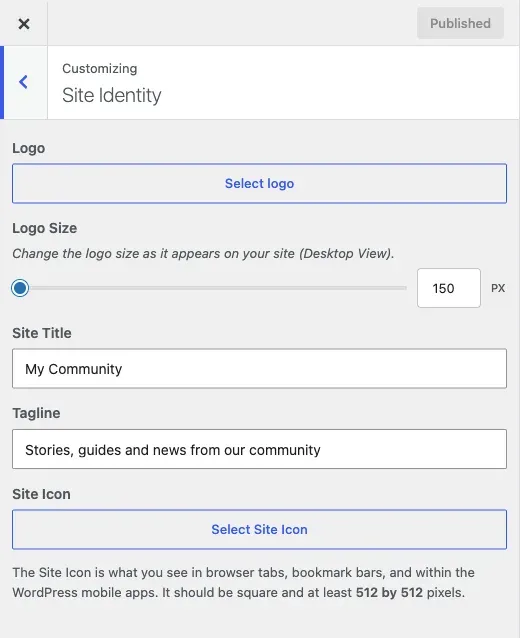
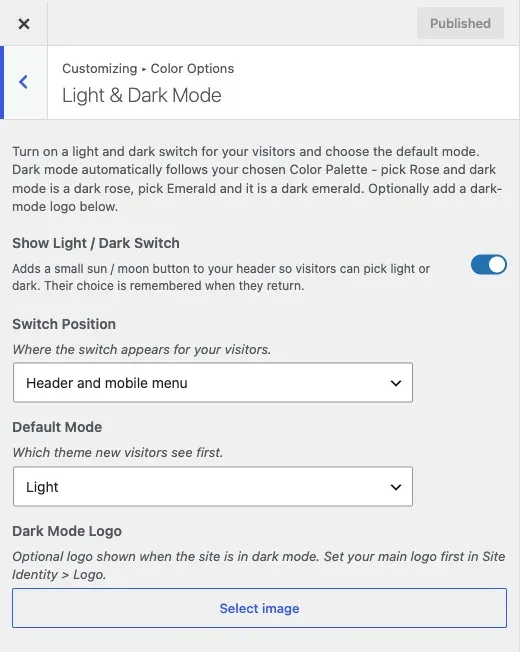
Logo. Select the button on the row. It opens Site Identity in the Customizer, which also holds the site title and tagline. Upload your logo there. When visitors can switch to dark mode and you have no Dark Mode Logo, the row reminds you: “If it is hard to see on dark backgrounds, add a Dark Mode Logo under Light & Dark Mode.”
-
Site icon. This is the small image in browser tabs and bookmarks. Use a square image, at least 512 by 512 pixels. Without one, browsers show the default WordPress mark.
-
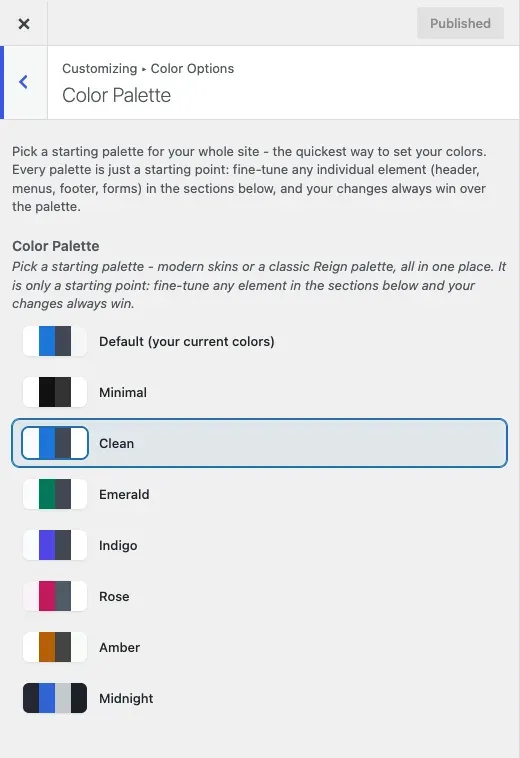
Colors. Pick one palette and the whole theme follows. This is faster than editing single colours.
-
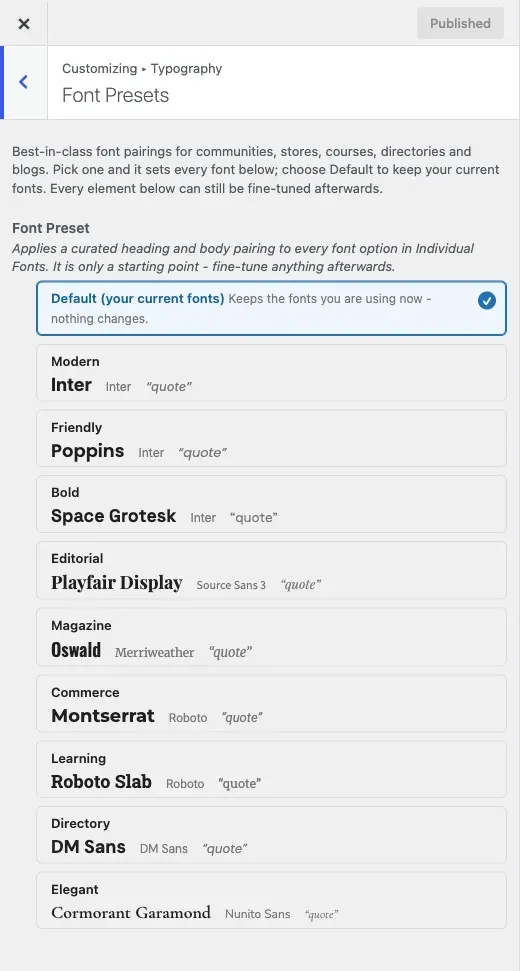
Typography. Pick a font preset. It sets the heading faces, the body face and the text sizes together.
-
Starter pages. Reign can preview a Welcome, About, Community and Contact page for you. Nothing changes until you publish them. Starter pages add only those four pages. To start from a whole demo site instead, use the Set up your site card above the checklist. See set up your site in about 2 minutes.
-
Navigation menu. This confirms your menu is assigned to the header. With no menu assigned, the header shows Home and your first six pages, so assign a menu to choose the links yourself.
-
Light / dark toggle. This turns on the switch that lets visitors choose light or dark. Without the switch, visitors see the mode you set as the default.
-
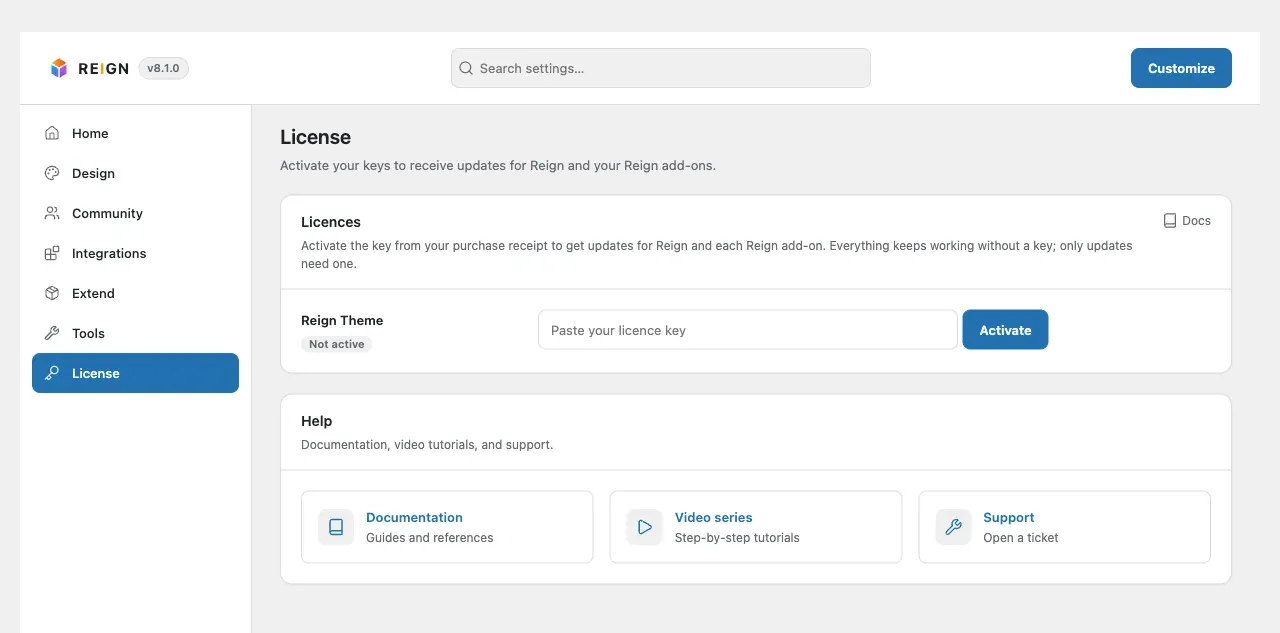
License. Activating turns on theme updates and the one-click installs on the Extend screen. Until then the row says “Theme updates are off”.
-
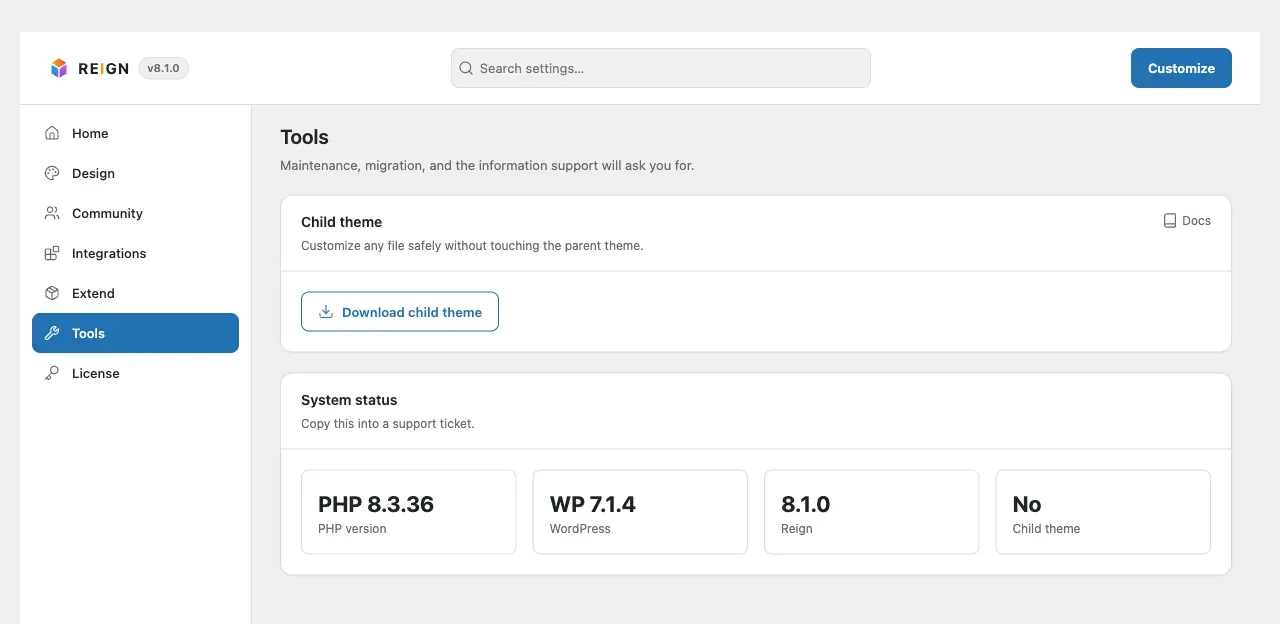
Child theme. Edits made directly to theme files are lost when Reign updates. Use Reign Settings > Tools > Download child theme to get a safe place for custom code.
How the palette, single colours and dark mode fit together is explained in how the colour system works. The dark mode switch has its own page, dark mode switch. The licence steps are in activate your licence, and the child theme is in child themes.
You’ll know it worked when
Section titled “You’ll know it worked when”The counter goes up as you finish each item. Your logo shows in the header, your colours show on buttons and links, and your site icon shows in the browser tab.
Good to know
Section titled “Good to know”Can I replace the Reign name or logo with my own?
Section titled “Can I replace the Reign name or logo with my own?”Yes. Upload your logo under Site Identity. It replaces the site name text in the header. The line at the bottom of the page, “Theme by Wbcom Designs”, is the copyright text. You can edit it under Customize > Footer > Copyright > Copyright Text.
How do I change the favicon?
Section titled “How do I change the favicon?”The favicon is the Site icon. Set it under Appearance > Customize > Site Identity.
Why is the counter stuck?
Section titled “Why is the counter stuck?”The counter shows the real state, so it is not a list you tick by hand. If an item still shows as not done after you set it, reload the screen. If it stays, open the setting and check the value saved. Then read changes are not showing on the site, because caching is a common cause.
What should I set up first?
Section titled “What should I set up first?”Do the first four items, then the menu. Those change what visitors see the most.