The Frontend Course Builder is a feature of Learndash Dashboard that allows Instructors to create courses without the need to go to the WordPress backend. instructors don’t need to understand anything about WordPress, which is perfect if you want you to want to provide a seamless experience to your site users
You just need to activate the Learndash Dashboard plugin. Once it is activated, instructors can access their frontend dashboard.
They can create a new course by clicking the “Add a New Course” button.
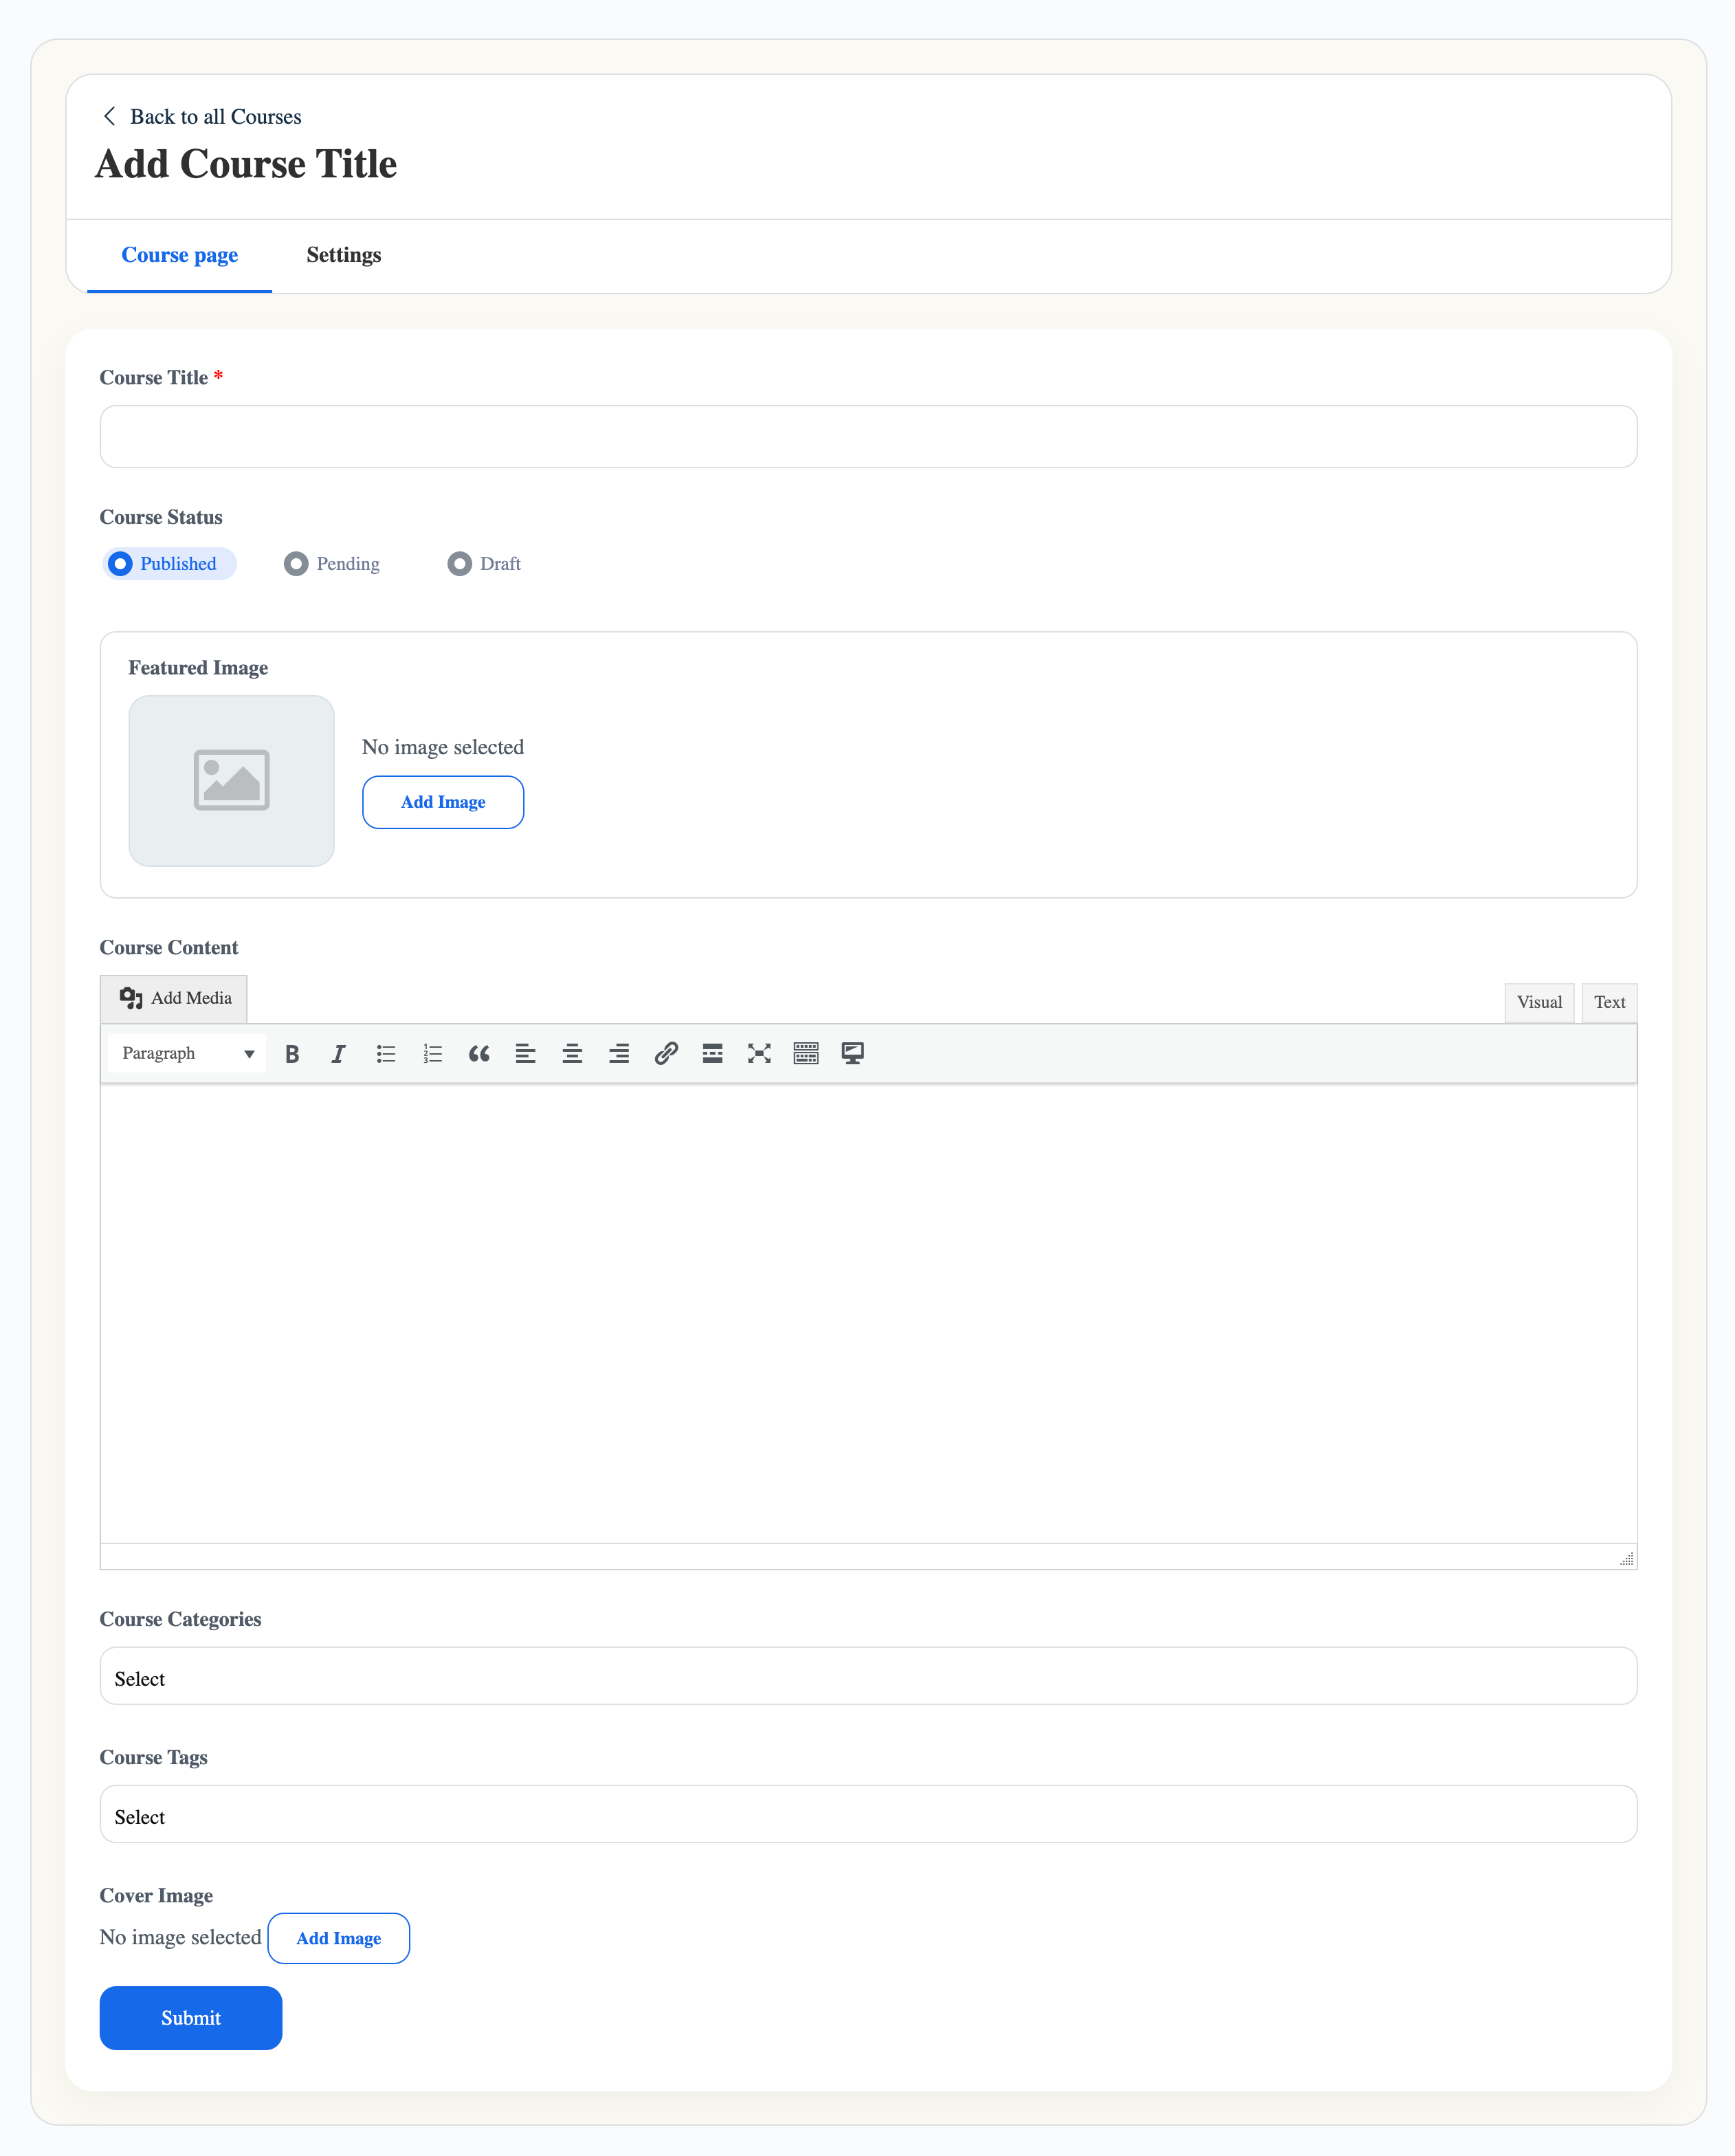
Course Title
This is the primary identification of the course. Make sure to keep it brief and informative.
Course status
Select the course status here. This can be selected between published, pending, and draft. This course status can later be changed anytime just by editing the course.
Course Content
You can fill in the brief introduction of the course here. This will give an idea to your students about the courses, their lessons, and topics.
Featured Image:
You can upload the featured image of the course using this section.
Course Categories:
Select the category of the course. You can create the course category by navigating to WordPress dashboard >> Courses >> Action >> Categories >> Add New.
Course Tags
Select the tags of the course. You can create the course tags from the front end as well as the backend.
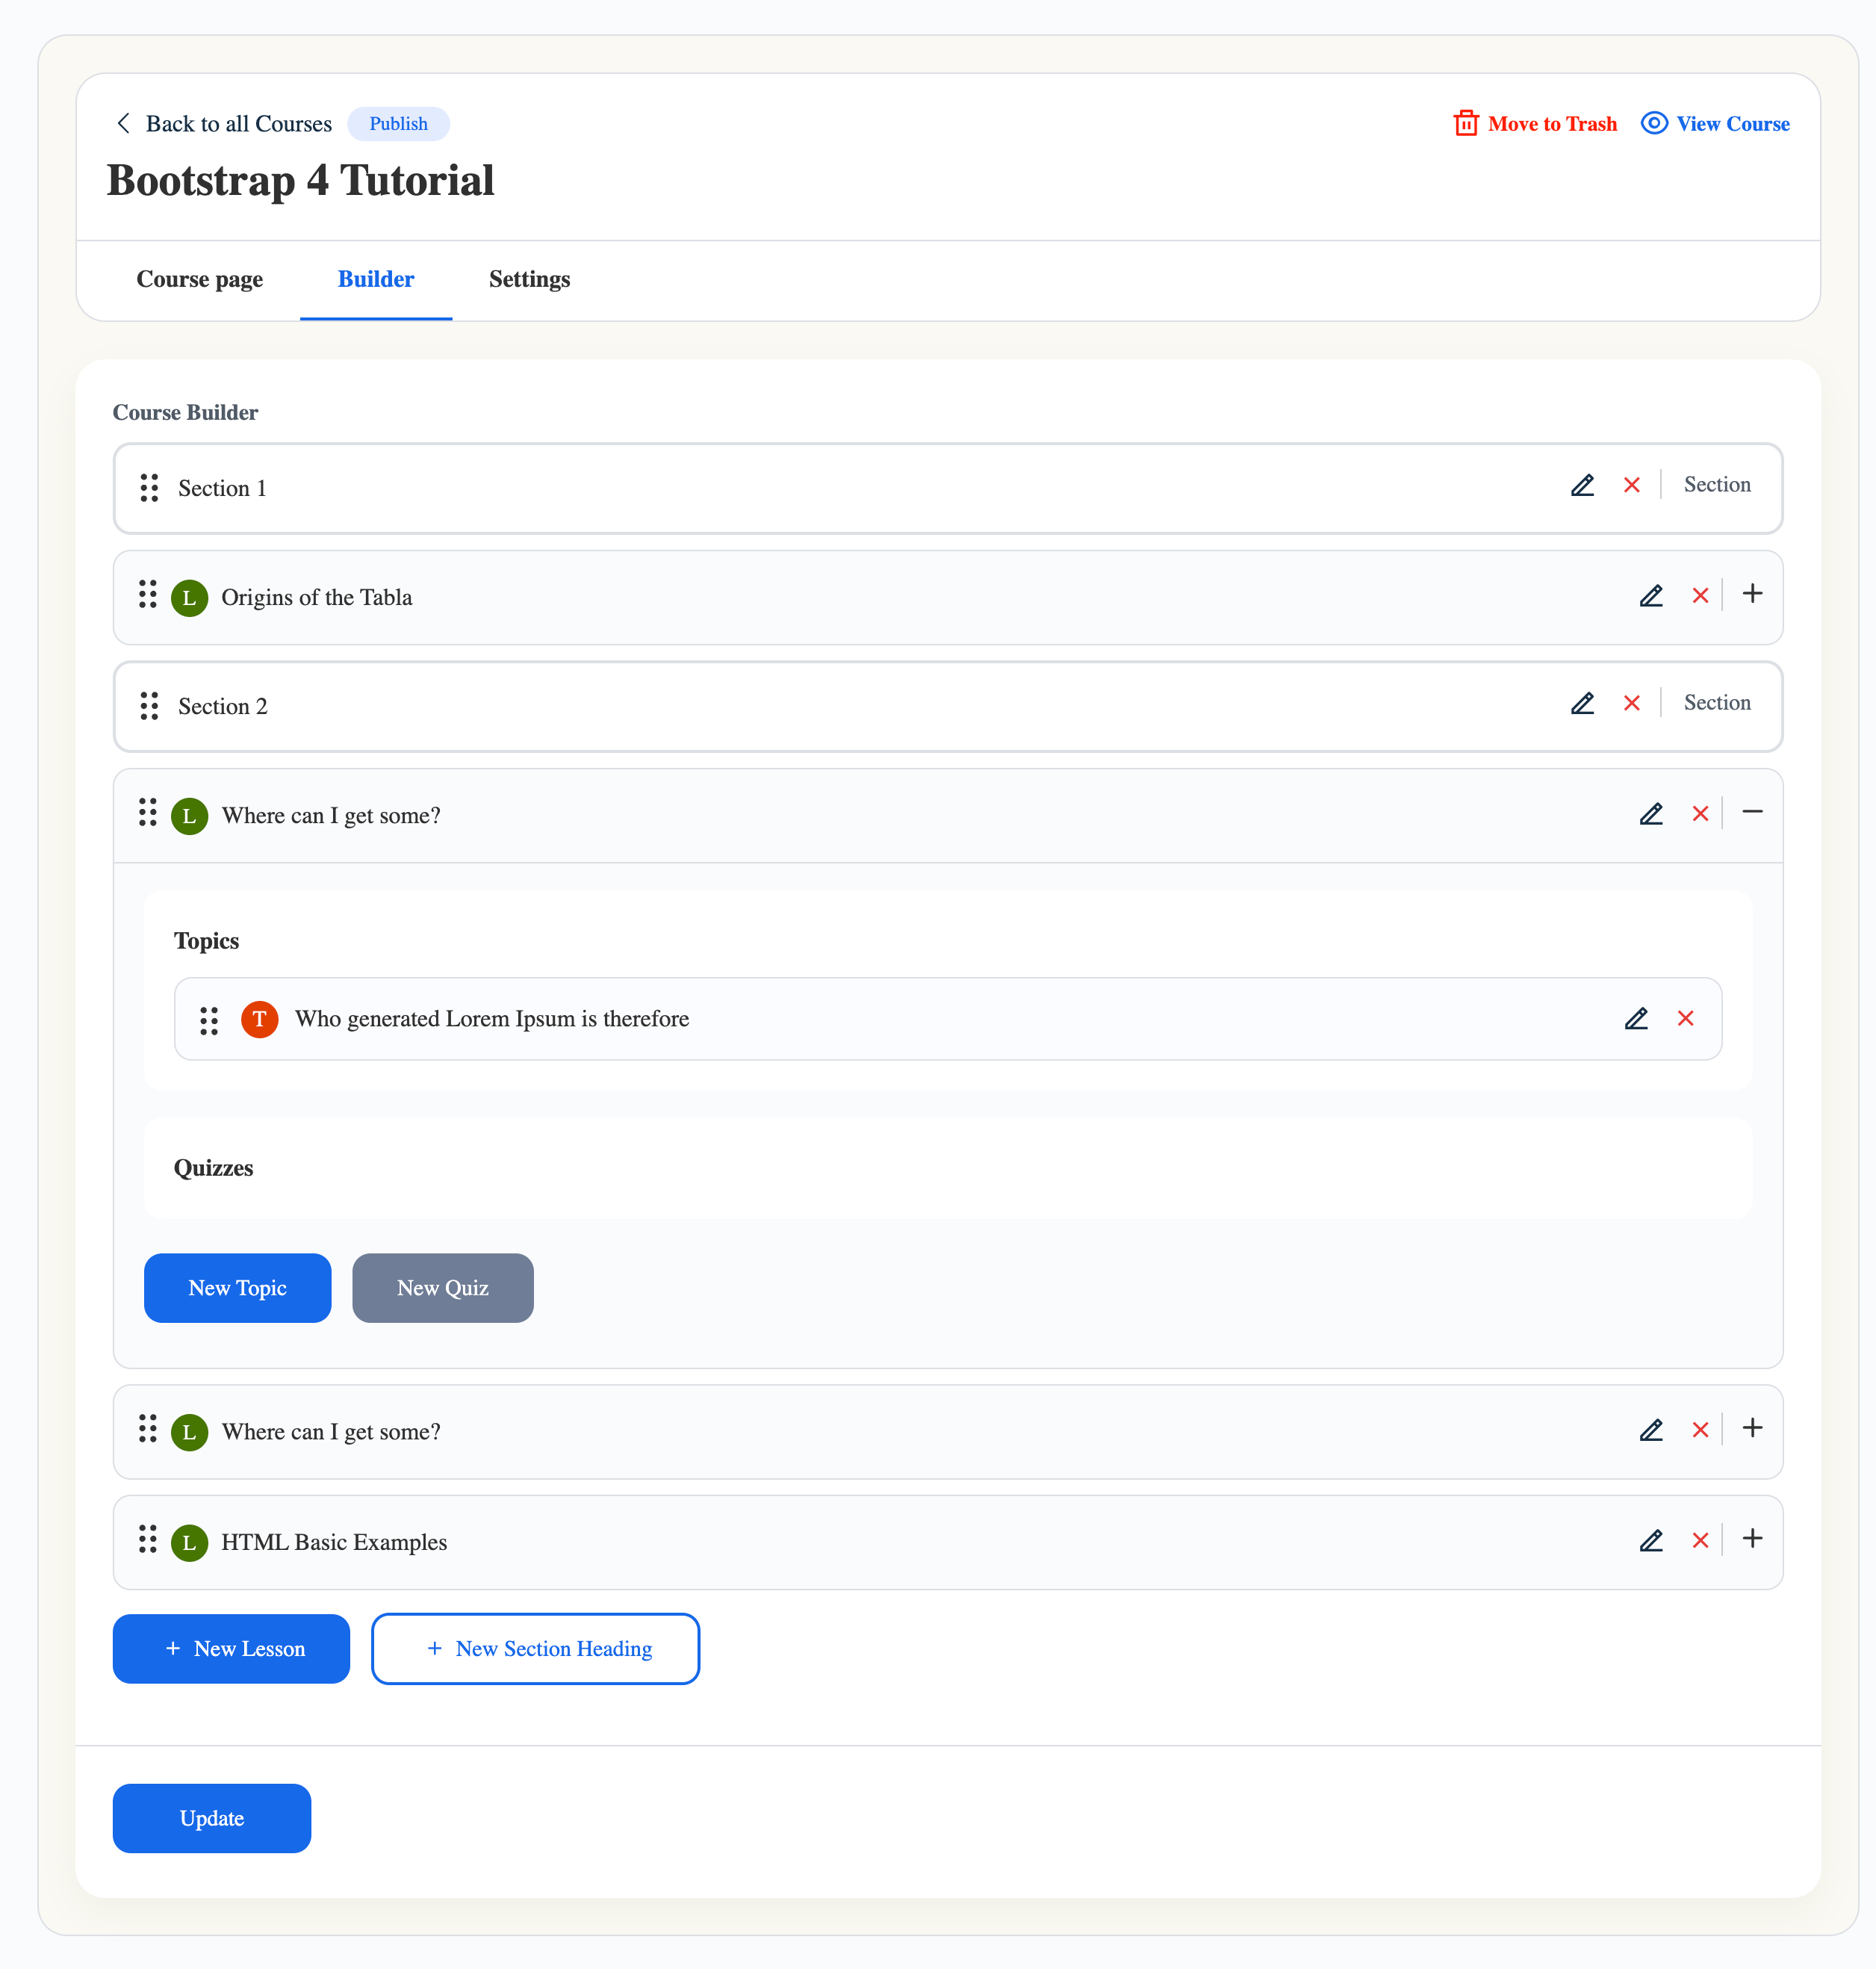
Course Builder
Thi LearnDash Dashboard Front End course builder simplifies the course creation process by offering a user-friendly and intuitive interface. Without the need to navigate away from the current page, you can effortlessly incorporate new sections, lessons, topics, and quizzes into your courses. This article is a comprehensive guide that walks you through utilizing every feature of the course builder, ensuring that course creation and editing become a seamless and straightforward task.
Accessing the Course Builder
You can access the LearnDash course builder through several methods.
For Existing Courses:
If you’ve previously established a course:
- Go to My Dashboard > COURSES.
- Hover your cursor over the Edit icon for course you want to edit.
- Click on the “Builder” link.
For the new lesson:
If you are creating a new course:
- Go to My Dashboard > COURSES.
- Click “Add A New Course Button”
- On the course creation screen, Fill out the Course Title and Description. And Then Click the Submit button.
- Once the Submit button is clicked you can View the Builder link
Course Setting
This tab allows you to manage the further settings of the course.
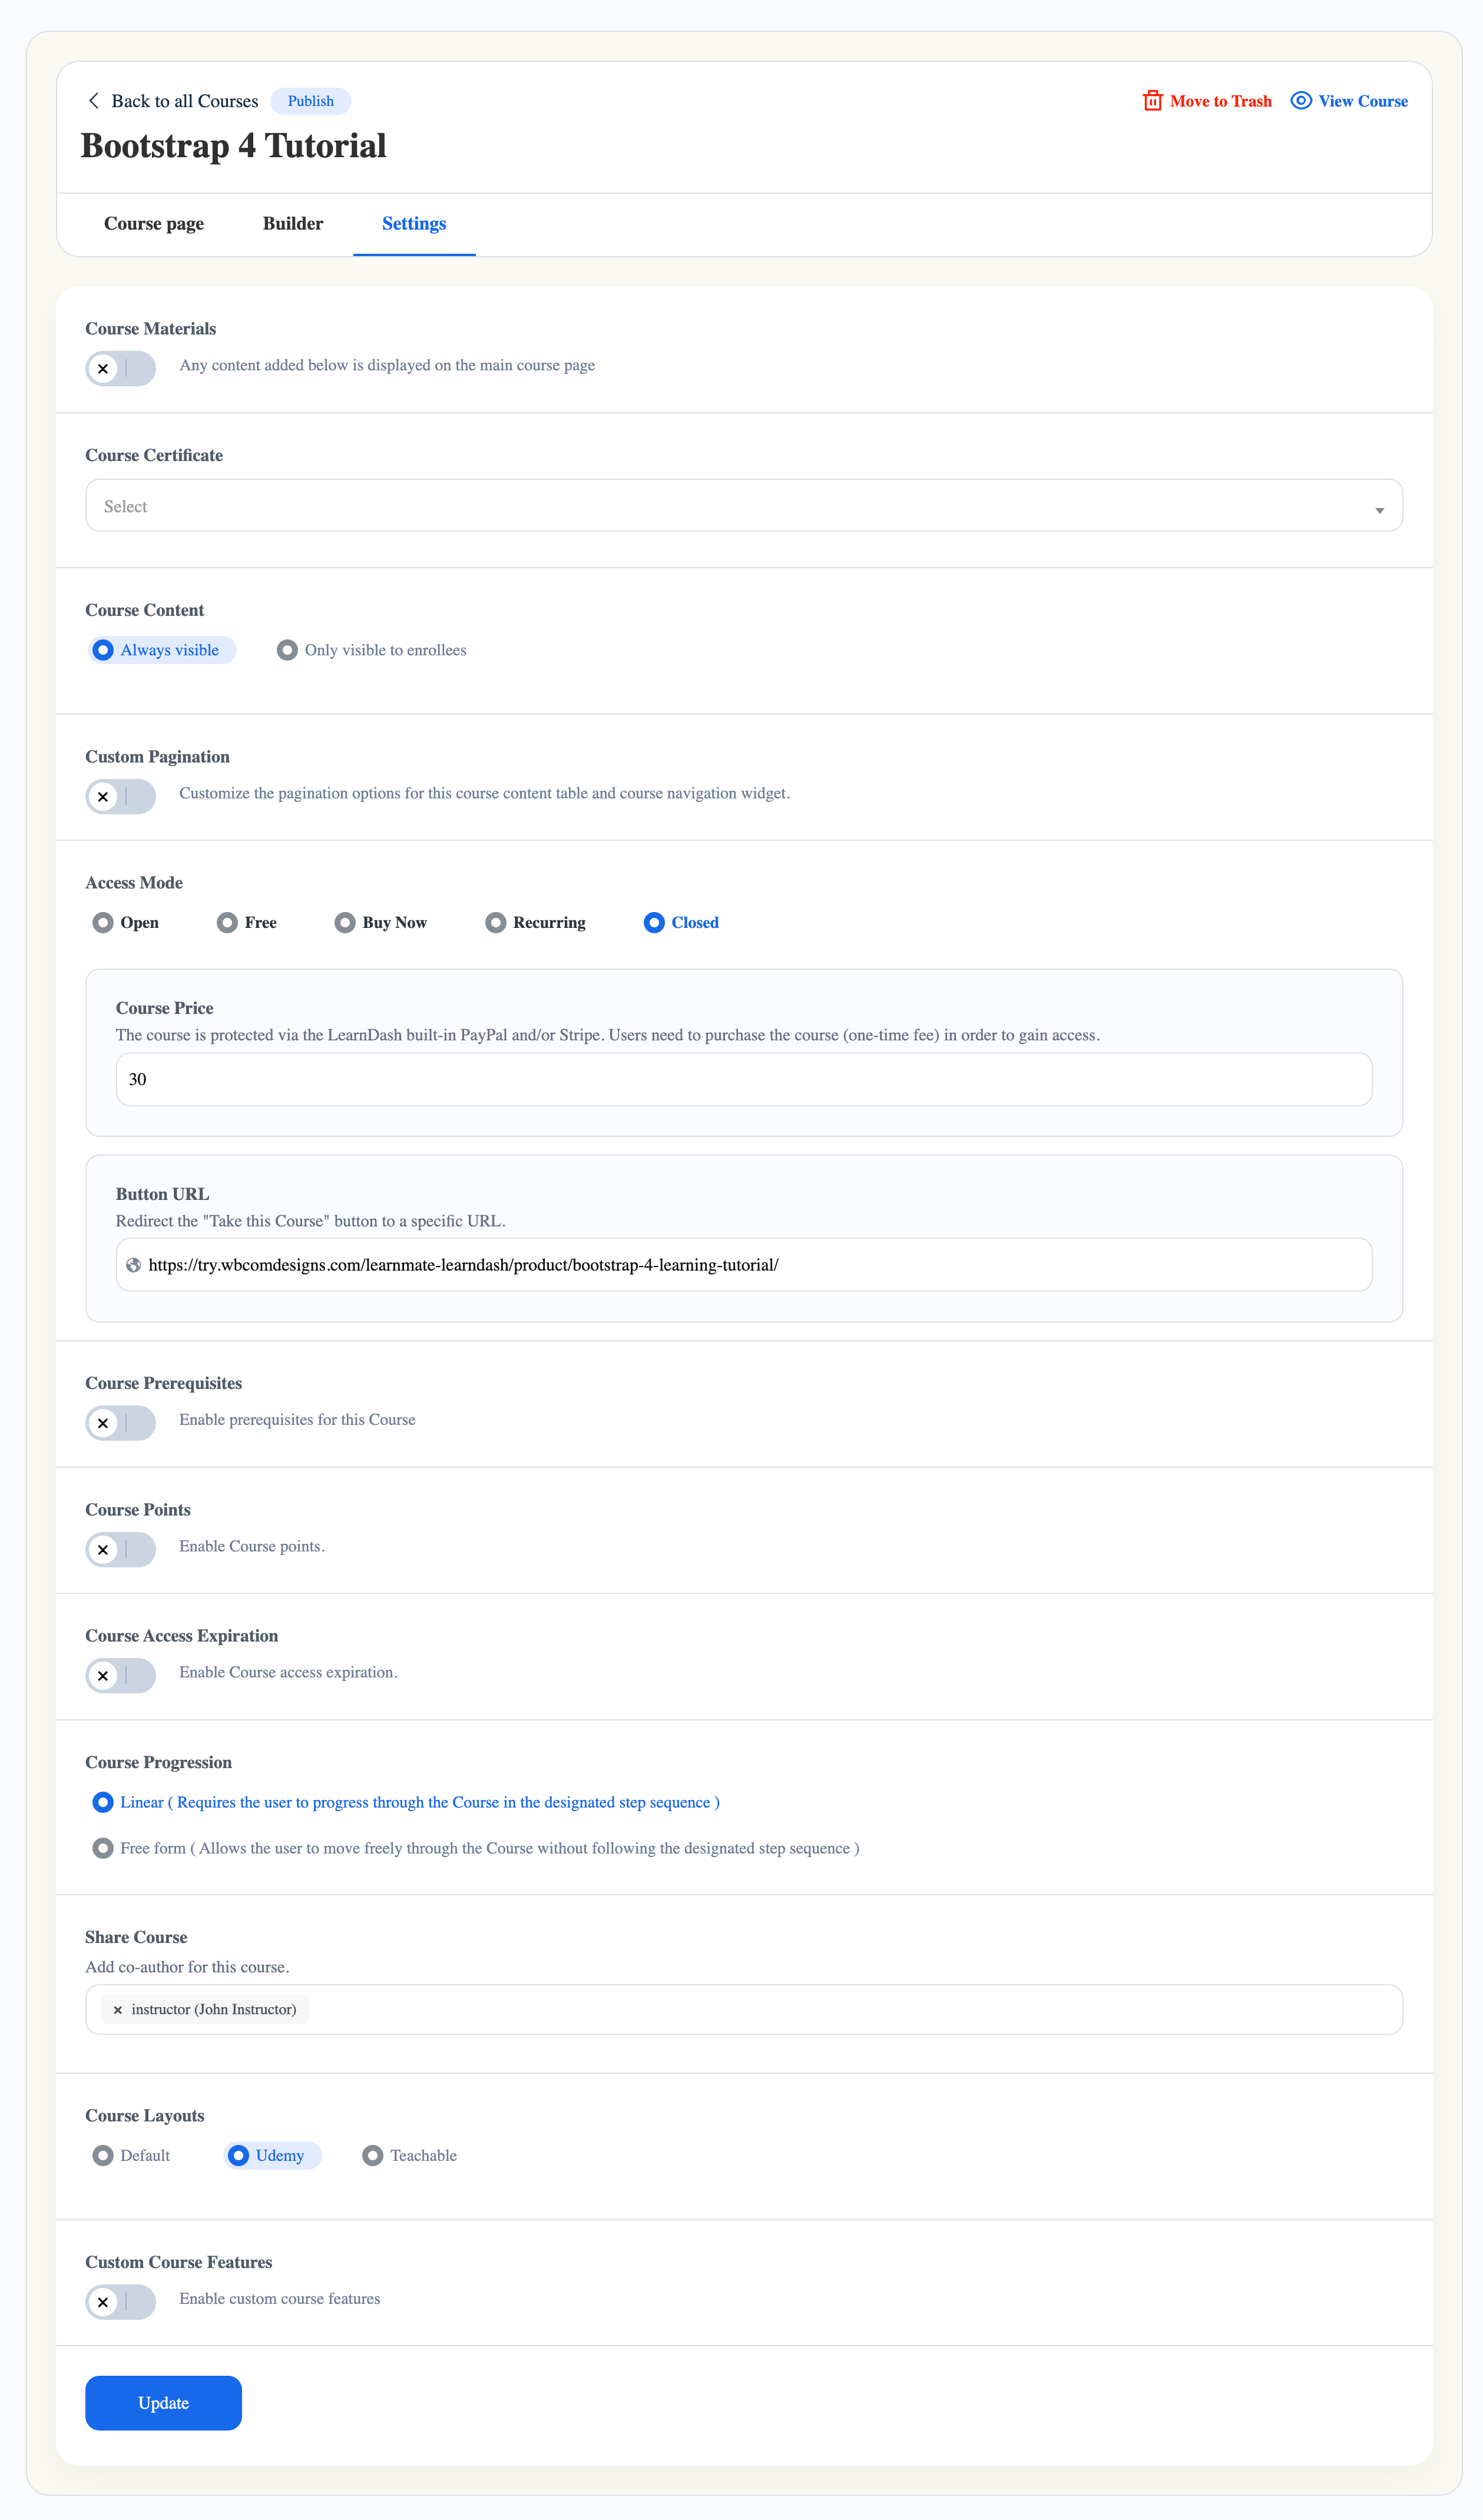
Course Material
Insert the course material Here.
Course Certificate
Select the course certificate. Course certificate can be created by navigating to WordPress dashboard >> Learndash >> Certificate >> Add New Certificate.
Custom Pagination
Set the pagination here.
Access Mode
Choose the course access mode from the dropdown.
Course Prerequisites
Manage the course prerequisite-related settings.
Course Points
Fill in the course points.
Course Access Expiration
Set the access expiration of this course.
Course Progression
Course progression pertains to the manner in which a user can navigate within your course, with two primary choices available:
- Linear ( Requires the user to progress through the Course in the designated step sequence )
- Free form ( Allows the user to move freely through the Course without following the designated step sequence )
Share Course
You can give another person access to collaborate on and contribute to the content and management of the course. This is done by adding them as a co-author, allowing them to make changes and updates to the course alongside you. It’s a way to work together on course development and administration.
Course Layouts
This option will let you choose your course layout in between the below options:
- Udemy
- Teachable
- Default
Note: This Feature is basically a part of Reign Learndash addon, This feature will be visible to you if you have installed and activated Reign Learndash Addon.