

Managing Roadmap Items
Roadmap items are a custom post type, so creating and editing them feels like working with a WordPress post, with a few roadmap-specific fields added.
Creating an item
Section titled “Creating an item”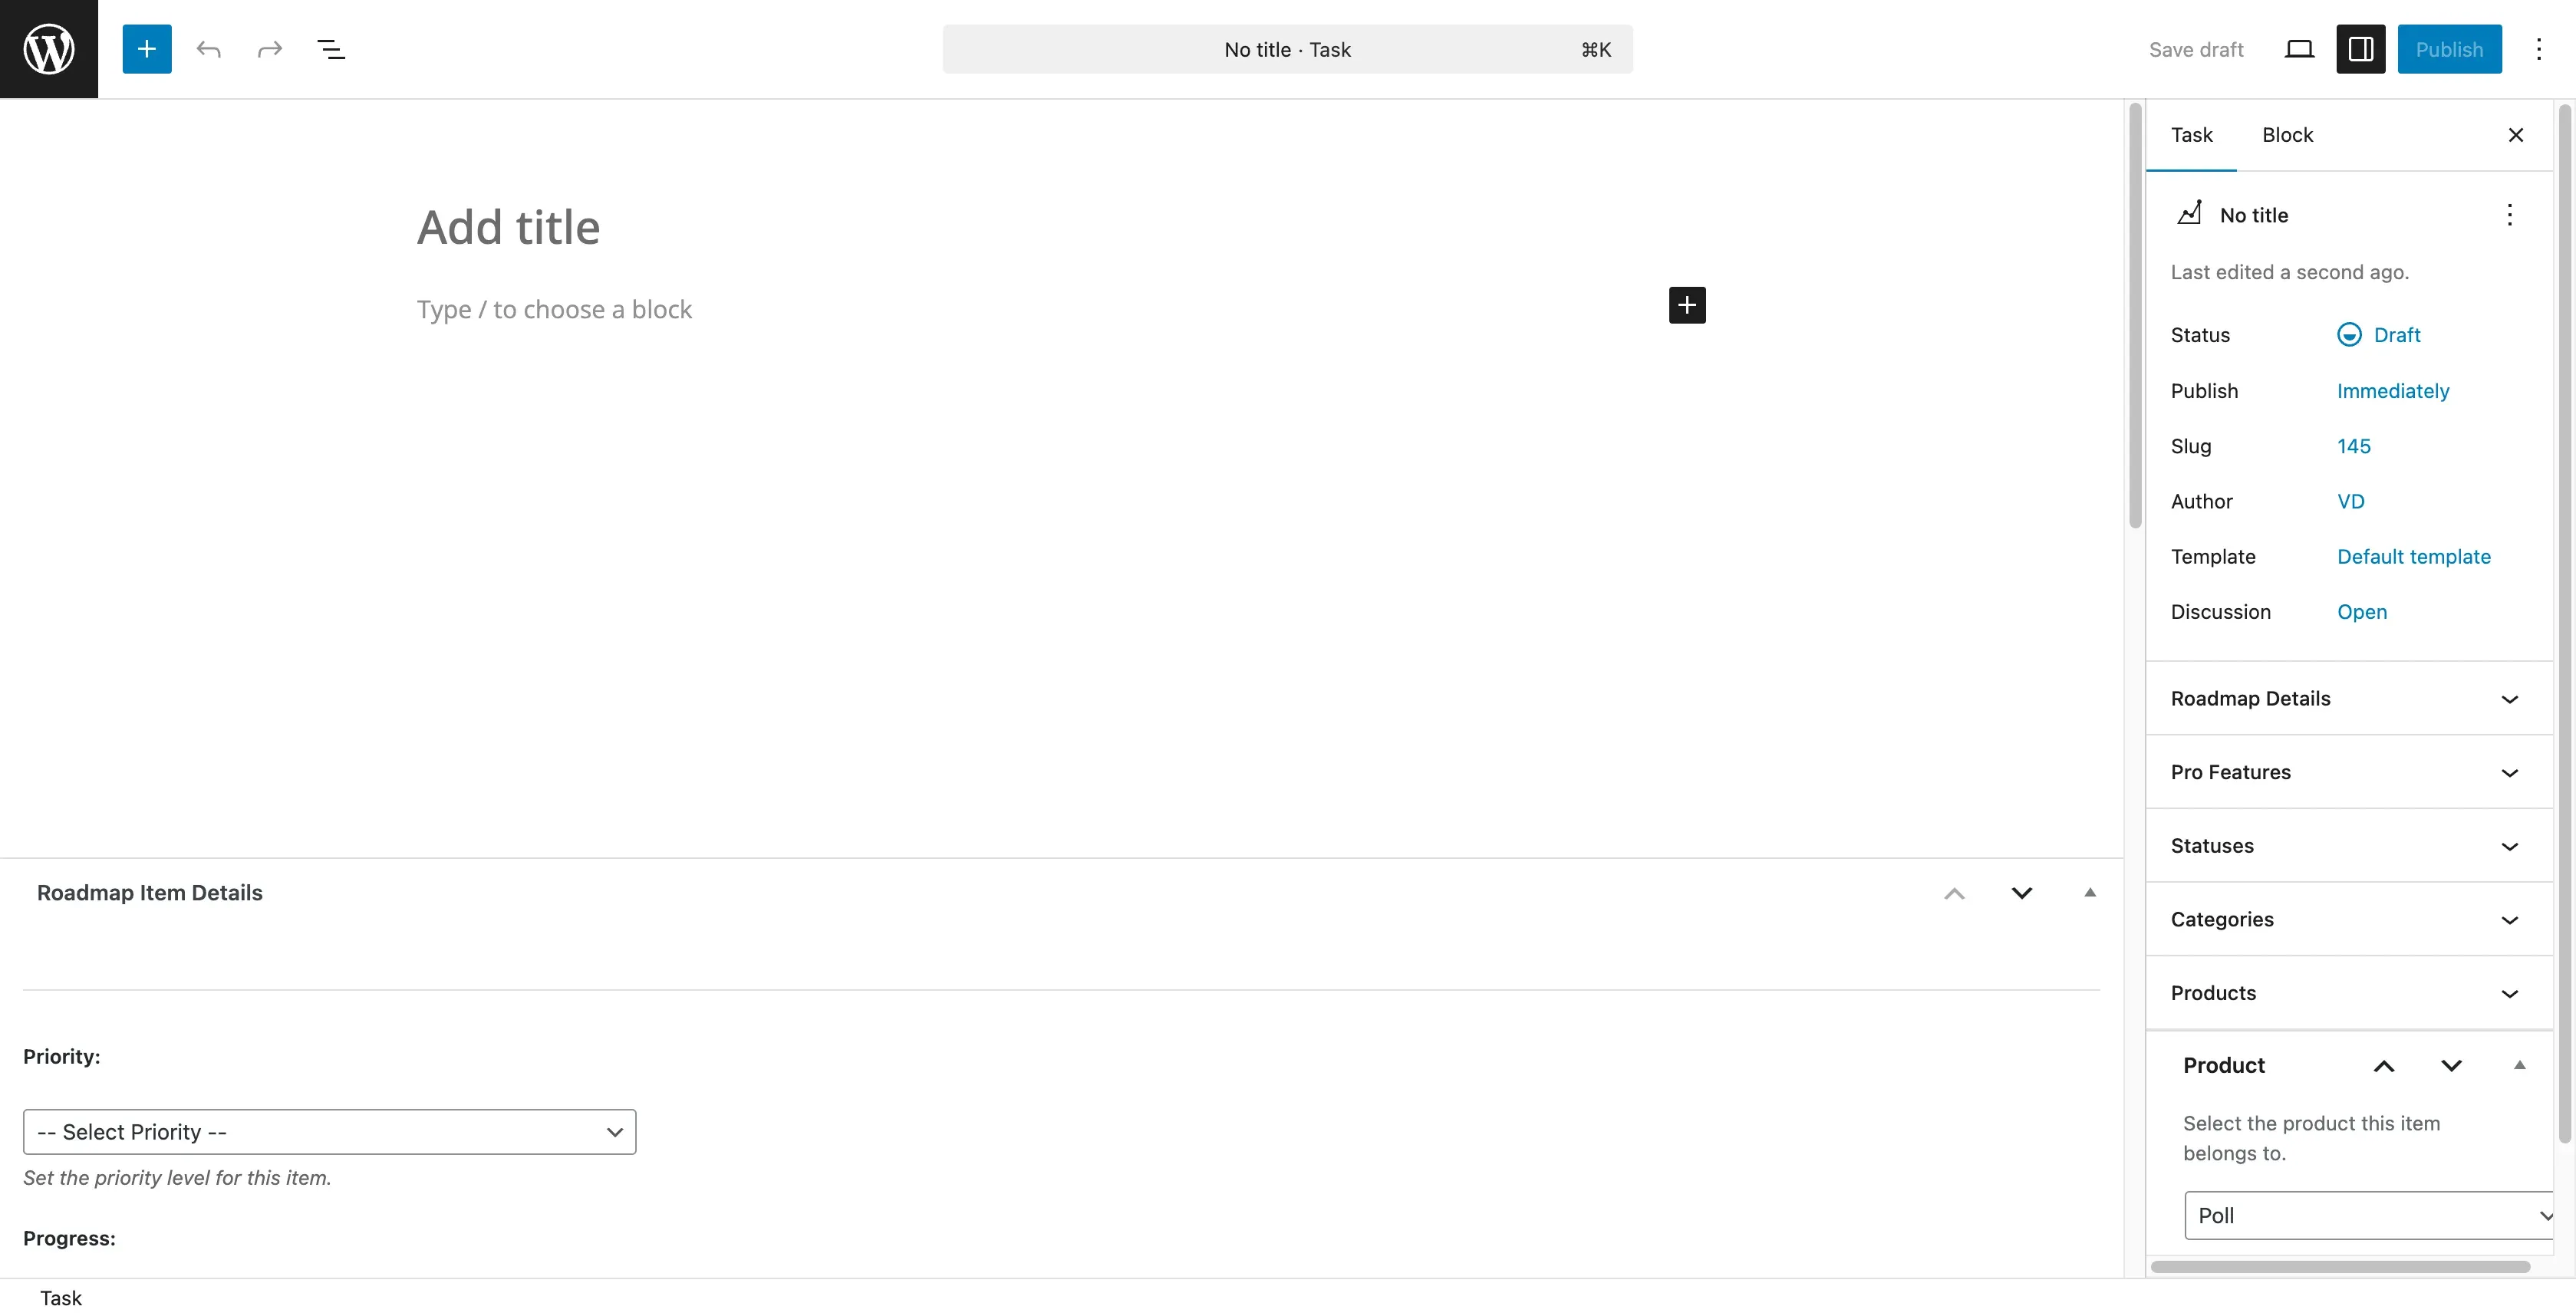
- Go to Roadmap > Add New.
- Enter a Title - keep it concise and specific (“Add dark mode toggle” reads better than “Dark mode”).
- Write a Description using the standard content editor. Explain the problem being solved, not just the feature name.
- Optionally add an Excerpt - a short summary shown on board cards. If left empty, it’s generated from the content.
- In the sidebar, assign a Status and one or more Categories.
- Fill in the Roadmap Item Details meta box (see below).
- Click Publish.
Roadmap Item Details fields
Section titled “Roadmap Item Details fields”| Field | Type | Notes |
|---|---|---|
| Priority | Low / Medium / High / Critical | Internal prioritization signal; can also be shown on the frontend depending on your template. |
| Progress | 0-100% slider | Drives the progress bar shown on item cards. |
| Completion Notes | Text | Shown to visitors on completed items - use it to explain what shipped. |
| Target Date | Date | Expected completion date. |
| External Link | URL | Link to external documentation or a reference page. |
| Vote Count | Read-only | Calculated automatically; not editable. |
Pro adds: Start Date, End Date, Effort Estimate (T-shirt sizing from XS to XXL), and a GitHub Issue URL field.
Editing existing items
Section titled “Editing existing items”Go to Roadmap > All Items.
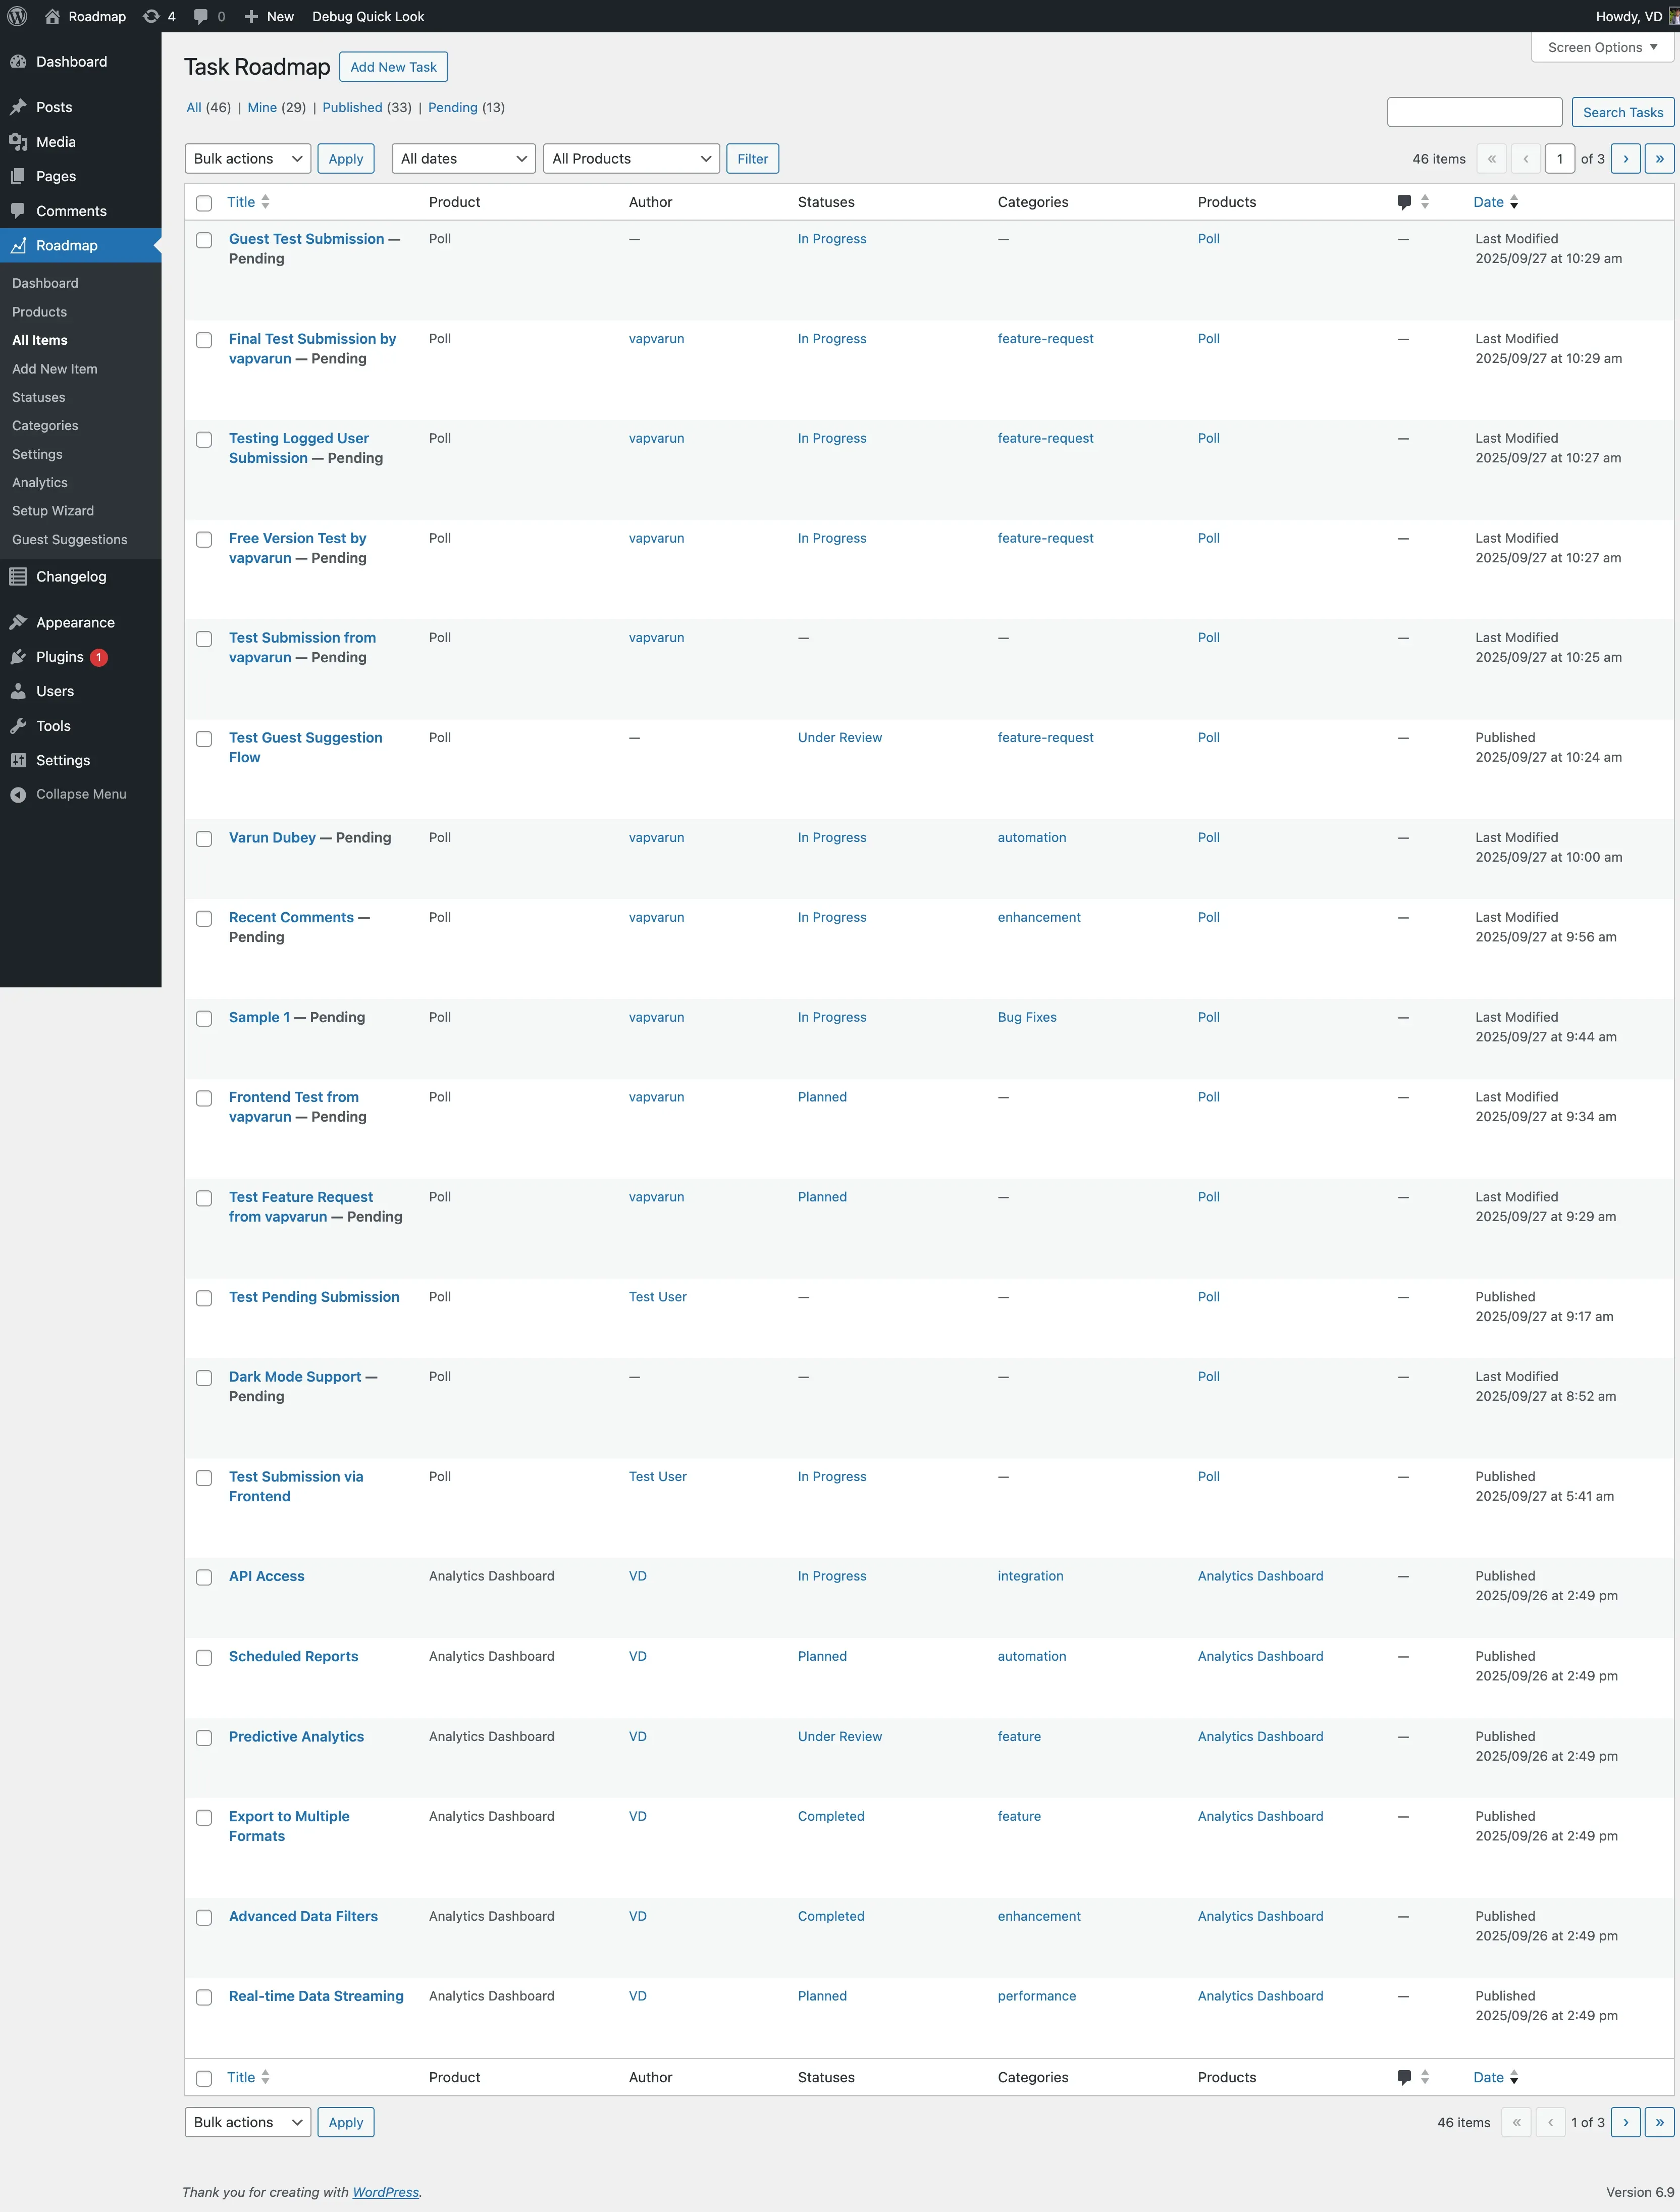
- Quick Edit - hover over an item and click Quick Edit to change status, category, or other fields inline without opening the full editor.
- Full edit - click the item title to change any field, including the description and the Roadmap Item Details meta box.
- Bulk actions - select multiple items with the checkboxes, then choose an action from the Bulk Actions dropdown (Edit or Move to Trash) and click Apply.
Members editing their own items
Section titled “Members editing their own items”Logged-in members (Subscriber role and up) can edit and delete the items they submitted themselves, both from the admin list and from the frontend when frontend editing is enabled. They cannot edit or delete items they didn’t create.
Deleting items
Section titled “Deleting items”Trashing an item (from the list, Quick Edit, or a bulk action) moves it to the WordPress Trash, where it can be restored or permanently deleted like any other post. This also applies to deleting a board item from Manage mode on the frontend - it moves to the trash rather than deleting immediately, so a mis-click is recoverable.
Organizing with categories
Section titled “Organizing with categories”Categories group related items (feature areas, product sections, team ownership - whatever grouping is useful to you). See Statuses and Categories for how to create and manage them.
Filtering the admin list
Section titled “Filtering the admin list”Use the Status and Category dropdowns above the items list, plus the built-in search box, to narrow down a large roadmap.
Next steps
Section titled “Next steps”| Goal | Guide |
|---|---|
| Show items on the frontend | Displaying Your Roadmap |
| Turn on voting and comments | Voting, Comments, and Suggestions |
| Document a release | Changelog |