

Quick Start
After completing the setup wizard, you’re ready to start sharing code. This guide covers your first steps.
Browse Existing Pastes
Section titled “Browse Existing Pastes”Visit /pastes/ on your site to see the public pastes archive.
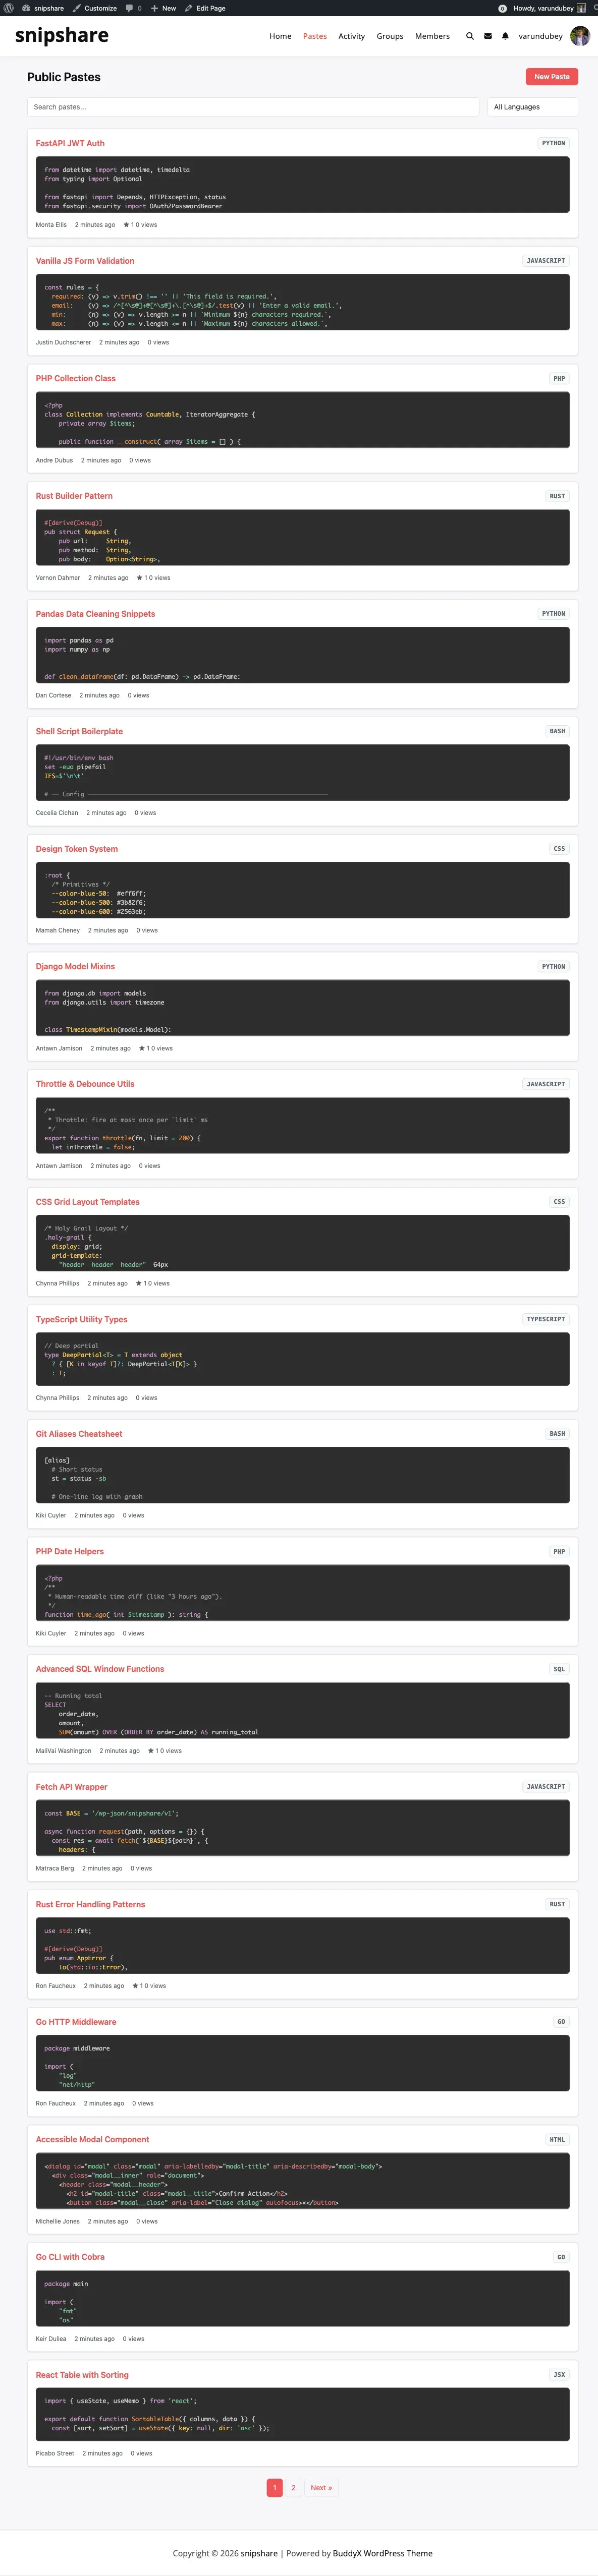
The archive shows:
- All public pastes from all users
- Filter by language, tag, or search term
- Sort by newest, most viewed, or most starred
- Toggle between list and grid layout (configurable in Settings → Appearance)
Create Your First Paste
Section titled “Create Your First Paste”Go to /pastes/create/ or click the New Paste button in the archive header.
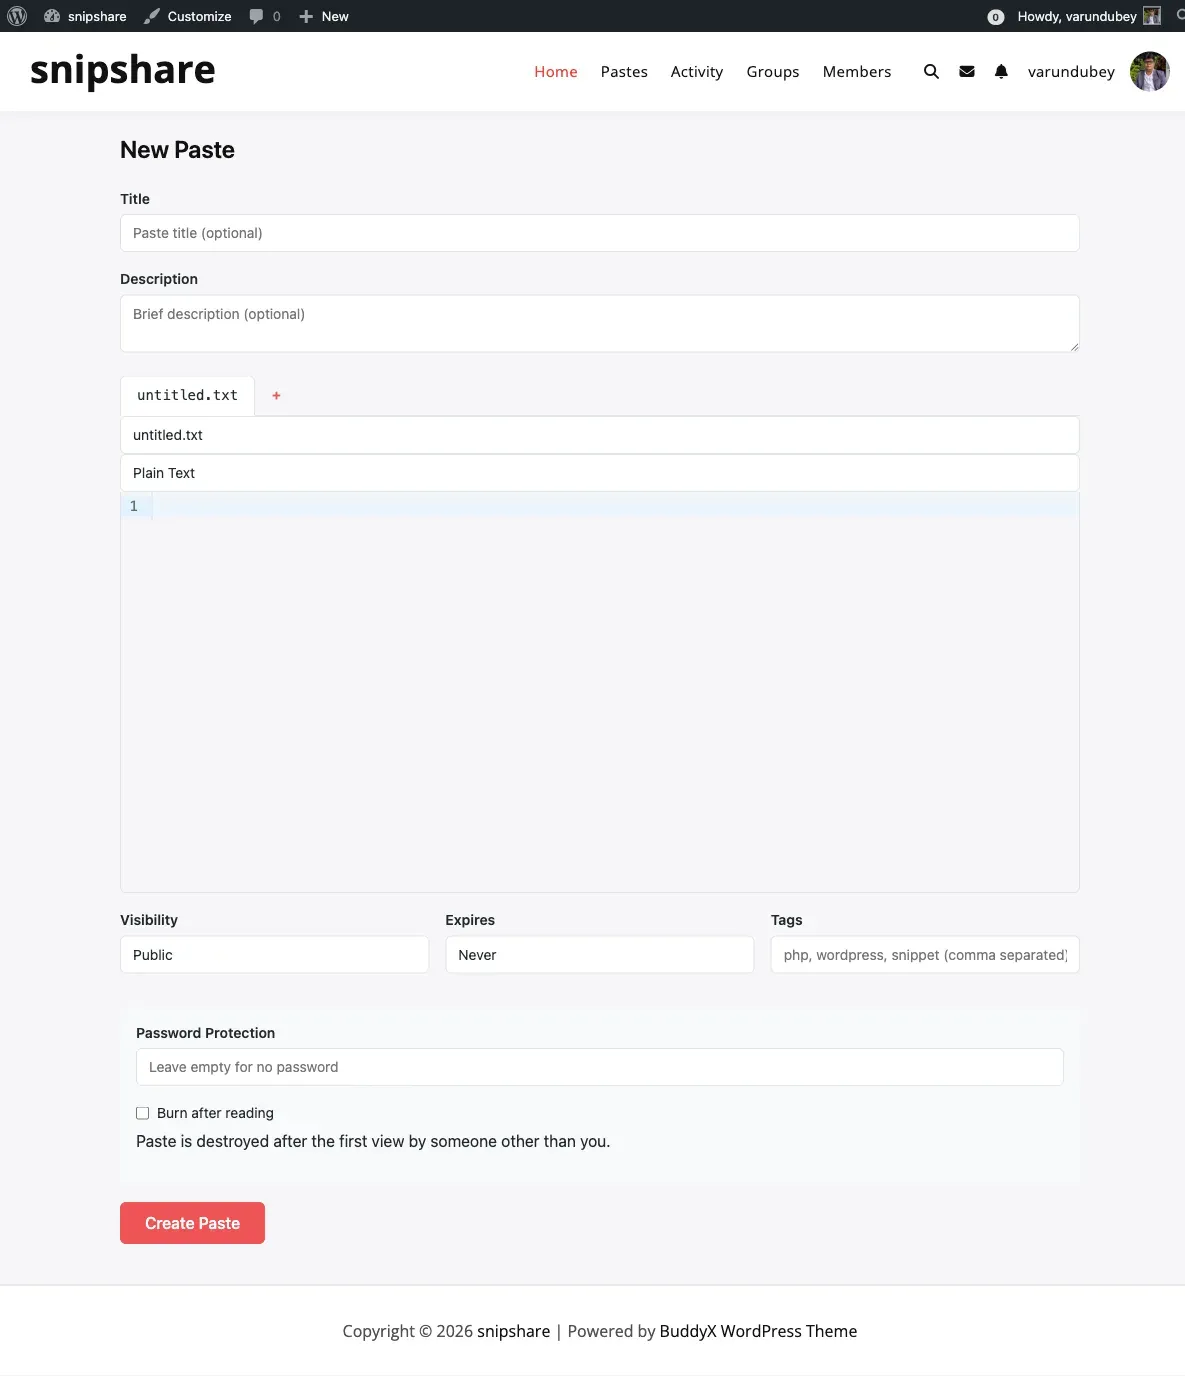
Fill in the paste form:
Section titled “Fill in the paste form:”- Title: Give your paste a descriptive name (optional but recommended)
- Description: Add context about what the code does
- Language: Select from 20+ languages for syntax highlighting. SnipShare auto-detects common file types.
- Code: Type or paste your code into the CodeMirror editor
- Add files: Click + Add File to create a multi-file paste (like a GitHub Gist)
Set options:
Section titled “Set options:”| Option | Description |
|---|---|
| Visibility | Public (listed), Unlisted (link only), or Private (owner only) |
| Expiration | Never, 1 Hour, 1 Day, 1 Week, or 1 Month |
| Password | Optional password protection |
| Burn after read | Paste deletes itself after the first view |
| Tags | Comma-separated tags for discovery |
Click Create Paste to publish.
What Happens Next
Section titled “What Happens Next”After creating a paste, you’re taken to the single paste view at /paste/{hash}.
From there you can:
- Share: copy the URL to share with others
- Fork: clone the paste into your own account
- Star: save it to your starred list
- Download: get the files as a ZIP or individual download
- Edit: modify the paste (creates a revision)
- View raw: see plain text at
/paste/{hash}/raw/
Next Steps
Section titled “Next Steps”- Managing Pastes - edit, fork, download, and delete
- Collections - organize pastes into named groups
- Stars and Tags - bookmark and categorize pastes
- General Settings - configure defaults for your community