

Installation and Activation
Learnomy overviewFree + ProGet Learnomy →
This page covers installing and activating the Learnomy Free plugin and, optionally, the Learnomy Pro add-on.
Overview
Section titled “Overview”Learnomy is a standard WordPress plugin. You install it the same way as any other plugin – either through the WordPress admin or by uploading the zip file directly. Once activated, Learnomy creates its database tables and launches the setup wizard automatically.
Requirements:
- PHP 8.1 or higher
- WordPress 6.7 or higher
- MySQL 5.7+ or MariaDB 10.3+ (required for FULLTEXT search)
Installing Learnomy Free
Section titled “Installing Learnomy Free”-
Download the
learnomy.zipfile from wbcomdesigns.com. -
In your WordPress admin, go to Plugins > Add New Plugin.
-
Click Upload Plugin at the top of the page.
-
Choose the
learnomy.zipfile you downloaded, then click Install Now. -
After the upload finishes, click Activate Plugin.
WordPress activates Learnomy, creates the database tables (41 custom tables under the
lrn_prefix), and redirects you to the setup wizard.If the setup wizard does not appear automatically, go to LMS settings > Settings and click Open setup wizard in the General section.
Installing Learnomy Pro
Section titled “Installing Learnomy Pro”Pro feature. Available in Learnomy Pro.
Learnomy Pro is a separate plugin that extends Free. Both must be active at the same time.
-
Download
learnomy-pro.zipfrom your Wbcom Designs account. -
In your WordPress admin, go to Plugins > Add New Plugin > Upload Plugin.
-
Upload
learnomy-pro.zipand click Activate Plugin. -
After activation, go to LMS settings > Settings > License and enter your Pro license key to enable automatic updates.
-
Open LMS settings > Modules to see the full module list, including modules with a Pro badge. Toggle any Pro module on to enable it.
Pro never replaces Free’s pages or database tables. It adds to them.
Verifying the installation
Section titled “Verifying the installation”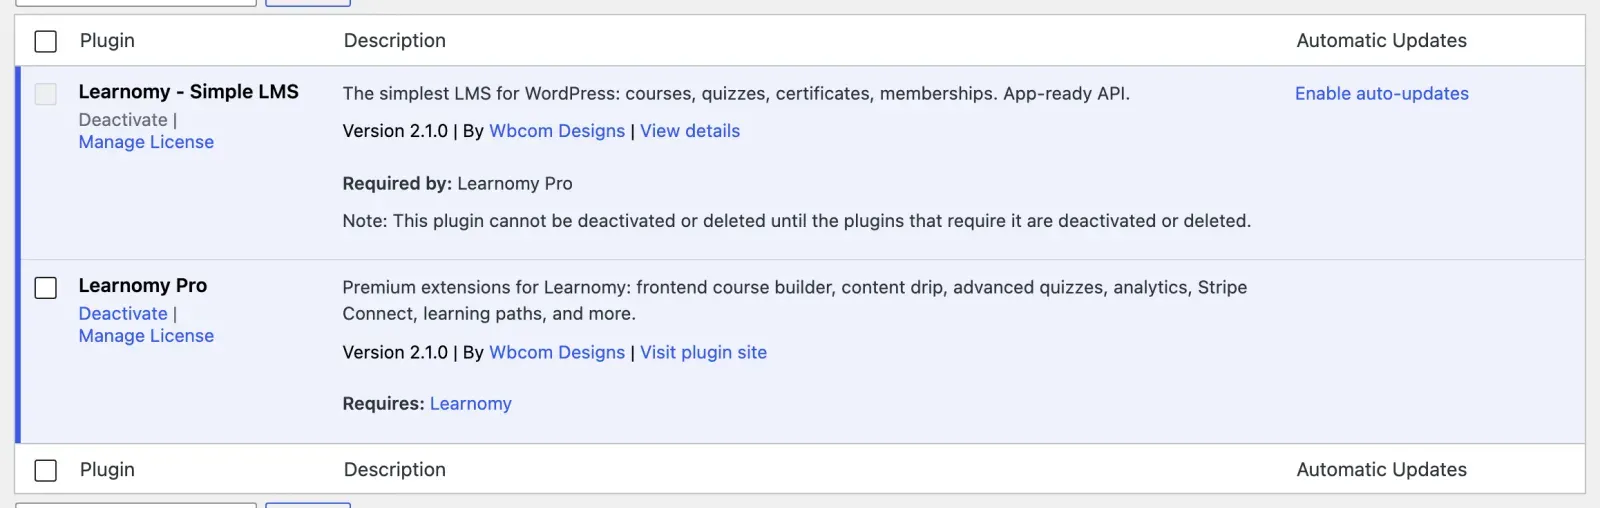
After activating, you should see three new top-level items in the WordPress admin sidebar:
- Learnomy – courses, students, instructors, and content management.
- LMS commerce – memberships, subscriptions, coupons, and earnings. This menu only appears when at least one commerce module is enabled.
- LMS settings – settings, modules, and system tools.
If you see all three menus (or at least Learnomy and LMS settings), the plugin is active and working.
WordPress Multisite
Section titled “WordPress Multisite”Learnomy keeps its data per site: each site on a network has its own courses, enrollments, progress, roles, settings and uploads. One network account that joins two sites has a separate enrollment, progress record and role on each.
- Activate on one site. Activate Learnomy (and Pro) from that site’s Plugins screen, as on a single site.
- Network Activate. From Network Admin > Plugins, Learnomy installs itself on each site of the network: tables, default settings and roles. On a large network the first 100 sites are installed straight away and each remaining site installs on its first page load.
- New sites. A site created after Network Activate gets its Learnomy install the moment it is created.
- Pro licence. Activate the licence on each site that uses Pro, main site or sub-site; each site uses one seat on the licence. Updates still reach the whole network: WordPress checks them once for all sites, using the key of any licensed site.
- Deleted sites. Deleting a site from Network Admin > Sites also removes that site’s Learnomy tables (Free and Pro). Its uploads go with the site’s own uploads folder.
Each site keeps its own LMS settings, so set up payments, URL bases and the setup wizard on every site that sells or teaches.
Updating Learnomy
Section titled “Updating Learnomy”Learnomy uses the Easy Digital Downloads (EDD) update system. Updates appear in Plugins > Installed Plugins as a standard WordPress notification. No manual download is needed. Click Update now to apply the update. Database migrations run automatically on the next page load after an update.
Uninstalling
Section titled “Uninstalling”Deactivating Learnomy from Plugins > Installed Plugins stops all plugin functionality but leaves your data intact. To remove all data as well, go to LMS settings > Settings > Advanced > Data Management and enable the Remove all plugin data when the plugin is deleted option before deleting the plugin.
- Run the site on PHP 8.1 or higher. The plugin uses strict types throughout and will not load on older PHP.
- If you are migrating from another LMS, install Learnomy on a staging site first and run the setup wizard before migrating production data.
- The setup wizard takes about five minutes. You can skip it and return to it later at any time from LMS settings > Settings > General > Open setup wizard.