

Set Up Email Notifications
Jetonomy overviewFree + ProGet Jetonomy →
Set Up Email Notifications
Section titled “Set Up Email Notifications”This guide is for community owners who want members to get useful emails and want those emails to arrive. You will prove that mail leaves your site, set the sender, and choose what gets emailed.
What you will set up
Section titled “What you will set up”- A working test email, before any member depends on it
- The name and address your emails come from
- Which events send an email by default
- (Pro) A daily or weekly digest, and reply by email
Before you start
Section titled “Before you start”- You need to be a WordPress administrator.
- Check that your WordPress admin email address is one you can open. The test email goes there.
- Plan for an SMTP plugin such as WP Mail SMTP or FluentSMTP. Many hosts cannot send mail reliably without one.
Step 1: Send a test email first
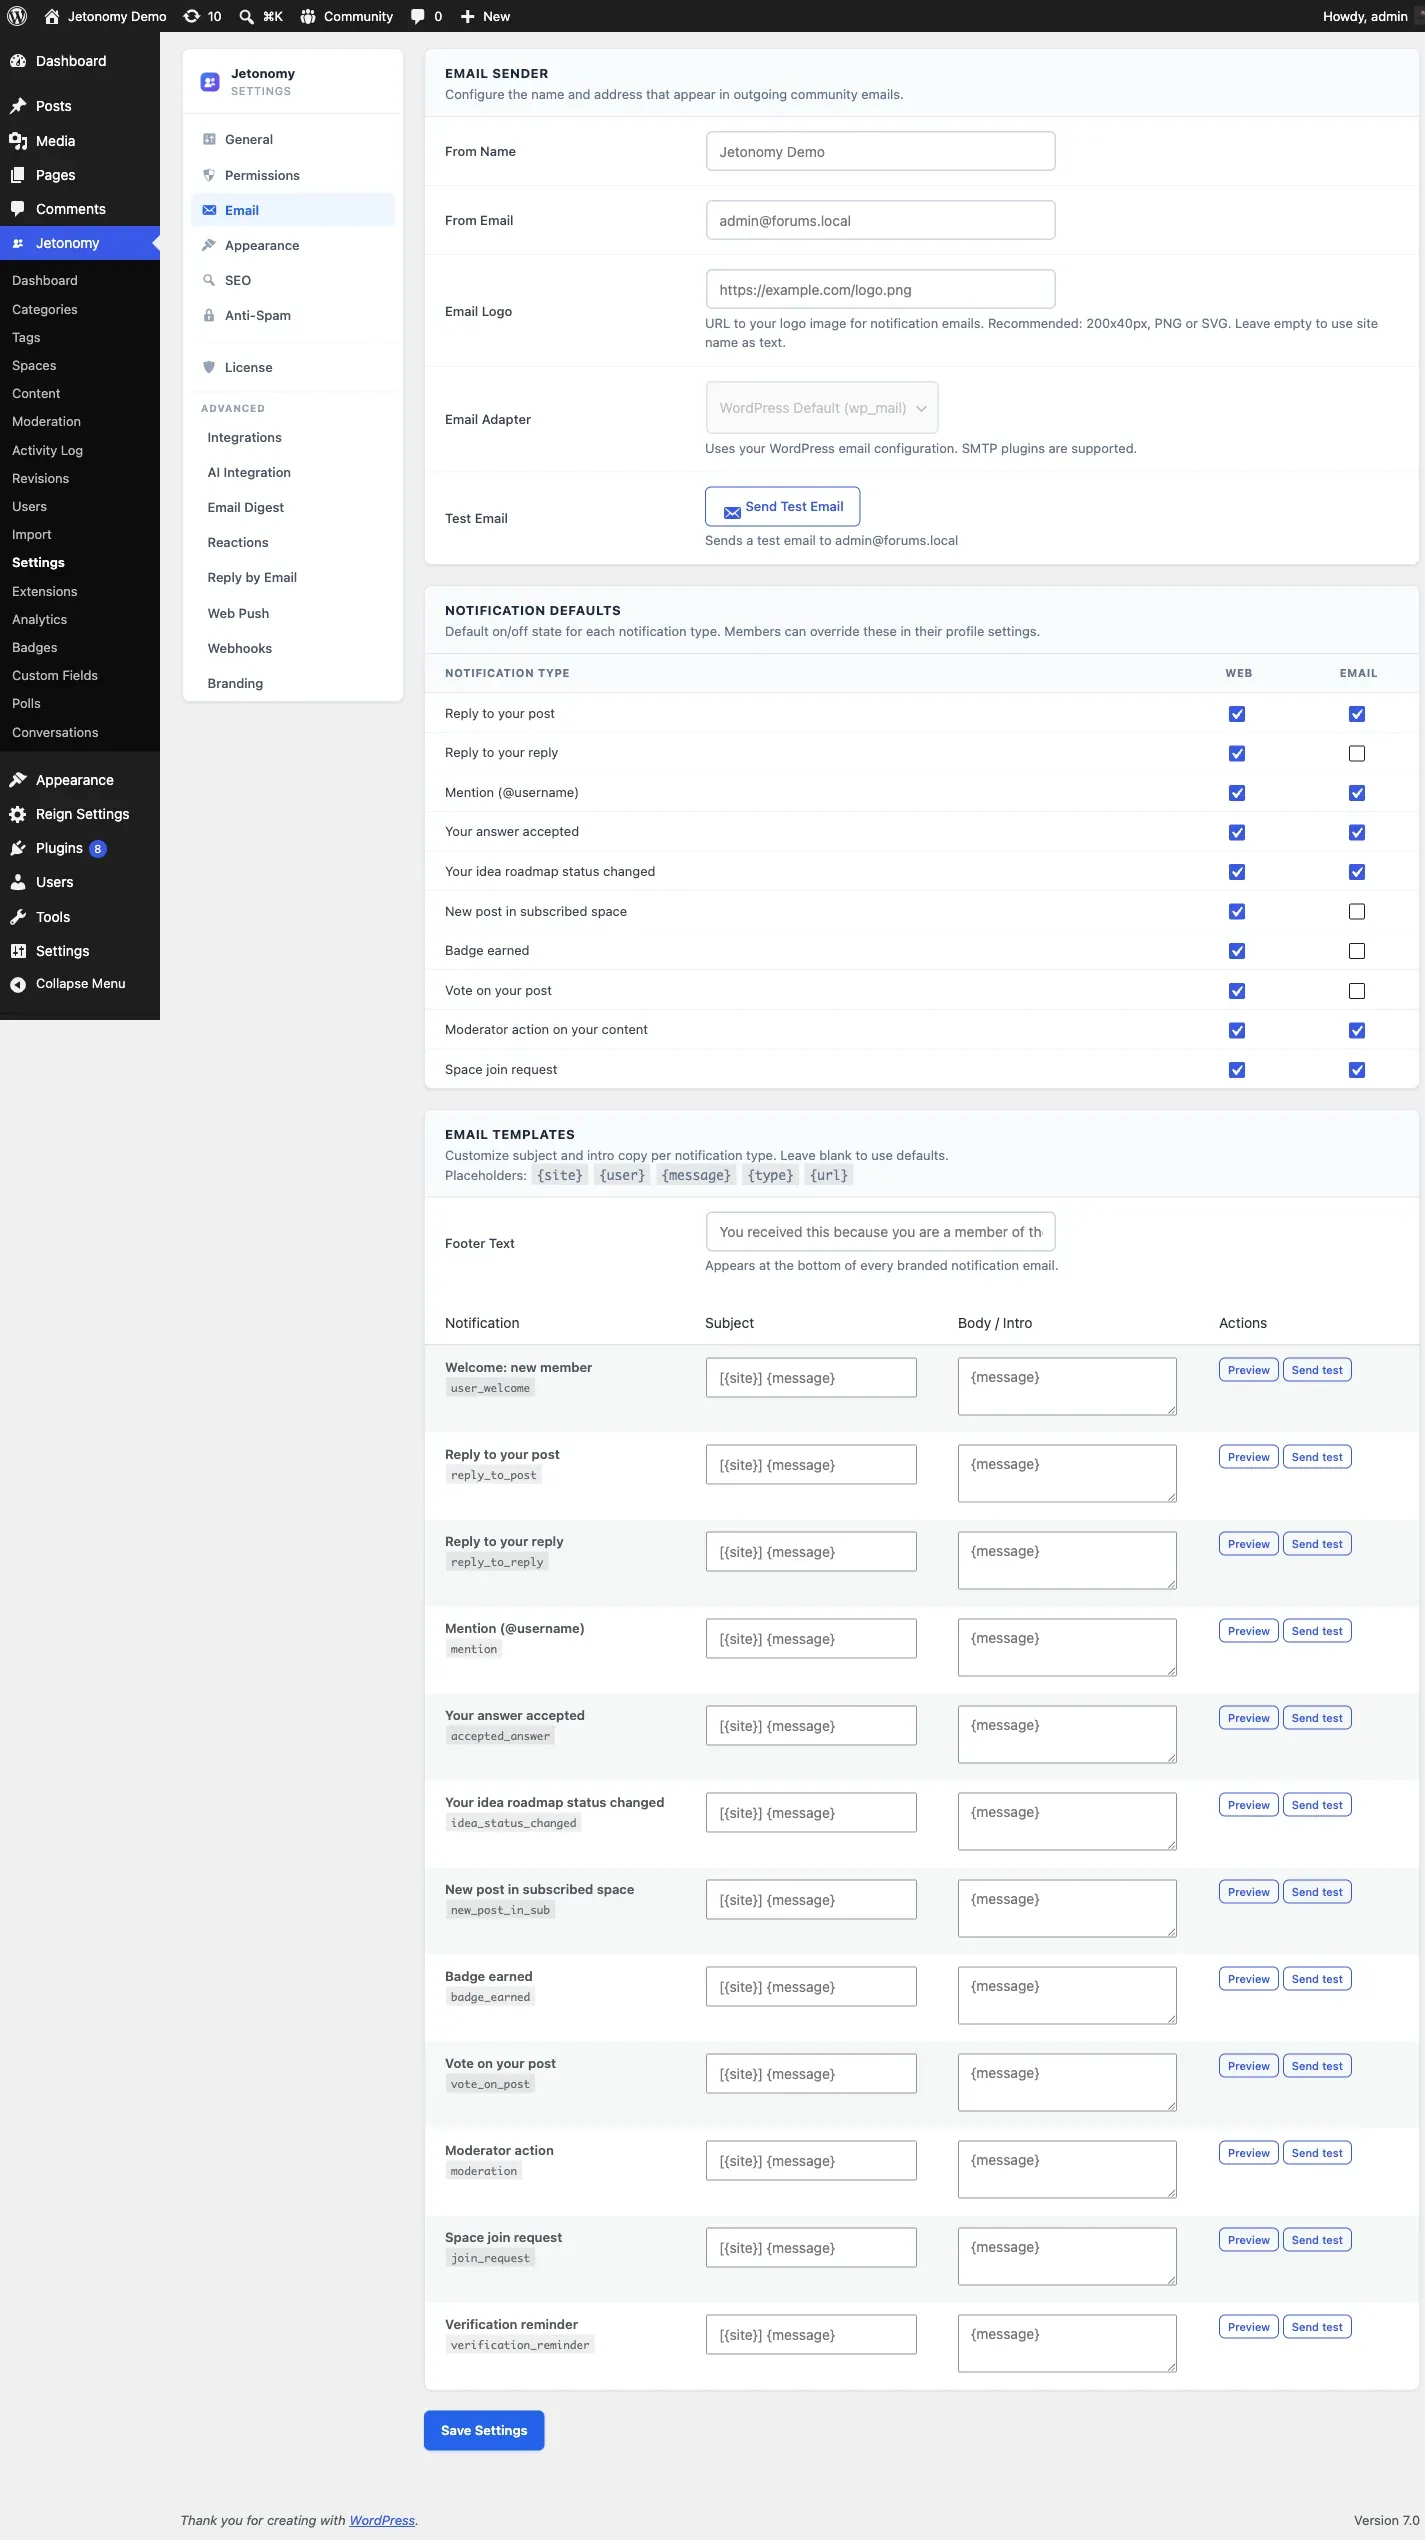
Section titled “Step 1: Send a test email first”- Go to Jetonomy → Settings → Email.
- In the Email Sender card, find the Test Email row.
- Click Send Test Email.
A message starting “Test email sent to” your admin address means WordPress handed the message over. Open your inbox and confirm it arrived. Check spam too.
If you see “Failed to send test email. Check your WordPress email configuration.”, install an SMTP plugin, connect it to a mail service, and try again. The Email Adapter row on this screen is fixed to WordPress Default (wp_mail). It works with any SMTP plugin.
Step 2: Set who the emails come from
Section titled “Step 2: Set who the emails come from”In the same Email Sender card:
- Type your community name in From Name. Empty means your site name.
- Type a sender address in From Email. Empty means your WordPress admin email.
- Optional: paste your logo address into Email Logo. Around 200 by 40 pixels works well.
- Click Save Settings.
Tip: Use an address your mail service has verified, such as
community@yoursite.com. An unverified sender can land in spam.
Step 3: Choose what gets emailed
Section titled “Step 3: Choose what gets emailed”Scroll to the Notification Defaults card. Each row is one event. Tick Web for the bell inside the community. Tick Email for an email.
The rows are:
- Reply to your post
- Reply to your reply
- Mention (@username)
- Your answer accepted
- Your idea roadmap status changed
- New post in subscribed space
- Badge earned
- Vote on your post
- Reaction on your post
- Moderator action on your content
- Your report was reviewed
- Space join request
- Private message (only when Pro messaging is on)
On a fresh install, email is on for replies to your post, mentions, accepted answers, idea status changes, moderator actions and join requests. It is off for the rest, because votes and followed-space posts can be frequent.
Click Save Settings when you finish.
New flag alerts for your team use the “Moderator action on your content” row. See Add a Moderator and Handle Reports.
Step 4: Know what members control
Section titled “Step 4: Know what members control”Your tick boxes are only defaults. A member’s own choice always wins. Members who never set their own choice follow your defaults.
Members change their choices here:
- Open the Edit Profile page at
/community/u/their-username/edit/. - Find Notification Preferences. Each event has a Web and an Email switch.
- To silence email completely, tick Pause all email notifications. You will still see web notifications in the community.
- Click Save Profile.
Members do not see the moderator and join-request rows. Only you control those. Every notification email also has an unsubscribe link in its footer.
Step 5: Put your wording on the emails
Section titled “Step 5: Put your wording on the emails”Still on the Email tab, the Email Templates card lets you edit emails without code.
- Type a line into Footer Text. It shows at the bottom of every branded email.
- For any event, change Subject or Body / Intro. You can use
{site},{user},{message},{type}and{url}. - Click Preview to see the email with sample data.
- Click Send test to send that email to your admin address.
- Click Reset to default to undo a change. It only shows once you have saved an edit.
- Click Save Settings.
Leave a field blank to keep the default.
Optional (Pro): Digest and reply by email
Section titled “Optional (Pro): Digest and reply by email”Turn on each feature at Jetonomy → Extensions first.
Email Digest. Open Email Digest in the Advanced group of Jetonomy → Settings. Tick Enable Digests, choose a Default Frequency of Daily, Weekly or None (opt-in only), then click Save Digest Settings. Use Send Test Daily or Send Test Weekly to see one first. See Email Digest.
Reply by Email. Open Reply by Email in the same group. You need an inbound address on your own domain. Set Email Domain and choose an Inbound Method. Your host or mail provider can help with this part. See Reply by Email.
Check that it works
Section titled “Check that it works”- Click Send Test Email and confirm it arrives.
- Open a private browser window and sign in as a test member who has not changed their notification choices.
- Post a topic as that test member.
- As another account, reply to that topic.
- The test member should get a bell notification and, because “Reply to your post” emails by default, an email.
- Untick Email for that row in the member’s Notification Preferences, save, reply again, and confirm no email arrives.
Common questions
Section titled “Common questions”Nothing arrives, even the test email. Mail is not leaving your server. Set up an SMTP plugin and try again.
Emails go to spam. Use a verified From Email on your own domain and a proper mail service.
Why do members stop getting emails after I change a default? They set their own choice. Their choice wins over your default.
Can I change a template’s design? You can change the text here. Layout changes need code. See Customize Emails.