

Editor & Formatting
WB Member Wiki provides a rich text editor for creating and editing wiki pages. This guide covers the editor features and formatting options available to wiki contributors.
Visual Editor
Section titled “Visual Editor”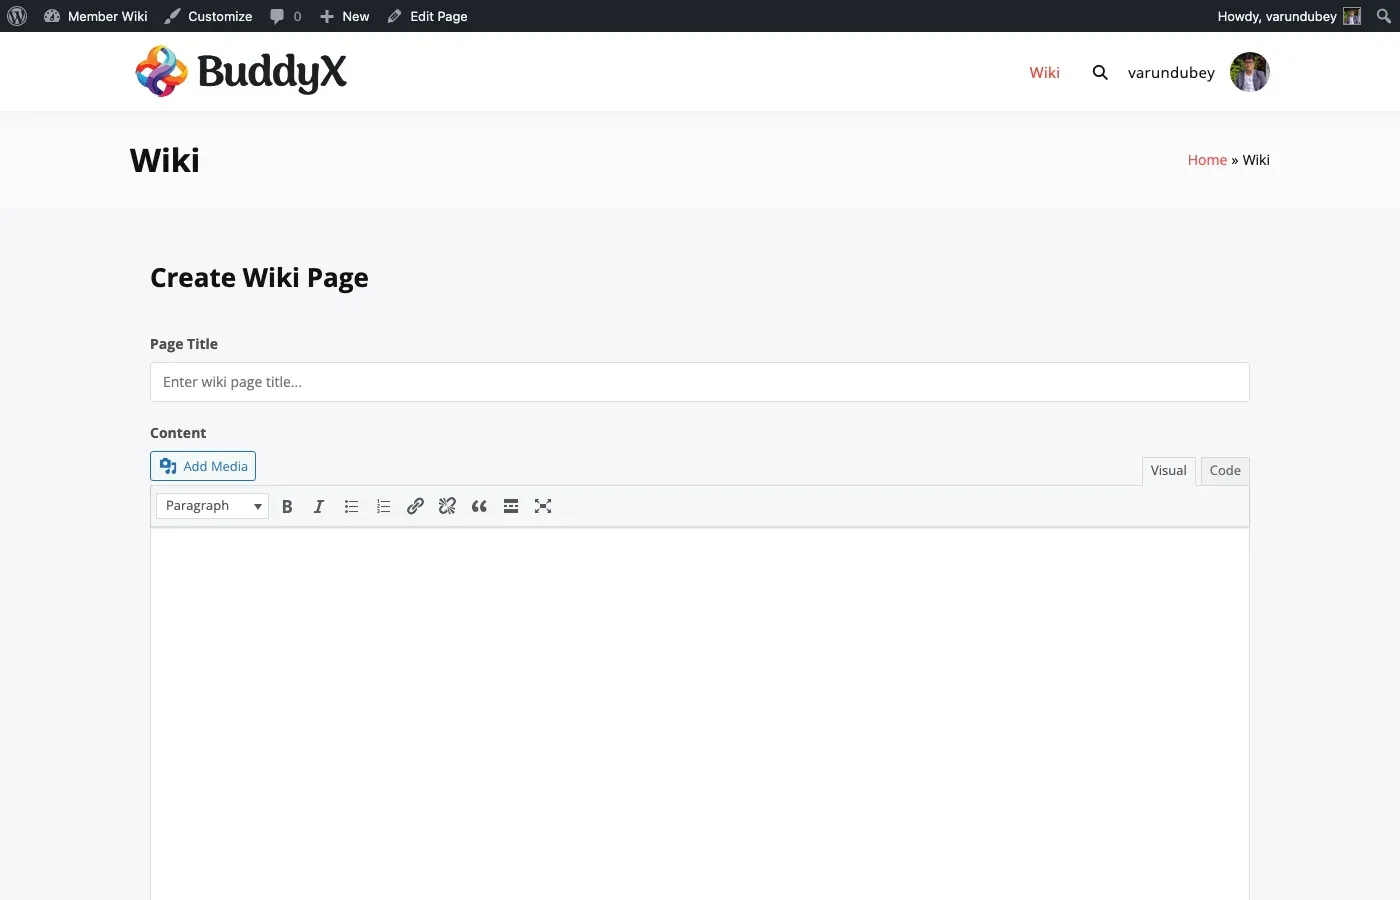
The default editor is the Classic Editor (TinyMCE), which provides a familiar word-processor-like interface. The editor includes a toolbar with formatting buttons for:
- Text formatting: Bold, italic, underline, strikethrough
- Headings: H2, H3, H4 levels (H1 is reserved for the page title)
- Lists: Bullet lists and numbered lists
- Links: Insert and edit hyperlinks
- Media: Upload and insert images
- Alignment: Left, center, right, justify
- Block quotes: Indented quotation blocks
Heading Structure
Section titled “Heading Structure”Use headings to organize your wiki page into logical sections. A well-structured page typically follows this pattern:
Page Title (H1 — auto-generated from title field)├── Introduction paragraph├── Section One (H2)│ ├── Subsection (H3)│ └── Subsection (H3)├── Section Two (H2)│ └── Detail (H4)└── References (H2)Pages with three or more headings automatically generate a Table of Contents at the top.
Wiki Link Syntax
Section titled “Wiki Link Syntax”The most important formatting feature is the wiki link syntax, which connects pages within your knowledge base:
Basic Link
Section titled “Basic Link”Learn more about [[Quantum Computing]] in our wiki.This creates a link to the wiki page titled “Quantum Computing”.
Custom Display Text
Section titled “Custom Display Text”See [[Quantum Computing|our quantum guide]] for details.This displays “our quantum guide” as the link text while linking to the “Quantum Computing” page.
Link Behavior
Section titled “Link Behavior”| Target Page Status | Link Appearance |
|---|---|
| Exists and published | Standard blue link |
| Does not exist | Styled differently with option to create the page |
For more details on interlinking, see Wiki Links & Interlinks.
Best Practices
Section titled “Best Practices”Writing Style
Section titled “Writing Style”- Lead with an introduction: Start each page with a clear paragraph summarizing the topic
- Use headings liberally: Break content into H2/H3 sections for readability and TOC generation
- Bold key terms: Highlight important concepts on first use
- Use lists: Present related items, steps, or options as bullet or numbered lists
- Add interlinks: Link to related wiki pages using
[[Page Title]]syntax
Content Length
Section titled “Content Length”Wiki pages work best at 400-1000 words. If a page grows beyond that, consider splitting it into parent/child pages.
Images
Section titled “Images”- Use images to illustrate complex concepts
- Add descriptive alt text for accessibility
- Supported formats: JPG, PNG, GIF, WebP
- Images upload as WordPress media attachments
Page Metadata Fields
Section titled “Page Metadata Fields”The editor sidebar includes optional metadata fields that give wiki pages special behavior. These appear below the category and tag selectors when creating or editing a page.
Stub Article
Section titled “Stub Article”Check Mark as stub to flag the page as a stub - a short article that needs expansion. Stub pages display a notice at the bottom encouraging other contributors to expand the content.
Use this when you want to create a placeholder page to establish a wiki link target without having the full content ready yet.
Disambiguation Note
Section titled “Disambiguation Note”The Disambiguation Note field lets you add a hatnote at the top of the page - a brief notice pointing readers to related pages with similar names.
For example, on a page about “Mercury (Planet)” you might add:
For the element, see [[Mercury (Element)]]. For the car brand, see [[Mercury (Automobile)]].The hatnote renders as a styled notice above the page content, making it immediately visible to readers who may have arrived at the wrong page.
Redirect
Section titled “Redirect”The Redirect to field lets you turn a page into a transparent redirect to another wiki page. Select the target page from the dropdown and save - anyone visiting the original page will be automatically forwarded.
Use redirects to handle:
- Alternative spellings (“Colour” → “Color”)
- Abbreviations (“AI” → “Artificial Intelligence”)
- Former page titles after a rename
Redirected pages are still visible in the admin and can be edited by selecting “Edit Redirect” on the page.
Edit Summary
Section titled “Edit Summary”When saving changes to an existing page, you can add an edit summary explaining what you changed. Edit summaries appear in the revision history and help other contributors understand the evolution of the page.
Good edit summaries are brief and specific:
- “Added section on safety considerations”
- “Fixed incorrect date in timeline”
- “Expanded the introduction paragraph”