

Surveys Guide
A survey bundles several standalone polls into one questionnaire. Respondents answer the polls one after another, and WB Polls stores their answers together as one response.
Surveys work with or without BuddyPress.
How Surveys Work
Section titled “How Surveys Work”- Each question is a standalone poll that you create first.
- Respondents see one question at a time with Previous and Next buttons and a “Question X of Y” progress indicator.
- A response is stored when the respondent clicks Submit Survey.
- Admins read responses and charts in WP admin and can export them.
Create a Survey
Section titled “Create a Survey”You need at least one published standalone poll for each question.
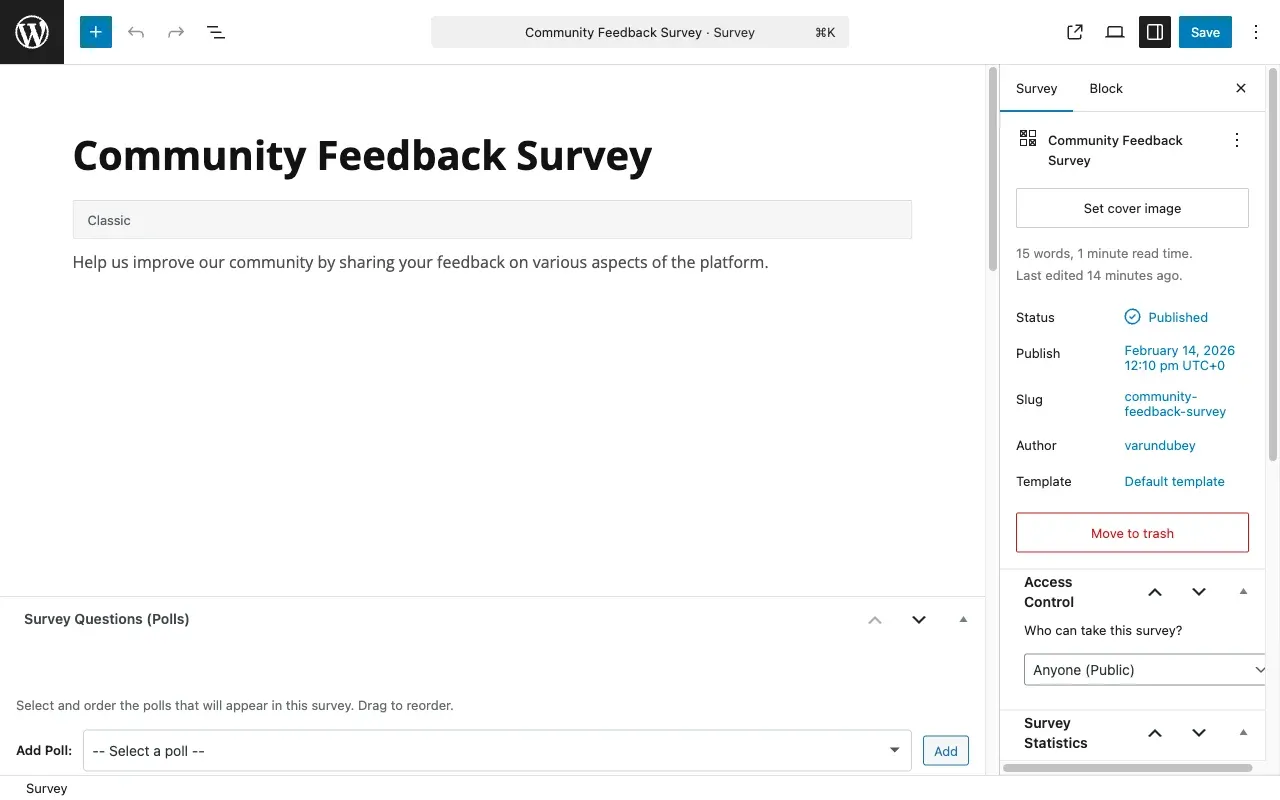
- Go to WP Admin > WB Surveys > Add New.
- Enter a title and a description. Both show on the survey start screen.
- In the Questions box, pick a poll from Add Poll and click Add. Repeat for each question.
- Drag the questions into order. Remove a question with its remove button.
- Set access, email, results and notification options in the boxes on the screen (see below).
- Click Publish.
Only a published survey can be taken. A draft or pending survey shows “Survey not found or not available.” The list at WB Surveys > All Surveys has Questions, Responses and Status columns.
Only administrators, and roles you pick in Survey Settings, can create surveys. See Survey Settings.
Survey Options
Section titled “Survey Options”Who Can Take This Survey
Section titled “Who Can Take This Survey”| Option | Who can take it |
|---|---|
| Anyone (Public) | Everyone, including logged-out visitors |
| Logged-in Users Only | Only logged-in members |
| Specific User Roles | Logged-in members with a selected role. If BuddyPress member types are available you can also pick member types; a member must then match one of them too |
| Password Protected | Visitors who enter the survey password |
New surveys start with the default access level from Survey Settings.
Response Settings
Section titled “Response Settings”| Option | What it does |
|---|---|
| Require Email | Asks for an email address before the survey starts. Logged-in members use their account email. |
| Allow Re-submission | Lets the same person submit the survey more than once. When off, a repeat visitor sees “already completed”. |
| Lead Capture Gate | Requires an email to see the survey results. |
| GDPR Consent Text | Consent text shown when email addresses are collected. |
| Expiry Date | The survey stops accepting responses after this date. Leave empty for no expiry. |
| Response Limit | The most responses the survey accepts. Leave empty or 0 for no limit. |
New surveys take the defaults for Require Email, Allow Re-submission and Show Results from Survey Settings.
Thank You and Results
Section titled “Thank You and Results”| Option | What it does |
|---|---|
| Thank You Message | Shown after the respondent submits. |
| Show Results | Shows the combined answer results after submission. |
| Redirect URL | Sends the respondent to this address after the thank-you message. |
| Redirect Delay | Seconds to wait before the redirect (0 to 60; 0 is immediate). |
Notifications
Section titled “Notifications”| Option | What it does |
|---|---|
| Admin Notifications | Emails you when someone completes the survey. On by default for new surveys. |
| Notification Email | The address that gets the notice. Empty uses the site admin email. |
| Respondent Notifications | Sends a confirmation to the respondent. Needs the respondent’s email, and also needs the Completion Confirmation email turned on in Email Settings. |
| Email Subject, Email Message | Your own text for the respondent email. Placeholders: {survey_title}, {user_name}, {user_email}, {response_id}, {completed_date}, {site_name}, {site_url}. |
The Email Settings tab also turns the admin notice on or off for every survey at once.
Survey Statistics
Section titled “Survey Statistics”Each survey has a Stats box with Views, Started, Completed and Completion Rate (completed divided by started). A View Responses button appears once someone has completed it.
Share a Survey
Section titled “Share a Survey”- Shortcode: paste
[wbsurvey id="123"]into a page or post. The survey editor shows the exact shortcode. The shortcode takes only theidattribute. - Direct link: every survey has its own page at an address like
yoursite.com/survey/survey-title/. The survey archive is atyoursite.com/survey/.
What a Member Does
Section titled “What a Member Does”- Open the survey link. The start screen shows the survey title and description.
- Enter an email address if the survey asks for one, and accept the consent text if shown.
- Click Start Survey.
- Answer each question and click Next. Use Previous to go back and change an answer.
- On the last question click Submit Survey.
- Read the thank-you message, or wait for the redirect. Results show if Show Results is on.
If a survey is closed to the member, a message says why: login required, no permission, password needed, expired, response limit reached, or already completed.
Read Responses
Section titled “Read Responses”Go to WB Surveys > Responses to see responses across surveys, or open a survey and click View Responses. See Survey Responses. For charts per question, open WB Surveys > Analytics.
Data Storage
Section titled “Data Storage”| Where | What |
|---|---|
wbsurvey posts |
The surveys |
wp_wbsurvey_responses |
One row per response |
wp_wbsurvey_response_meta |
Extra data per response |
wp_wbsurvey_leads |
Emails collected at the lead gate |
Survey settings are post meta with the _wbsurvey_ prefix, for example _wbsurvey_poll_ids for the question list. The respondent’s IP address and browser string are stored with each response.