

Creating Standalone Polls
Create standalone polls with dedicated pages, vote on them, and share them across the web. This guide covers the poll creation form, voting process, and best practices for standalone polls.
Creating a Standalone Poll
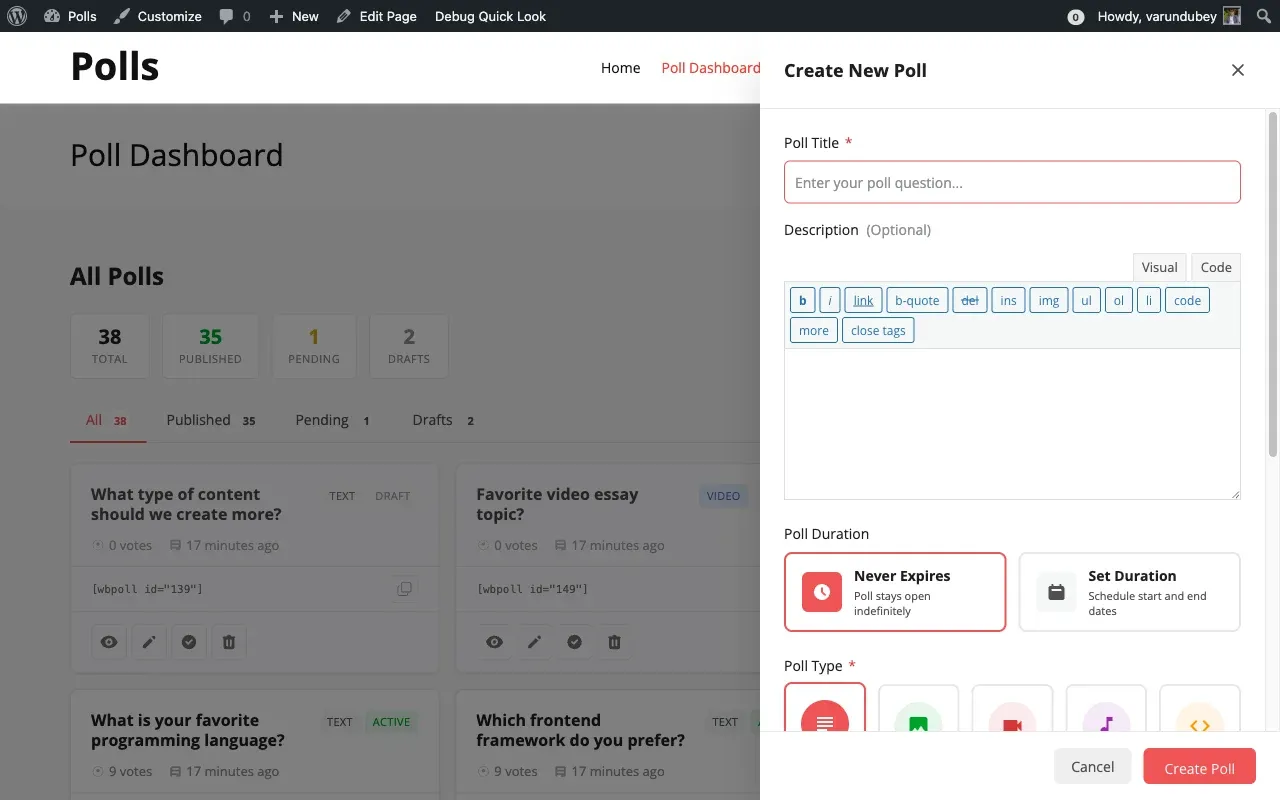
Section titled “Creating a Standalone Poll”Click Create Poll on the dashboard to open the creation form.
Step 1: Enter the Poll Title
Section titled “Step 1: Enter the Poll Title”Write your poll question. This becomes the page title and URL slug. A character limit may apply depending on your site settings.
Step 2: Add a Description
Section titled “Step 2: Add a Description”Provide context for voters. Explain why you are asking and what you plan to do with the results. The editor type depends on your site configuration: rich text, simple textarea, or plain text.
Step 3: Choose the Poll Duration
Section titled “Step 3: Choose the Poll Duration”| Option | Meaning |
|---|---|
| Never Expires | Poll stays open indefinitely |
| Set Duration | Pick start and end dates for voting |
The start date defaults to now and the end date defaults to seven days from the start.
Step 4: Select a Poll Type
Section titled “Step 4: Select a Poll Type”| Type | Best For | Requirement |
|---|---|---|
| Text Only | Simple choices and quick decisions | Always on |
| With Images | Visual comparisons and design choices | Image Poll switched on |
| With Videos | Product demos and tutorials | Video Poll switched on |
| With Audio | Music polls and voice samples | Audio Poll switched on |
| Rich HTML | Rich formatted content | HTML Poll switched on |
| Star Rating | A 5-star scale; the stars are made for you | Rating Poll switched on |
| Yes / No | A two-option choice; the answers are made for you | Yes/No Poll switched on |
Step 5: Add Answer Options
Section titled “Step 5: Add Answer Options”For text polls, enter each option in the text fields. Click Add Option for more choices. Drag handles to reorder and click the trash icon to remove options. You need at least two options.
For media polls, enter the option text and then attach the relevant media file by uploading or entering a URL.
Step 6: Configure Advanced Settings
Section titled “Step 6: Configure Advanced Settings”- Hide results until the poll ends holds the results until the end date. It appears only when the poll has an end date. Polls that never end do not hide results.
- Allow multiple selections lets voters select more than one answer.
- Allow Users to Add Options enables voter-suggested answers (text polls only).
Step 7: Submit
Section titled “Step 7: Submit”Click Create Poll. The poll is published or held as Pending Review, depending on New Poll Status in Polls Settings.
Voting on Standalone Polls
Section titled “Voting on Standalone Polls”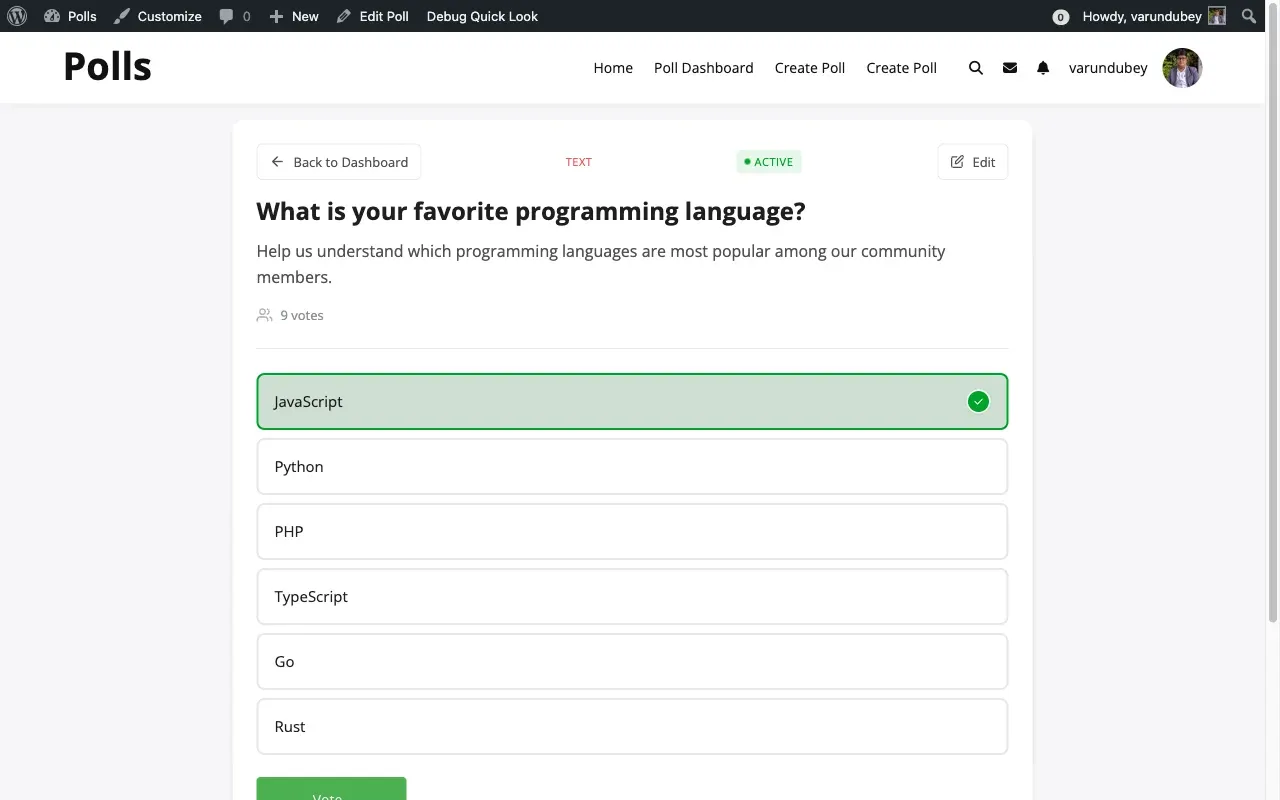
- Navigate to the poll page or find it embedded on a post
- Read the question and review the options
- Click your choice (or multiple choices if multi-select is enabled)
- Click Vote
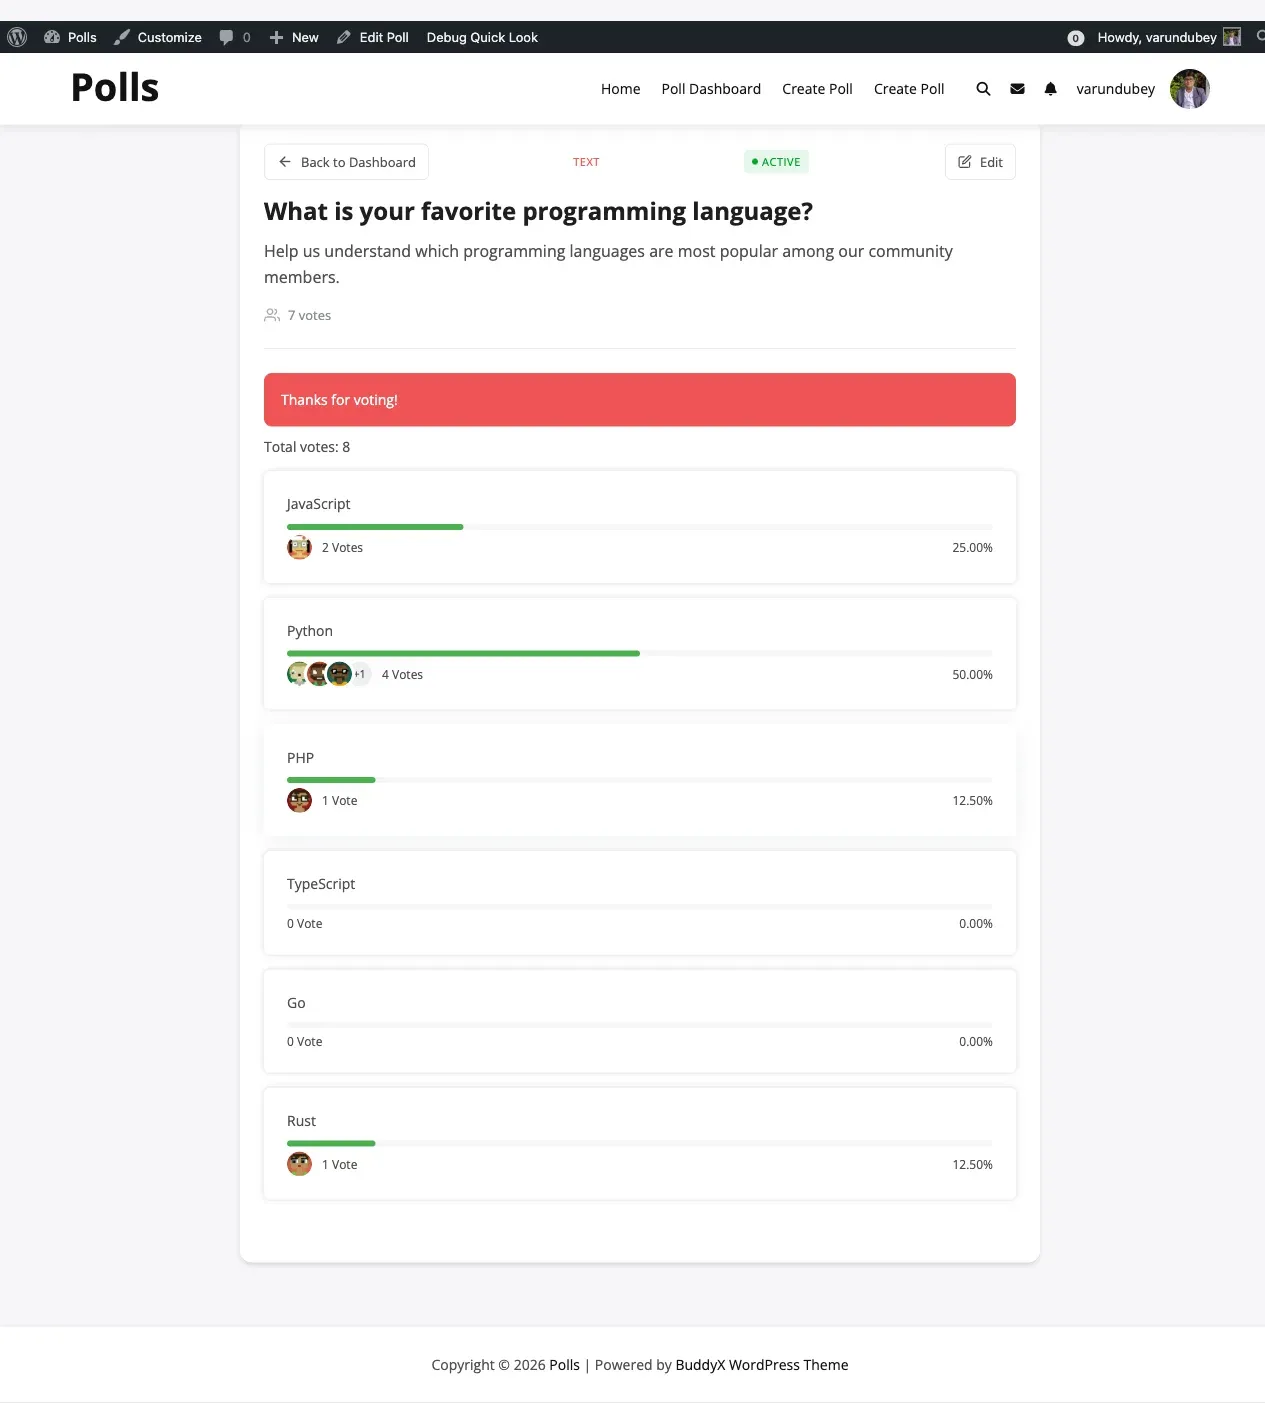
- View results and optionally leave a comment
In the results, your own choice or choices (several on a multiple-choice poll) are marked with a check and the words “Your vote”.
Creating Polls from Admin
Section titled “Creating Polls from Admin”Administrators can also create polls from WB Polls > Add New in the WordPress admin.
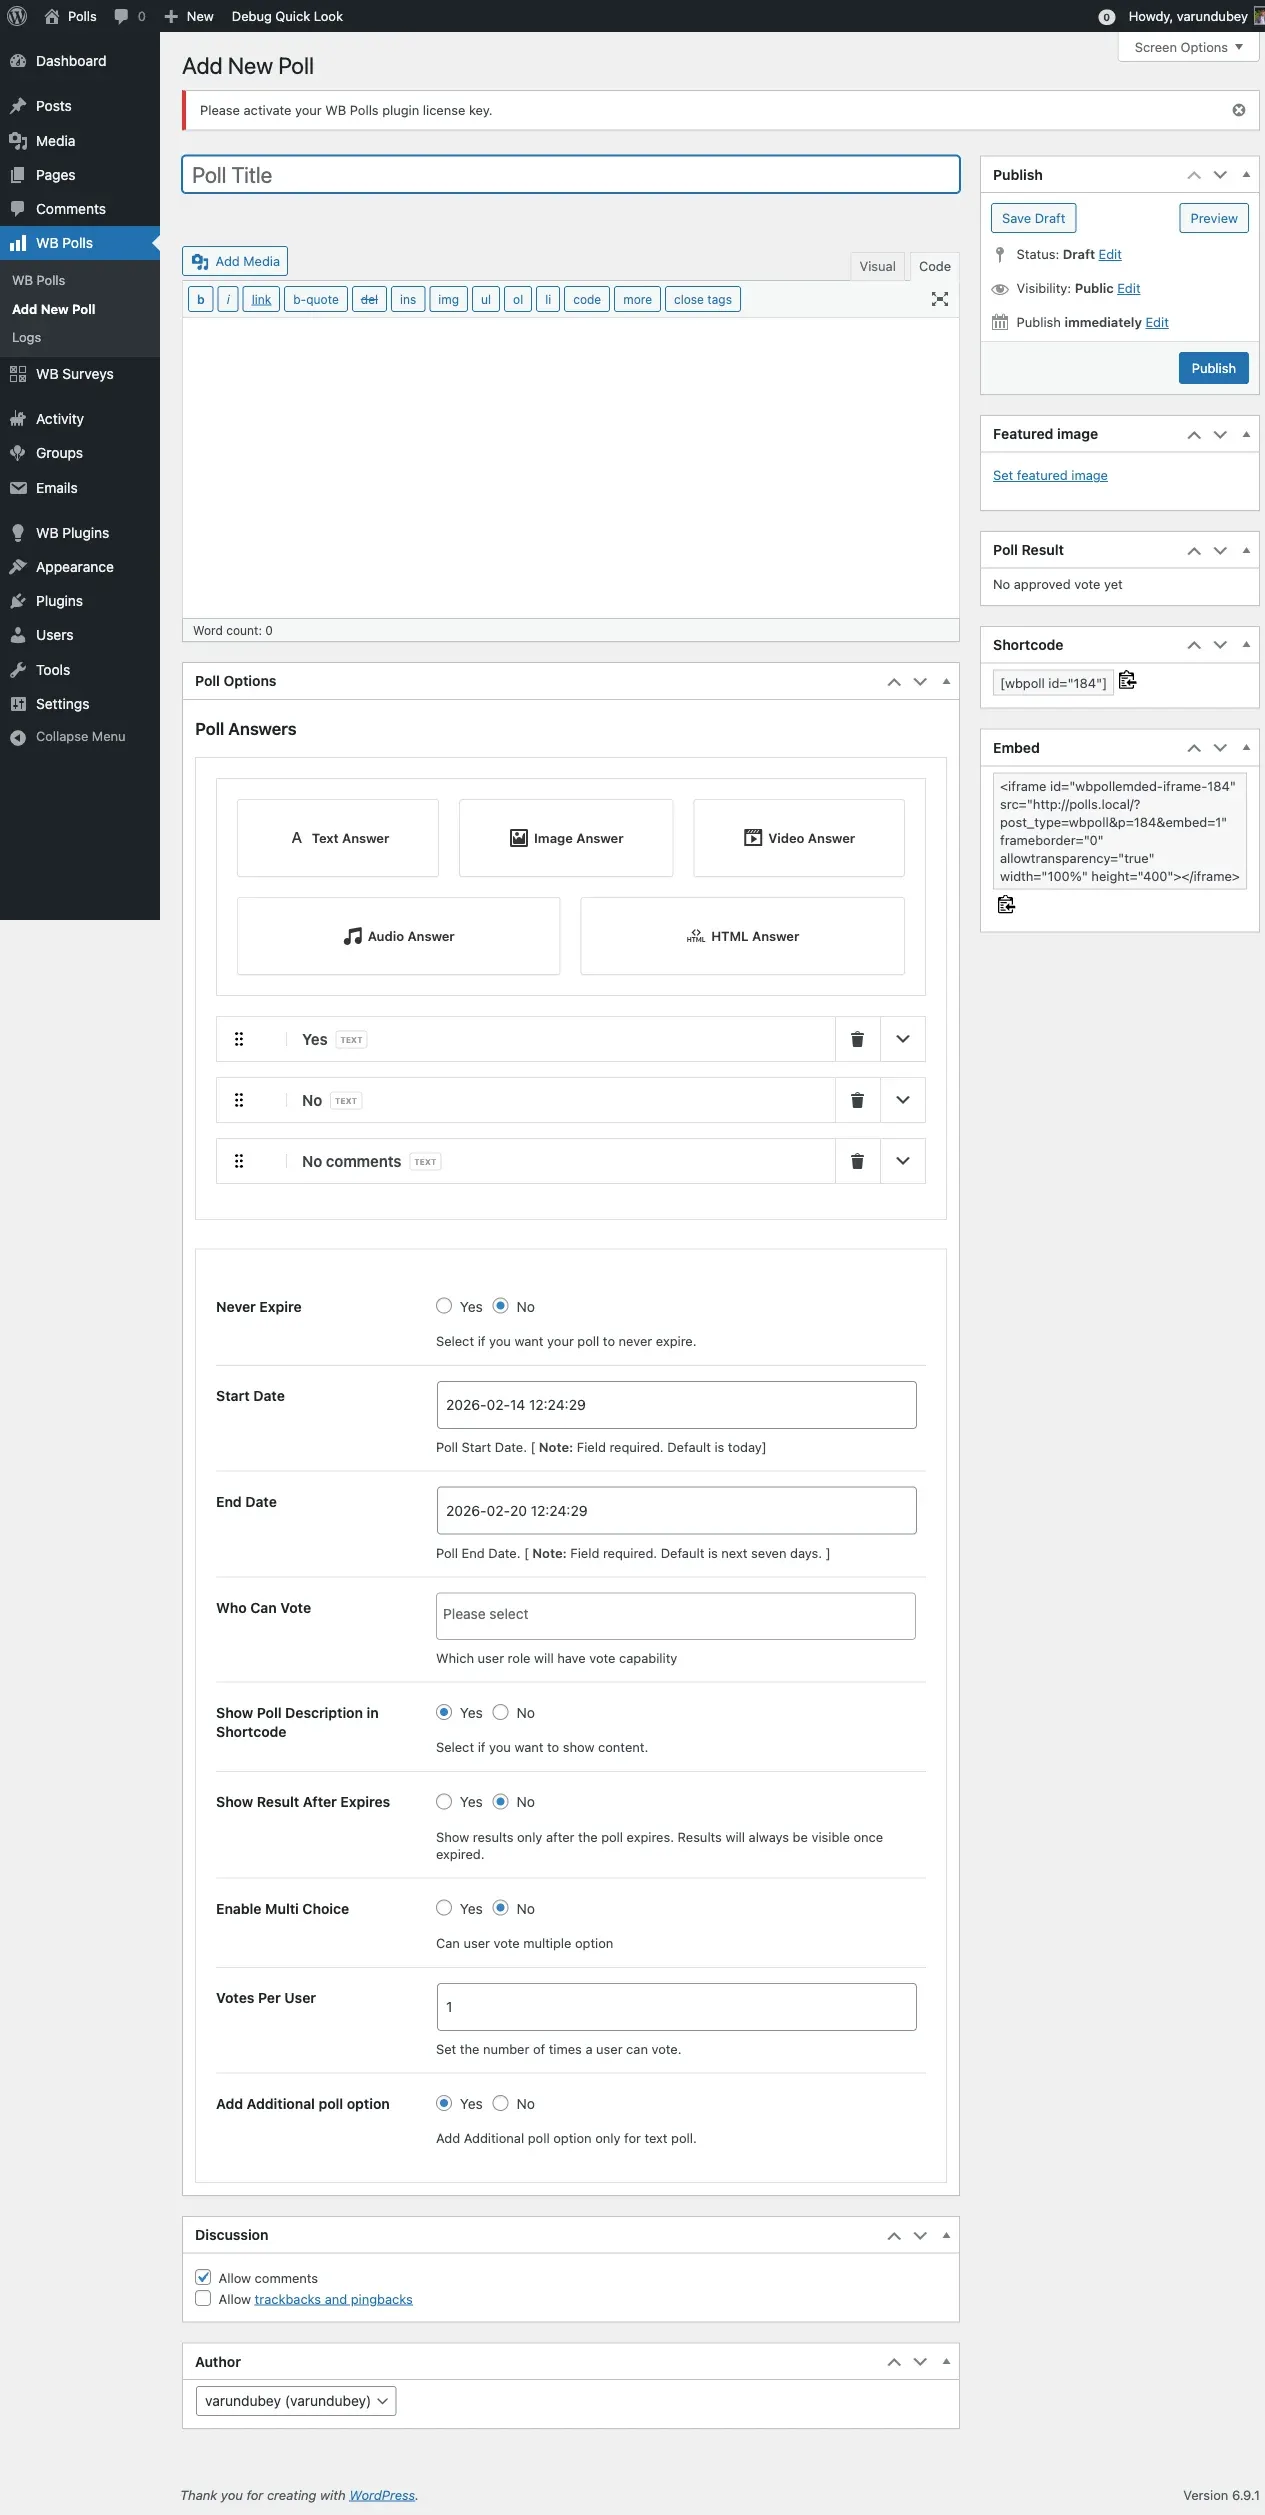
The admin form provides additional controls not available on the frontend:
- Poll Options meta box with all poll type tabs (Text, Image, Video, Audio, HTML)
- Poll Result section showing current vote counts
- Shortcodes box with the embed code
- Embed box with iframe code for external sites
- Who Can Vote role selector
- Show Poll Description in Shortcode toggle
- Hide results until the poll ends option
- Enable Multi Choice toggle
- Votes Per User limit
- Add Additional poll option toggle for user-suggested answers
- Show poll under the BuddyPress activity toggle
- Discussion settings for comments, when comments are enabled in Polls Settings
Use admin creation when you need more control over poll settings or want to set up polls before the frontend dashboard is ready.
Best Practices
Section titled “Best Practices”When to Use Standalone Polls
Section titled “When to Use Standalone Polls”- Formal community decisions that need a dedicated page
- Polls you plan to share on social media
- Surveys embedded in blog posts
- Time-limited voting events with clear deadlines
- Polls that benefit from discussion via comments
- Public polls requiring guest voting
Guest Voting Tips
Section titled “Guest Voting Tips”When allowing guest voting, consider whether the poll topic is appropriate for logged-out visitors. Monitor for vote manipulation, use expiration dates to limit voting windows, and combine guest voting with low-stakes polls for best results.