

Quick Setup
Publish your first ad and see it on the front end. There are no zones to build - each ad carries its own placement checkboxes, and ads sharing a placement rotate automatically.
Step 1 - Create an ad
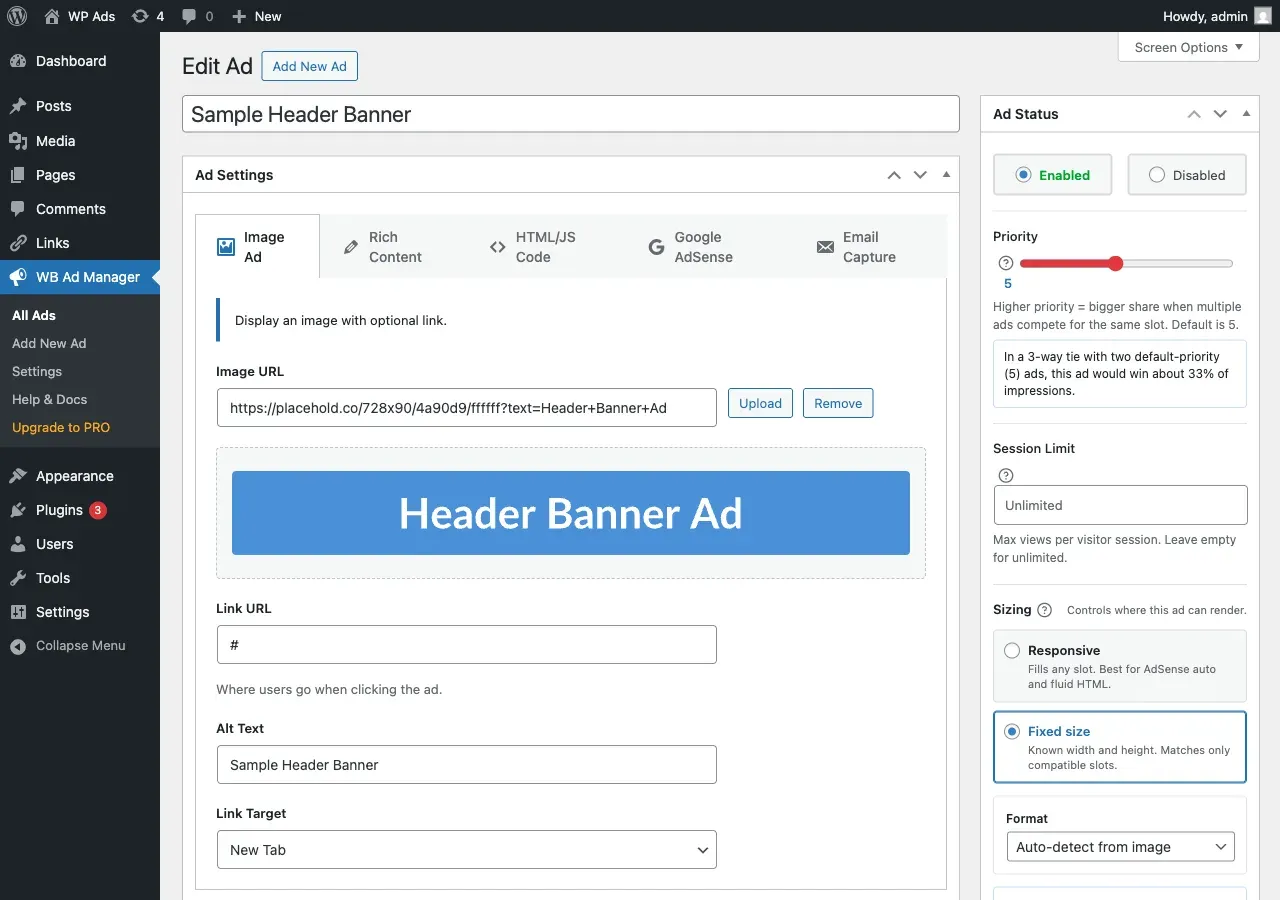
Section titled “Step 1 - Create an ad”- Go to WB Ad Manager -> Ads -> Add New.
- Enter a Title (internal reference only - visitors never see it).
- In the Ad Settings metabox, choose an ad type: Image, Rich Content, HTML/JS Code, Google AdSense, or Email Capture.
- Fill in the content for that type (see Ad Types).
- In the Placements metabox, check where the ad should appear (header, footer, content, and more).
- In the Ad Status metabox, set Priority (1-10, default 5) - higher priority wins a bigger share of impressions when ads compete for the same slot.
- Click Publish.
Step 2 - Display the ad
Section titled “Step 2 - Display the ad”You have two ways to place ads:
- Automatic placements - the boxes you checked in the Placements metabox. No shortcode needed.
- Shortcodes - drop an ad anywhere by ID:
[wbam_ad id="123"]Display several specific ads at once:
[wbam_ads ids="1,2,3"]See Ad Shortcodes for all attributes.
Step 3 - Verify and track
Section titled “Step 3 - Verify and track”- Visit a page where the ad should show.
- Click the ad to test tracking.
- Return to WB Ad Manager -> Ads - impressions and clicks appear per ad in the list.
Ad statuses
Section titled “Ad statuses”| Status | Meaning |
|---|---|
| Published | Live and eligible to show |
| Draft | Saved, not live |
| Scheduled (start date set) | Goes live on its start date |
| Disabled | Turned off with the Enabled toggle in the Ad Status metabox |
Next steps
Section titled “Next steps”- Placements - every location an ad can appear.
- Rotation and Split Testing - how the winning ad is chosen.
- Targeting and Scheduling - control who sees each ad and when.