With the BuddyPress Business Page, you can create extra firlds through the ACF (Advanced Custom Fields) plugin. To implement this feature, you’ll need to ensure that the following plugins are installed and active:
These newly created fields will become visible under the “Settings” menu, specifically within the “Contact Info” section on your Business Page.
Creating Taxonomies
- Begin by creating a custom post within the Business section. If Custom Post UI is enabled and active on your website, you will notice a new menu item, “CPT UI.”
- Navigate to “CPT UI” and select “Add/Edit Taxonomies.”
- A new form will open, prompting you to enter the following details:
– Taxonomy Slug
– Plural Label
– Singular Label
– Select “Business” in the “Attach Post Types” section. - Click the “Add Taxonomy” button to save these settings.
Once completed, a new taxonomy will appear as a submenu within the Business menu. For instance, you might have created a new taxonomy called “Store Location”

Assigning Values Inside Taxonomy
Now, it’s time to populate the newly created “Store Locations” taxonomy with values. To do this:
1. Navigate to “Business” > “Store Locations.”
2. Create as many store locations as needed. For instance, you can create locations such as California, Texas, and Florida.

Creating a Field Group for Business Page
To access your WordPress admin dashboard and navigate to the ACF (Advanced Custom Fields) section, follow these steps:
1. Log in to your WordPress website as an administrator.
2. Once you’re logged in, you will typically see the WordPress admin dashboard.
3. In the admin dashboard, look for the “ACF” menu or submenu. It might be listed as “Advanced Custom Fields” or simply “ACF.”
4. Click on the “ACF” or “Advanced Custom Fields” menu item.
5. From the dropdown or page that appears, select “Field Groups.”
This action will take you to the ACF Field Groups interface, where you can manage and configure custom fields for your WordPress site. This is particularly useful for creating and managing custom content types and fields.
1. Enter the title of the Field Group2. Choose the “Field Type” as “Taxonomy.”
3. Enter details such as the field label, field name, and field type.
4. In the “Field Type” section, you will find a new dropdown called “Taxonomy.” Choose the “Store Location” option, which you created earlier.
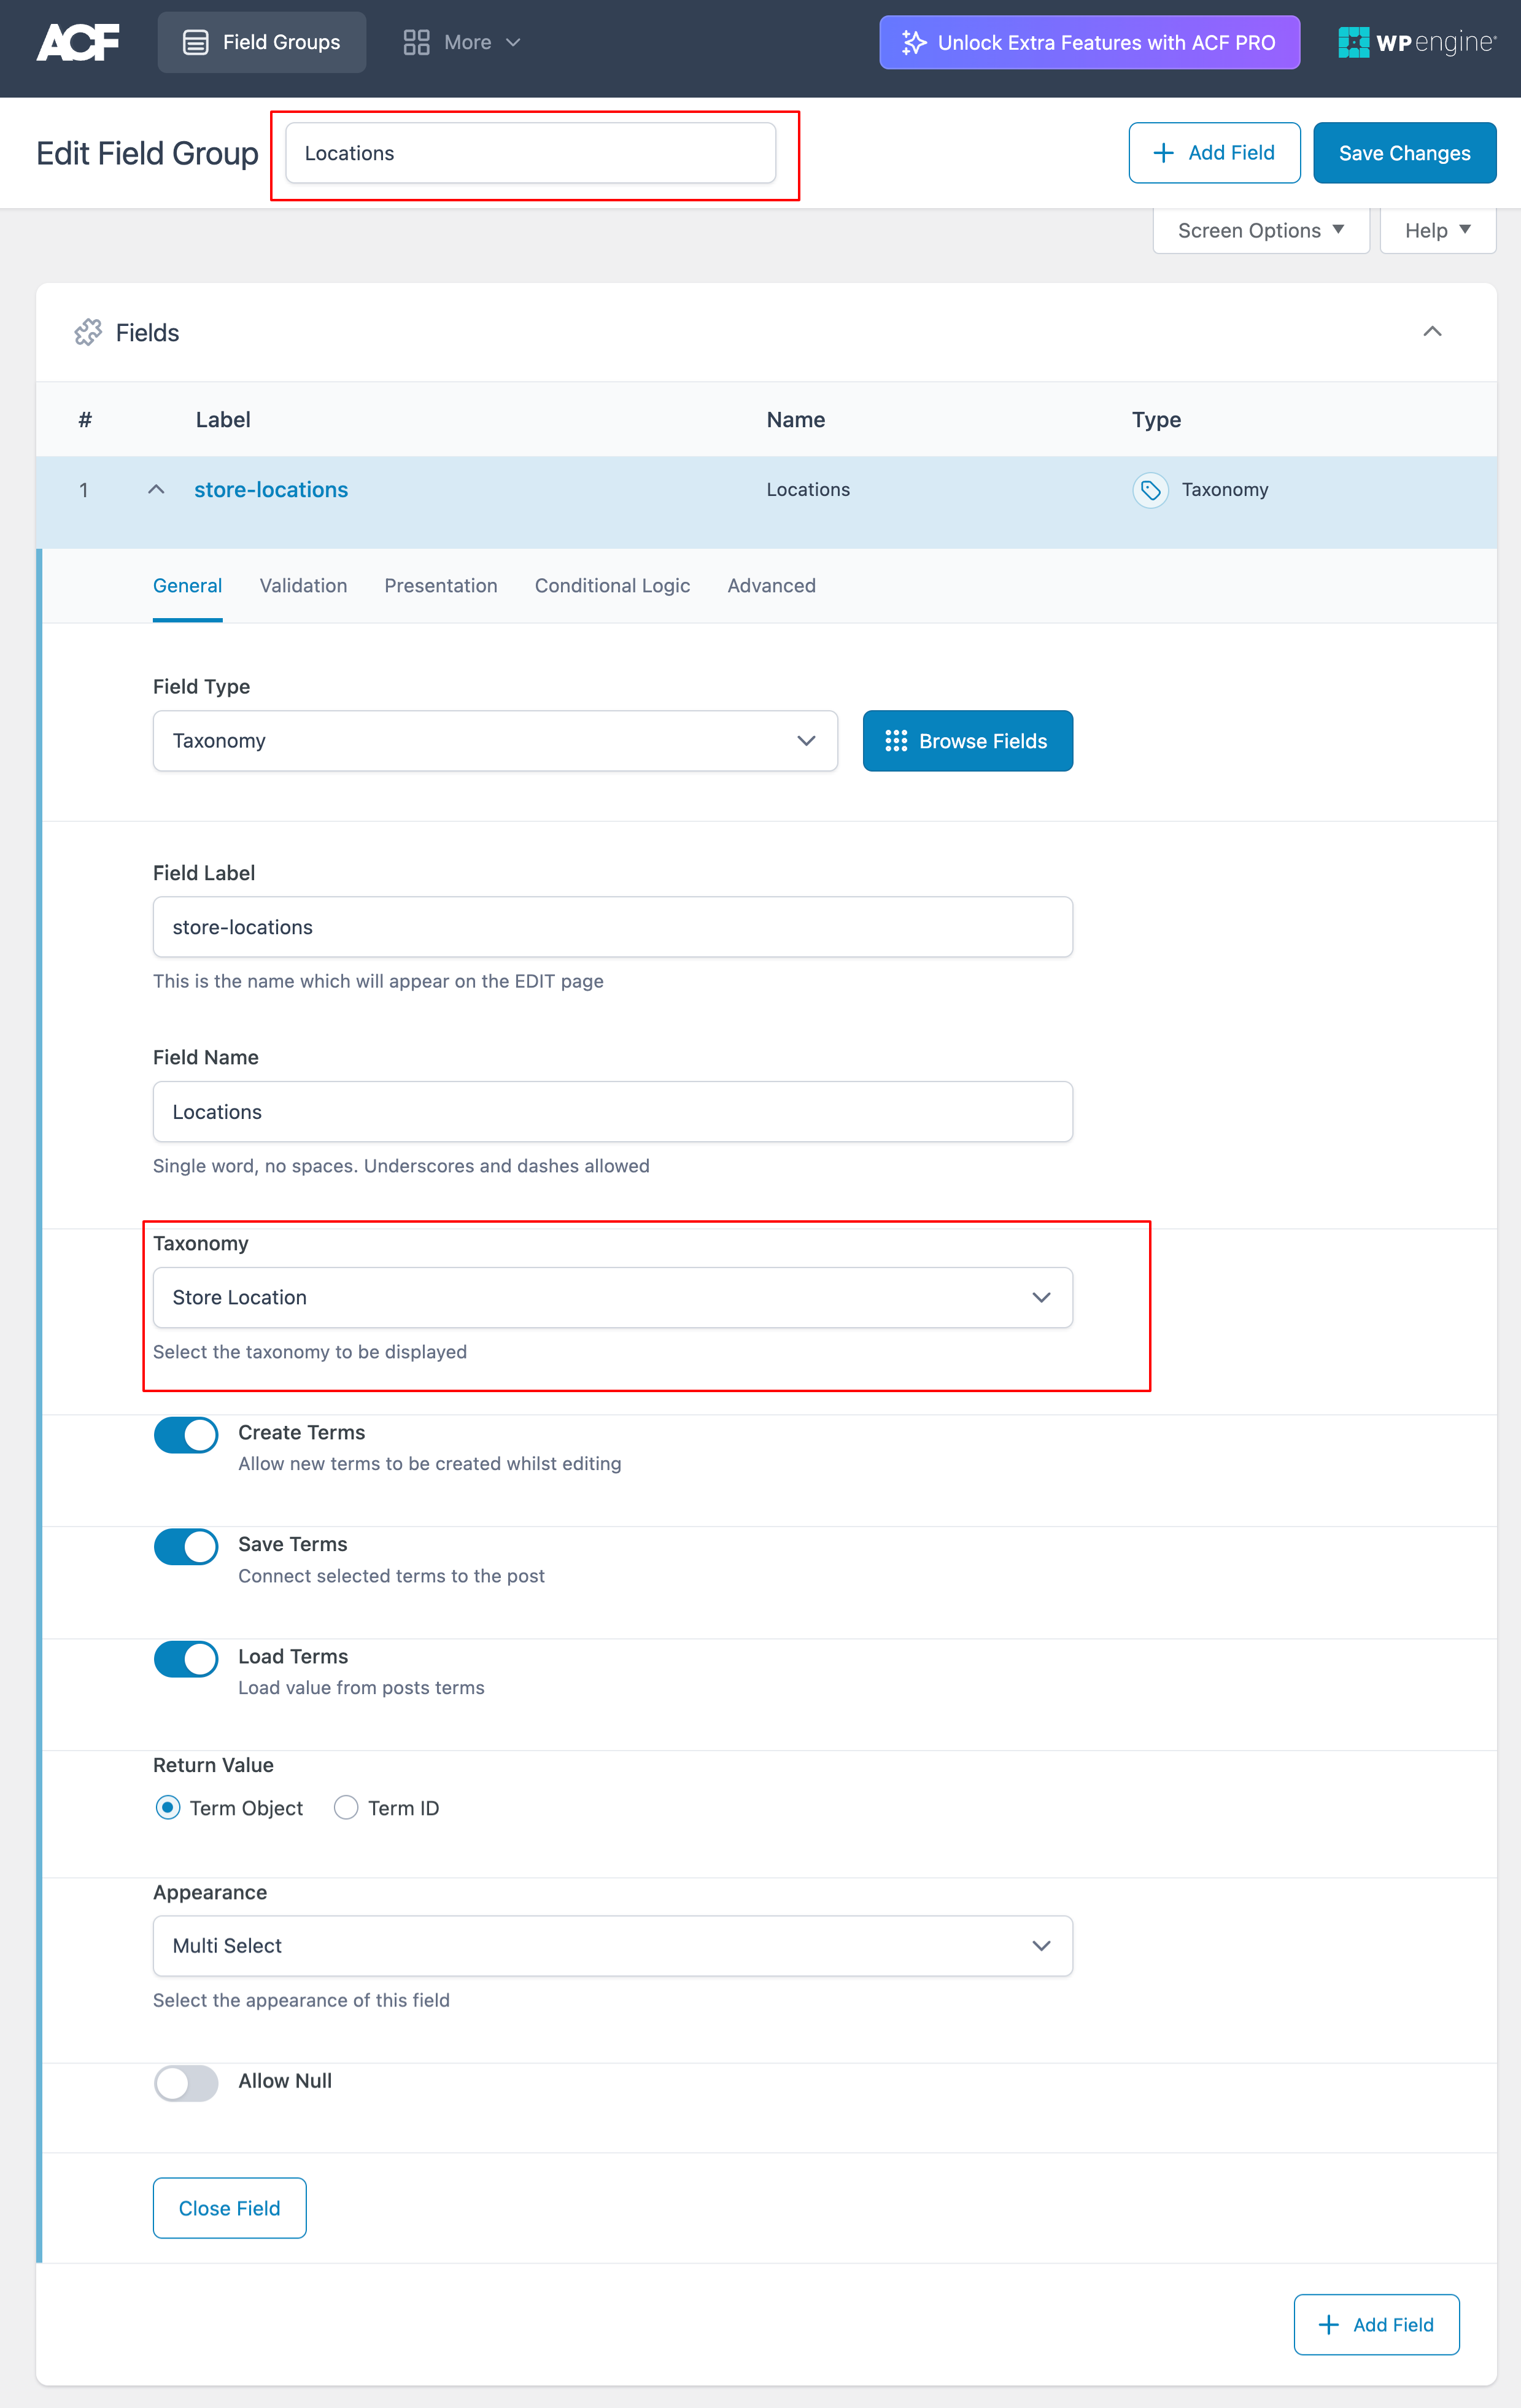
5. Enable the options “Create Terms,” “Save Terms,” and “Load Terms.” Also, close the “Term Object” in the return value.
6. In the “Appearance” dropdown, select “Multiselect.”
7. Save the changes.
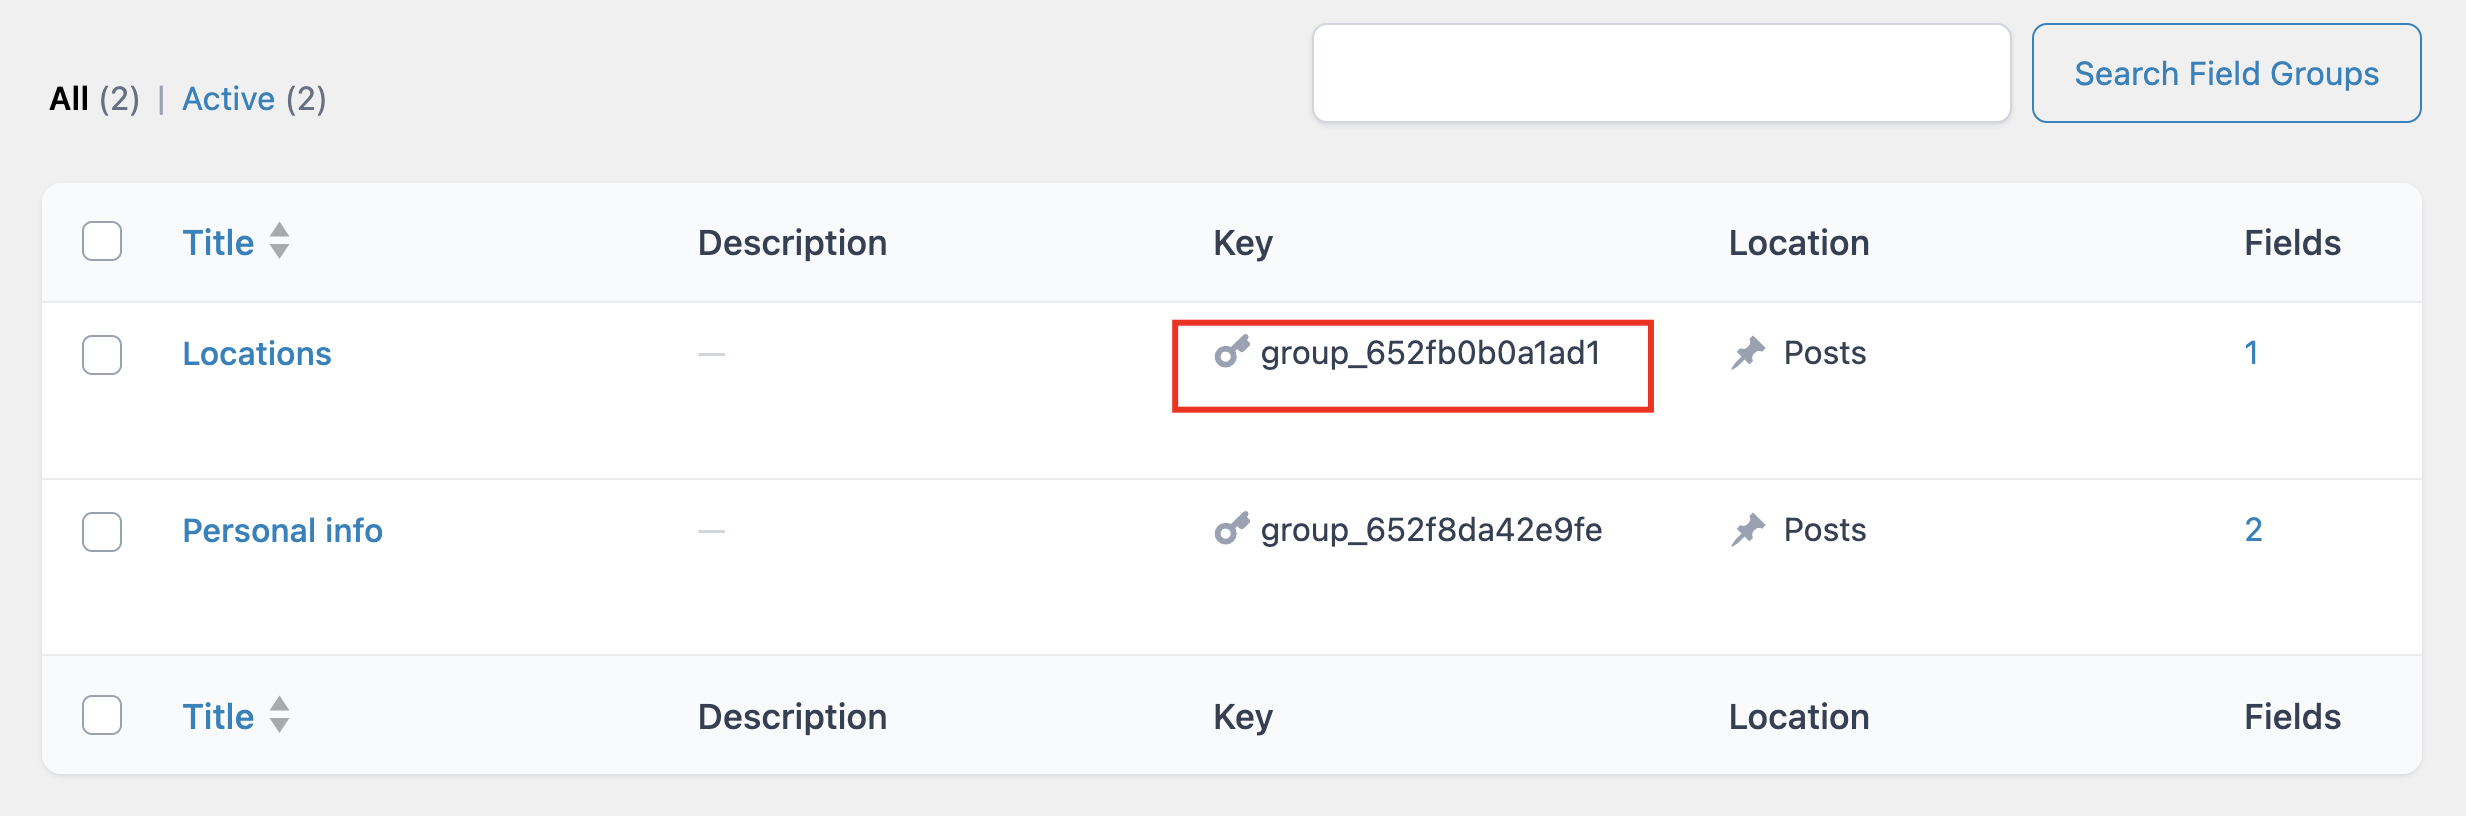
Copy the Group ID
To copy the group ID from the ACF (Advanced Custom Fields) Field Groups, follow these steps:
- Go to your WordPress admin dashboard.
- In the admin dashboard, find and click on the “ACF” menu or submenu. This is where you access the Advanced Custom Fields settings.
- From the dropdown or page that appears, select “Field Groups.” This is where you manage and configure your custom fields.
- In the list of field groups, Copy the group id of any particular field group.
Code Snippet
Paste the below Code Snippet with in the functions.php of your Child theme.
Insert the previously copied group ID into the specified location within the code snippet.
function get_acf_group_field() {

$acf_group_fields=acf_get_fields( 'group_652f8da42e9fe' );// replace it with group key

return$acf_group_fields;

}
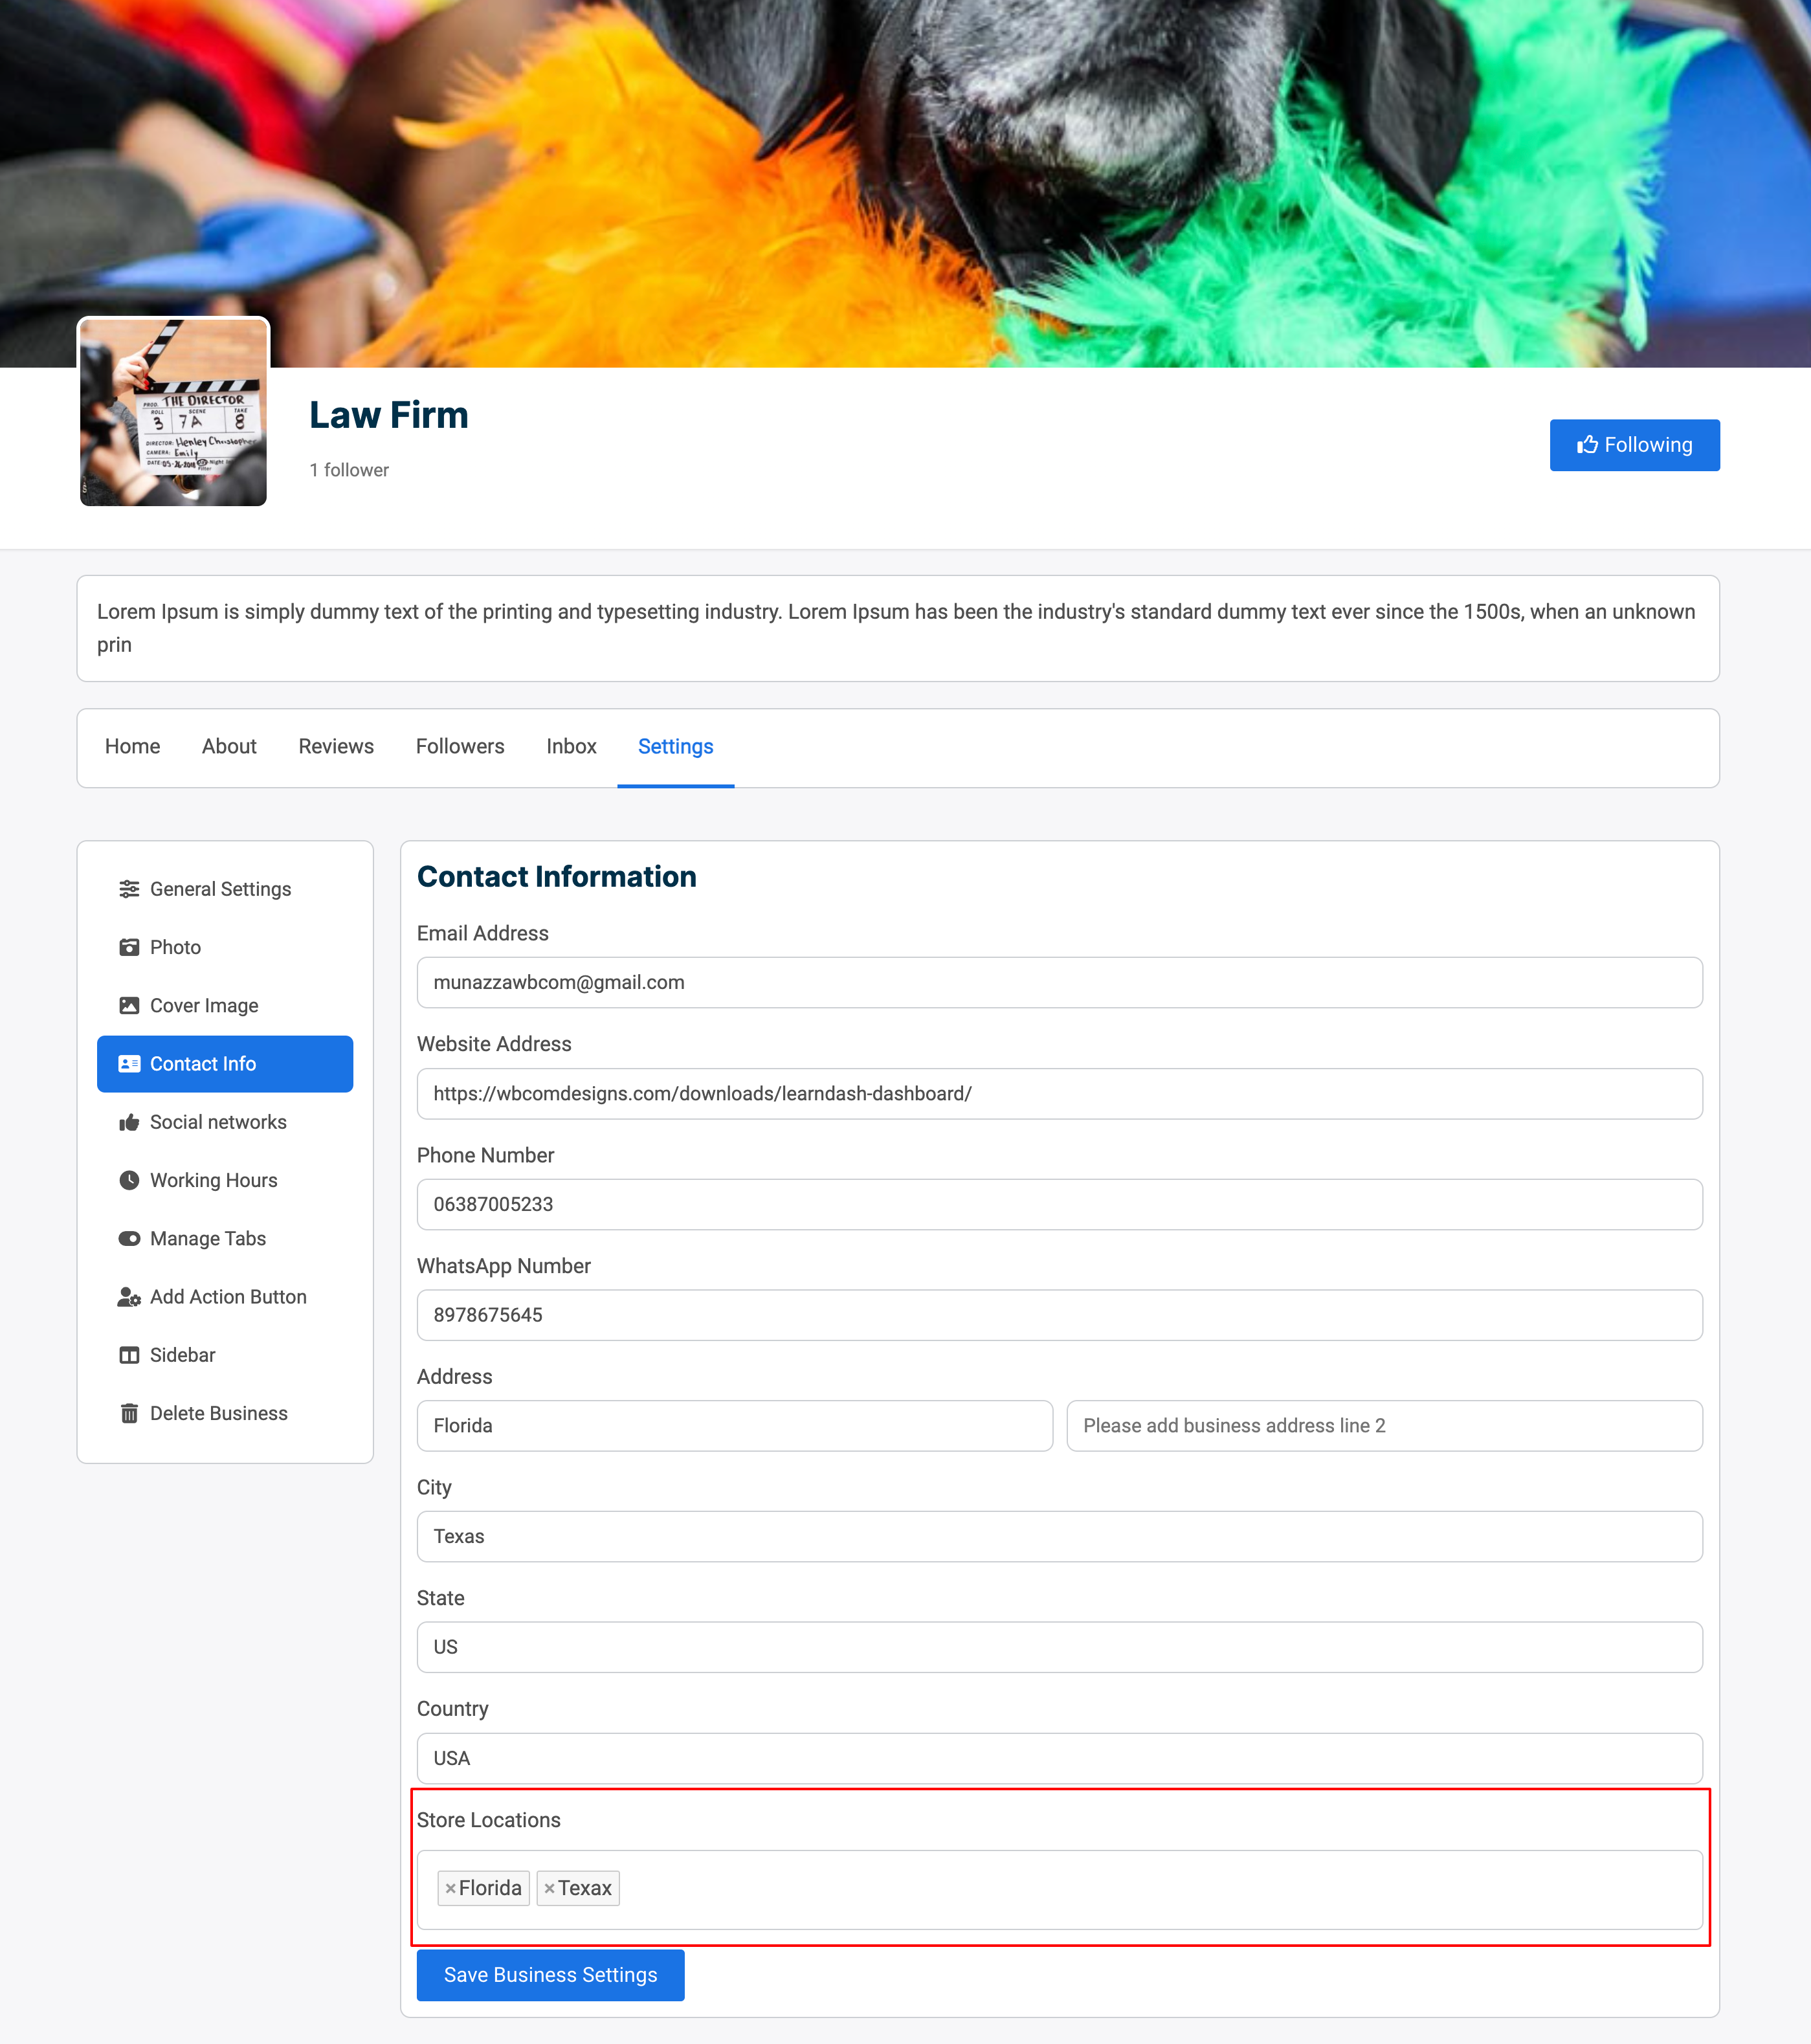
Frontend View
Go to your Single Business Profile> Setting > Contact info. Here you’ll be able to view the Store Location Field.
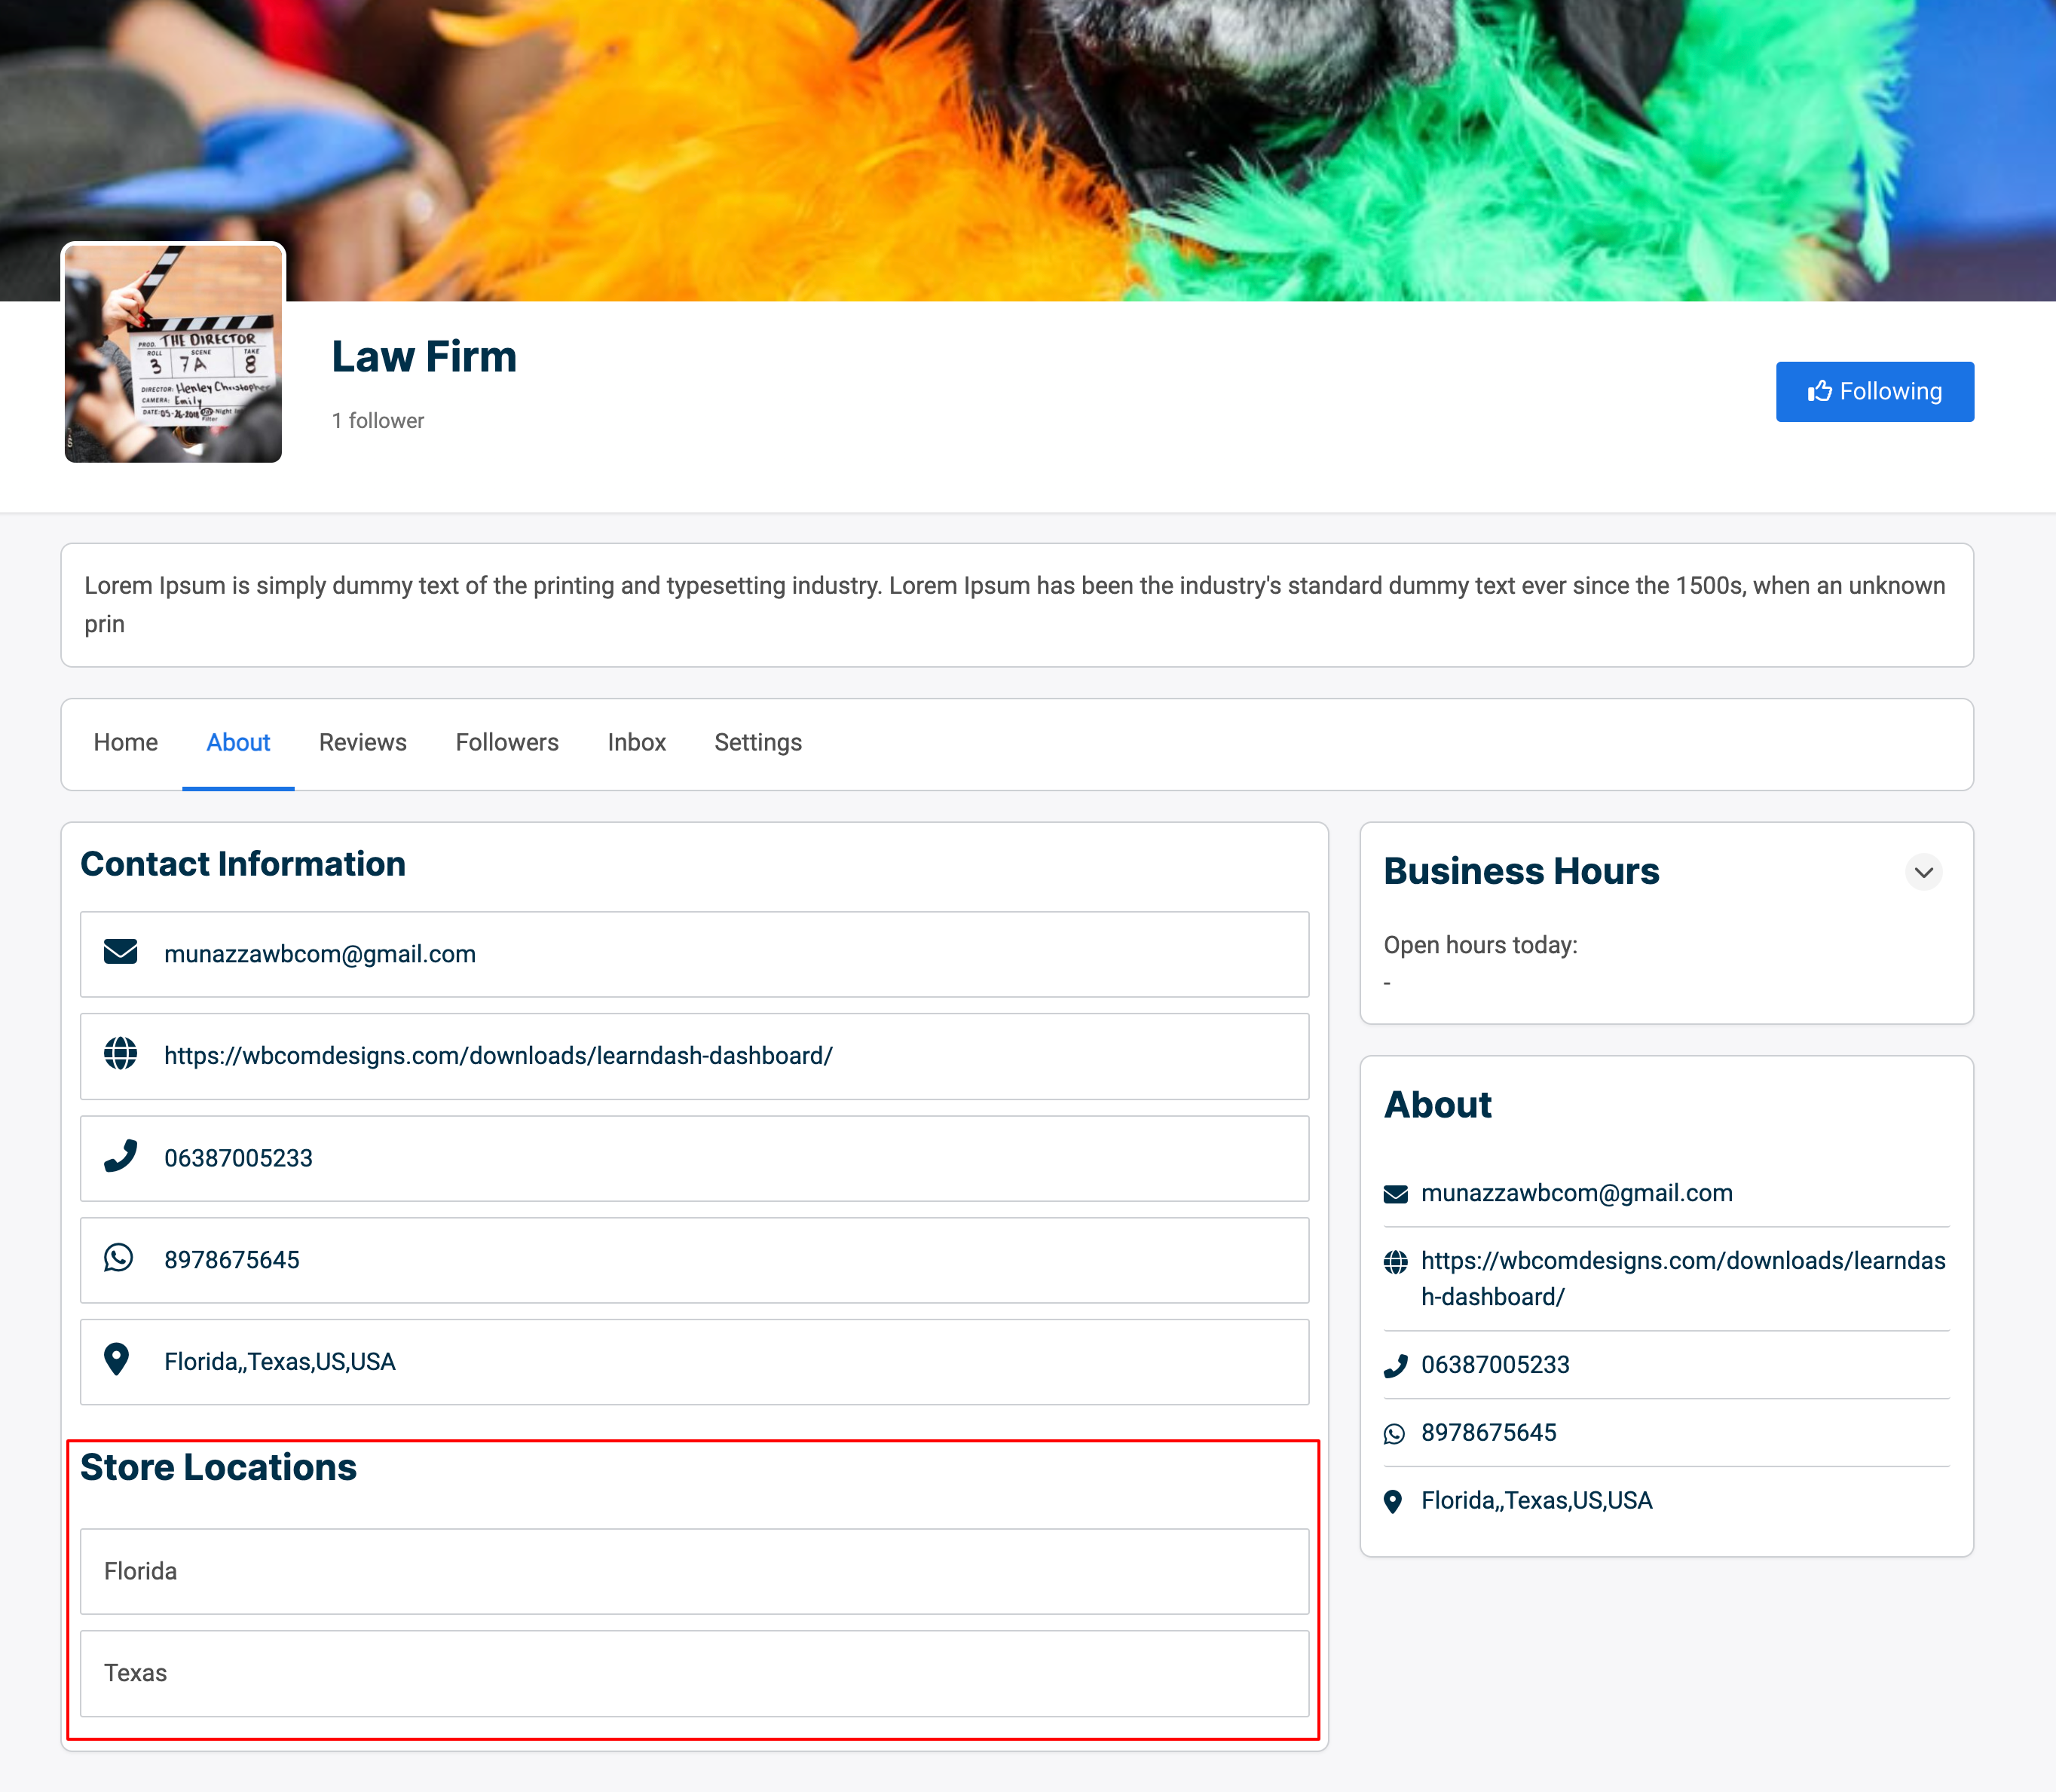
View Field Group
You can view the saved field groups on the About tab of your Business Page.
By following these steps, you can create extra fields and enhance the functionality of your BuddyPress Business Page with added taxonomy options. This allows for more robust and customized content organization and presentation on your website.