

Install and Activate the Plugin
This page walks through installing BuddyPress Contact Me and reaching its admin screen for the first time.
Requirements
Section titled “Requirements”| Requirement | Minimum | Tested |
|---|---|---|
| WordPress | 6.0 | 6.9 |
| PHP | 7.4 | 8.4 |
| BuddyPress or BuddyBoss Platform | active | BuddyPress 14.x |
The BuddyPress Notifications component must be active if you want in-site notification-bell entries. Email notifications work without it.
Install via WordPress admin
Section titled “Install via WordPress admin”- Go to Plugins > Add New.
- Click Upload Plugin and choose the ZIP you downloaded from your Wbcom Designs account.
- Click Install Now, then Activate Plugin.
Install via FTP
Section titled “Install via FTP”- Unzip the plugin archive on your computer. You will get a folder named
buddypress-contact-me. - Upload the folder to
/wp-content/plugins/on your server. - Go to Plugins > Installed Plugins and click Activate under “Wbcom Designs - BuddyPress Contact Me”.
Install via WP-CLI
Section titled “Install via WP-CLI”wp plugin install /path/to/buddypress-contact-me.zip --activateWhat happens on activation
Section titled “What happens on activation”The activator runs once and does the following:
- Creates the
{prefix}contact_metable that stores all submitted messages, with the recipient indexes the inbox relies on. - Records the database schema version in the
bcm_db_versionoption so future upgrades can add indexes without you re-activating. - Sets every existing user’s
contact_me_buttonuser-meta toon, so existing members default to accepting contact. - Seeds the default settings: notifications, email, the profile Contact tab, and the sender copy are on, the admin copy is off, and the send and receive role lists include Visitors plus every editable role.
- Installs a BuddyPress email post of type
bcm-contact-messageso notifications render through the BuddyPress email template. Once you edit that email from Dashboard > Emails, the plugin never overwrites your changes on future upgrades.
Find the admin screen
Section titled “Find the admin screen”Wbcom plugins share a single top-level WordPress menu called WB Plugins. After activation:
- Open WB Plugins in the sidebar.
- Click Contact Me in the submenu.
You land on the Overview tab. The sidebar inside the page lists the four tabs: Overview, Notifications, Access, and License.
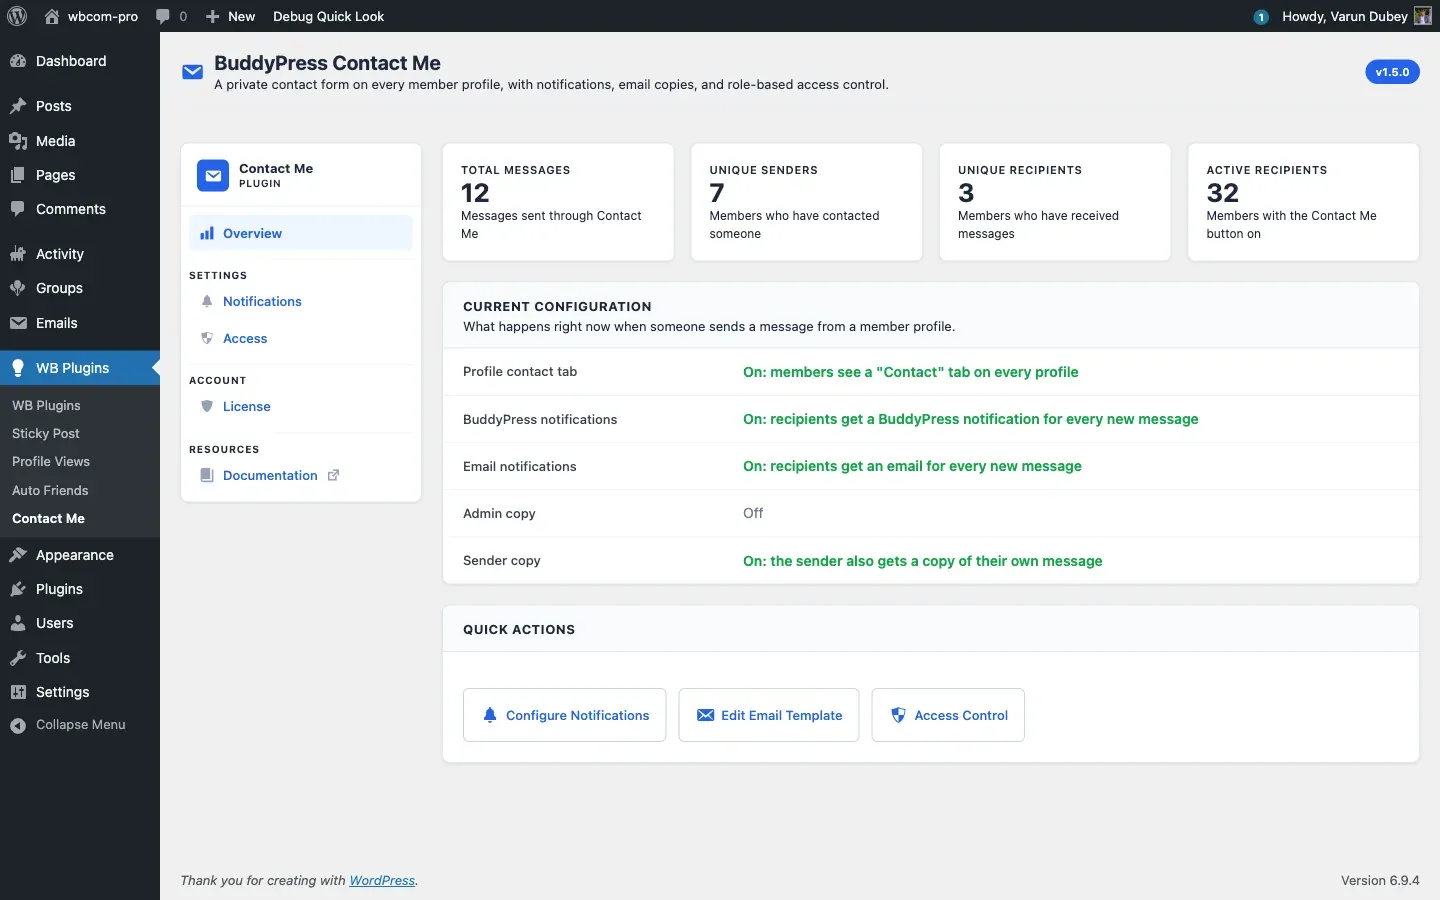
Recommended first-run checklist
Section titled “Recommended first-run checklist”- Notifications tab - confirm at least one of “BuddyPress notification” or “Email notification” is on so recipients find out about new messages. Both are on by default.
- Access tab - confirm the role lists match your community. By default every editable role plus Visitors can send, and every editable role can be contacted. Administrators are always allowed and always contactable.
- License tab - paste your license key and click Activate License so the plugin can pull updates straight from your dashboard.
What’s next
Section titled “What’s next”The Features section walks through every user-facing surface in detail, and the Settings section explains each admin tab.