Ease of making course structure or curriculum directly from one place without any confusion can be achieved by LifterLMS course builder.
You can create, edit and delete a section, lesson, assignment and quiz from here. Can manage the ordering of section and lessons by dragging and dropping inside the desired one.
How can I access builder?
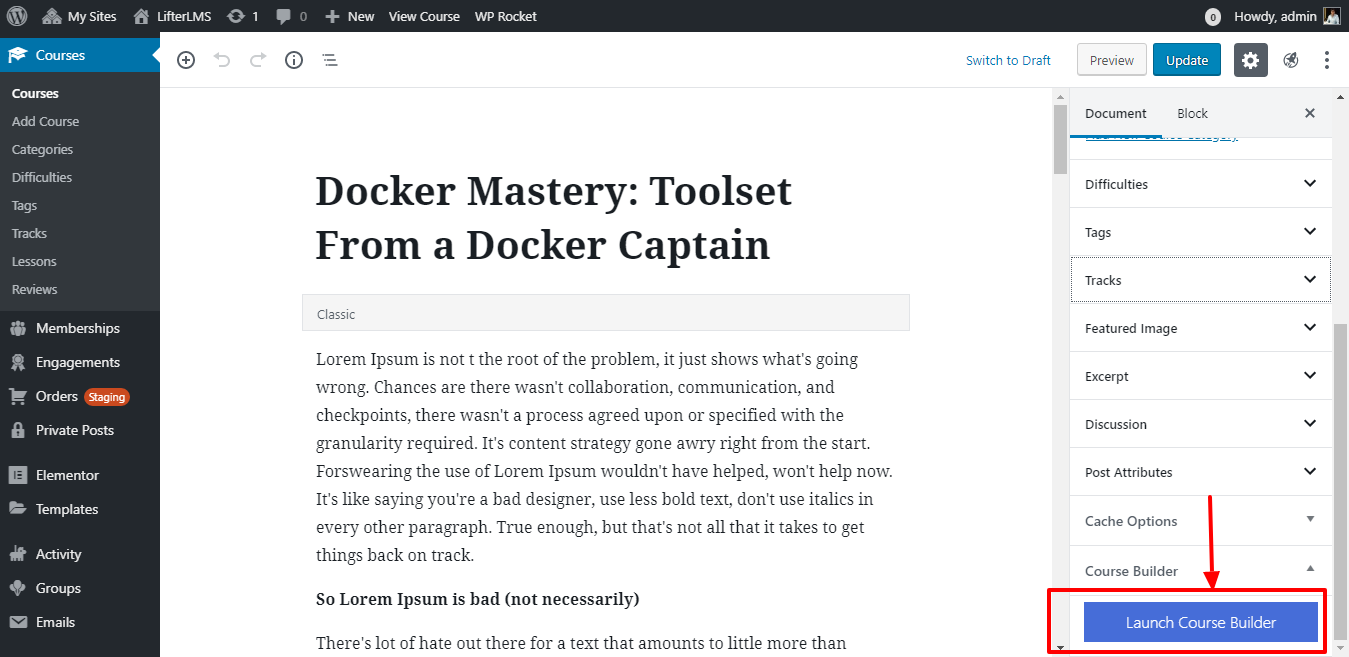
You can easily access course builder by course listing screen or from the course edit screen. Simply, navigate to
Dashboard >> courses >> builder
Alternatively,
Dashboard >> courses >> edit >> launch course builder
How can I create, delete and change the title of a section?
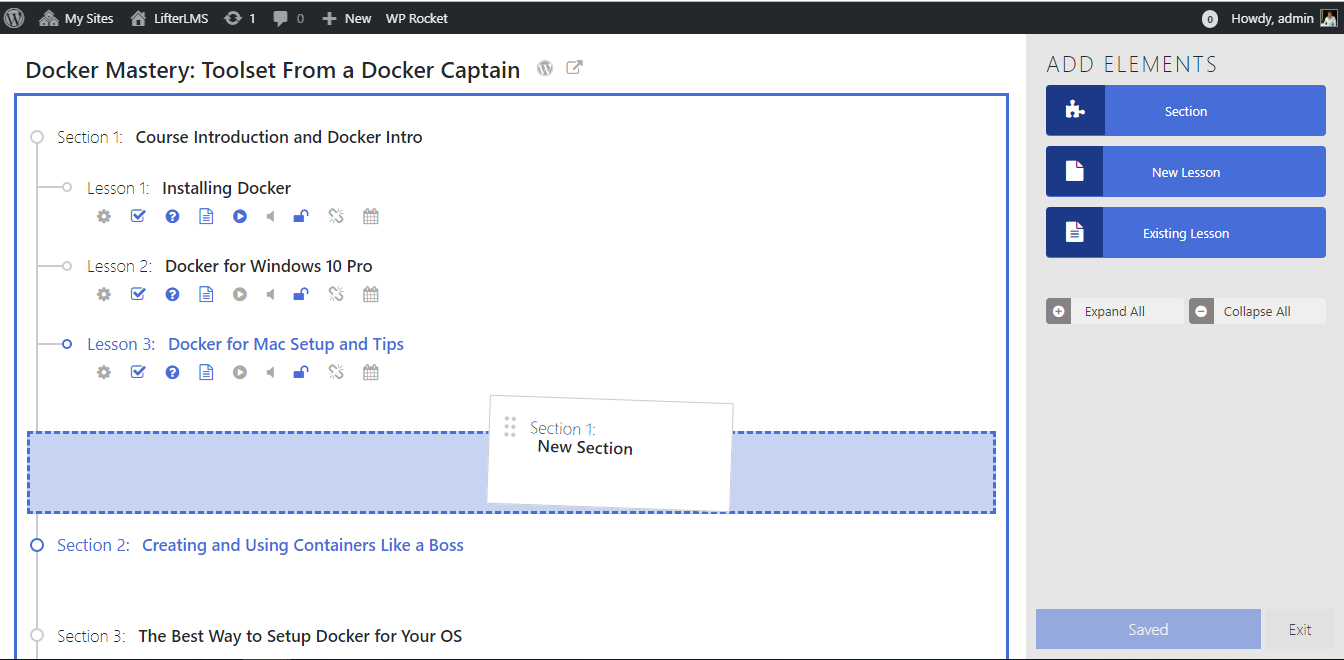
First of all, here we’ll discuss the section creation. You can create a new section by clicking on the section button under course elements it will be automatically added to the end of the course
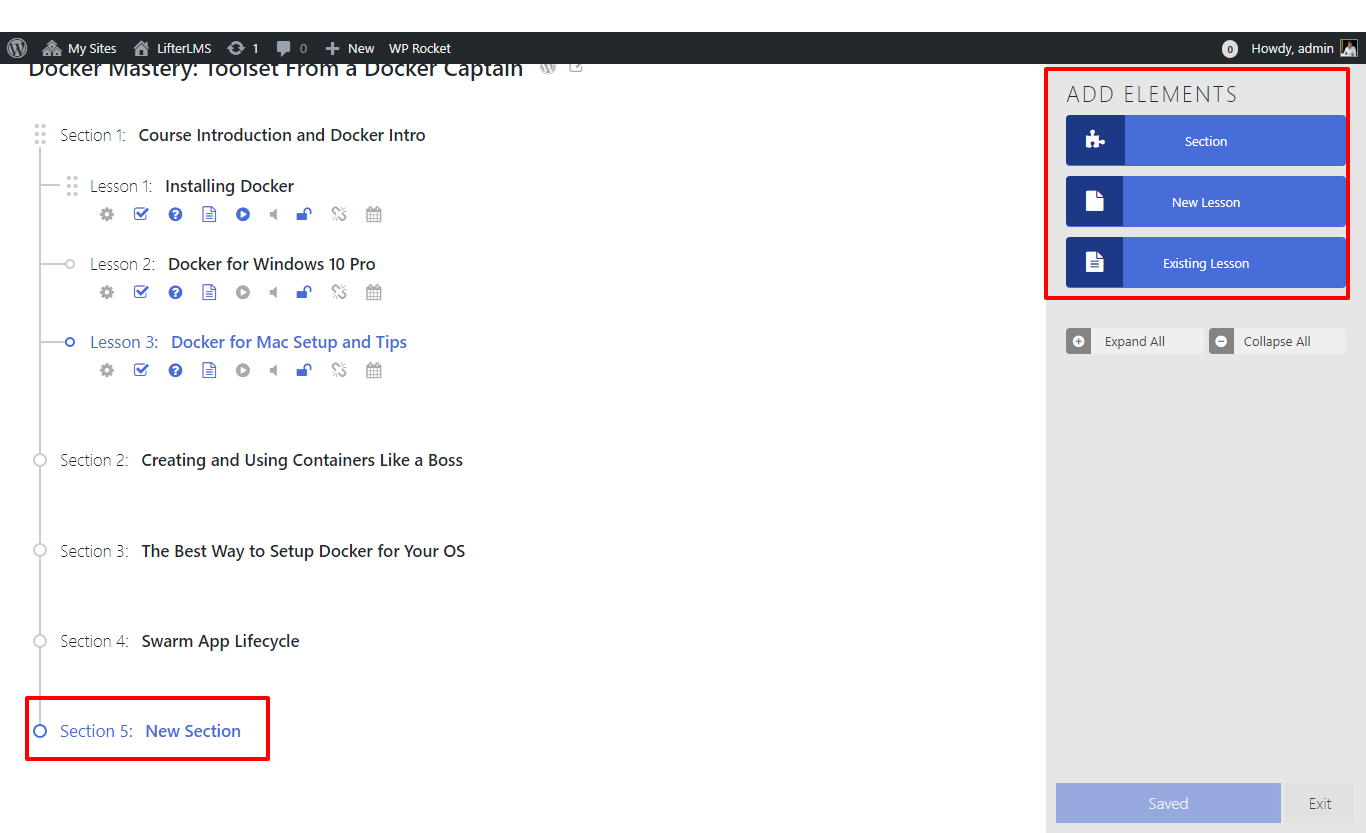
if in case you want to insert it in between other sections you can do so by dragging and dropping to the desired place.
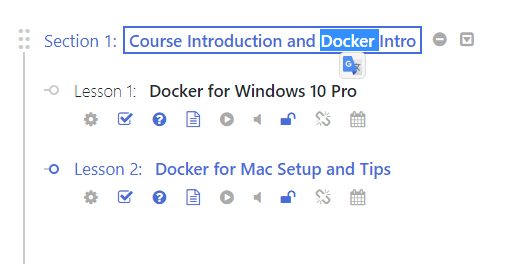
Let’s proceed further and give a look at how can we change the title of the existing section, you can do so by clicking on the section title
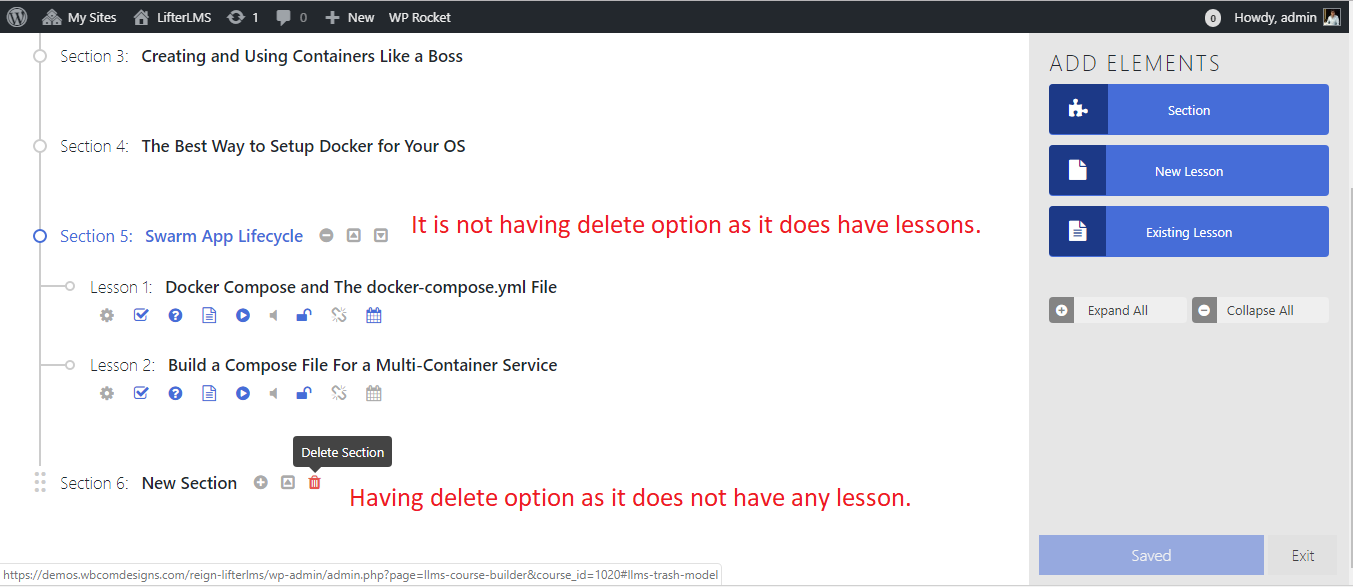
Note that you can not delete the section until unless you have deleted the lessons associated to it, once the lessons are deleted you will have the trash icon when you hover over the section title.
Let’s move forward to adding, editing and deleting lessons.
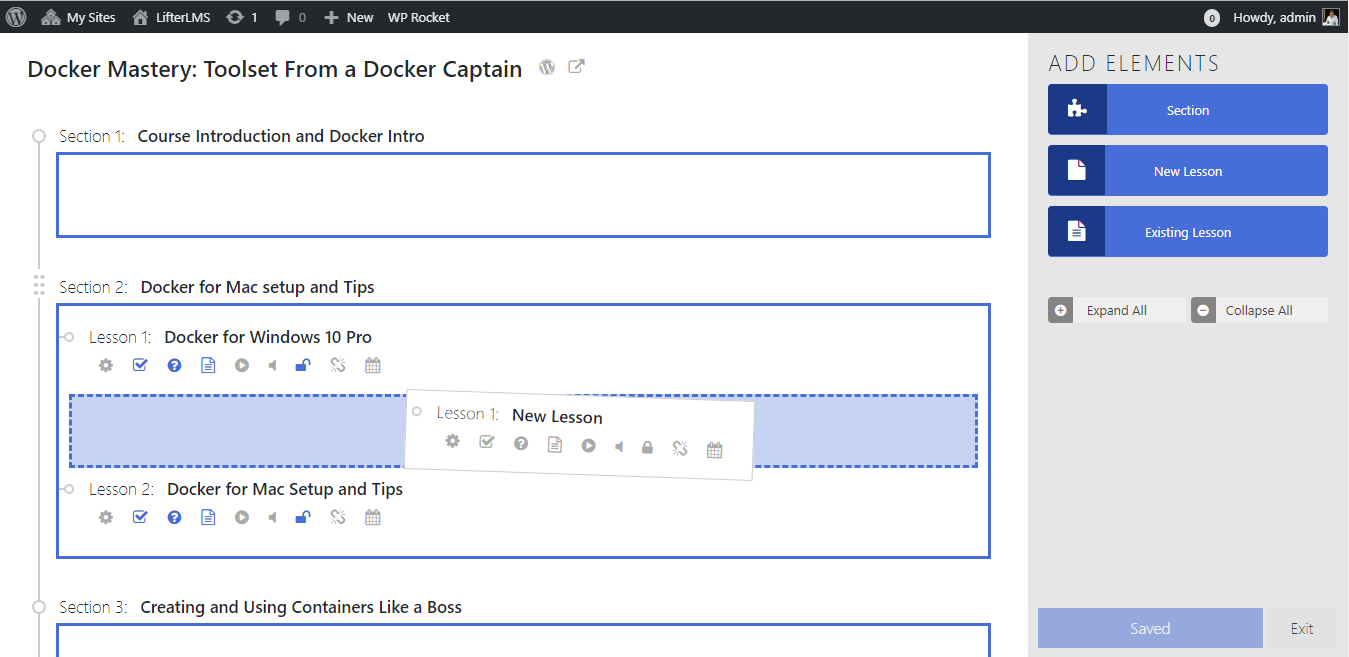
New lesson creation is the same as a section creation. For creating a new lesson click on “New Lesson” button under add elements it will automatically add new lesson inside active section if no section is active then it will add to the last section.
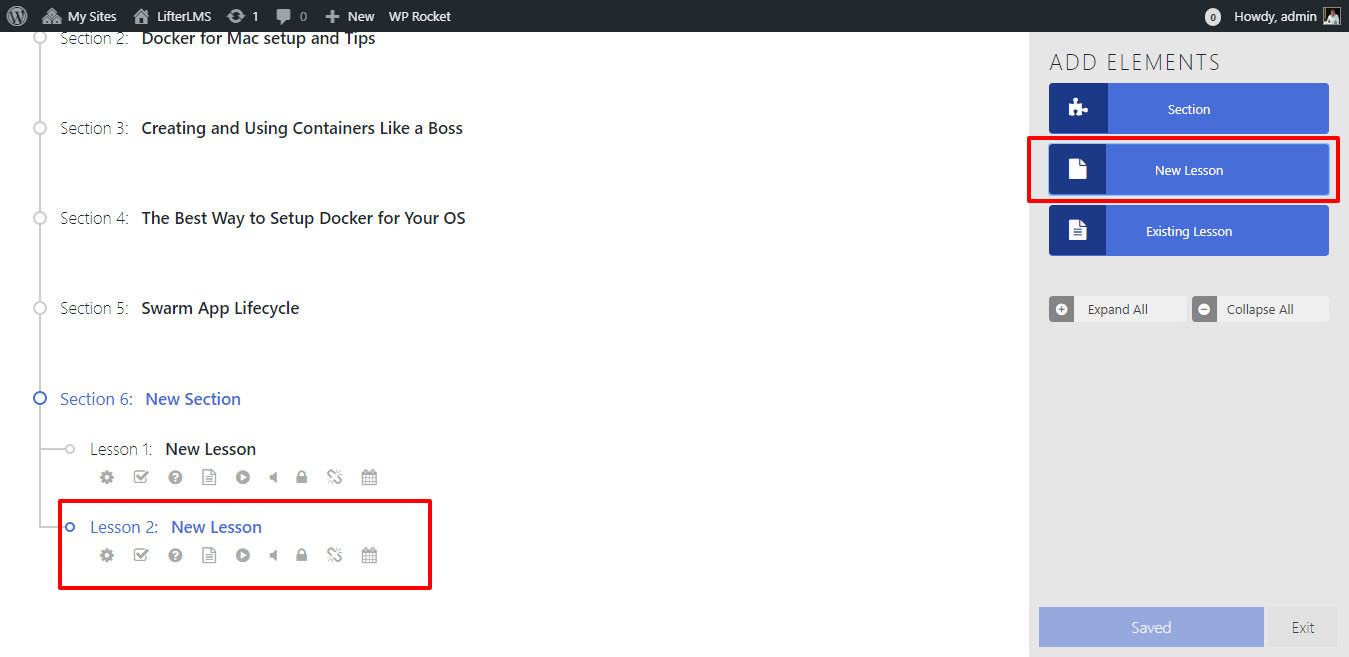
You can use drag and drop feature to add lesson at your desired sections.
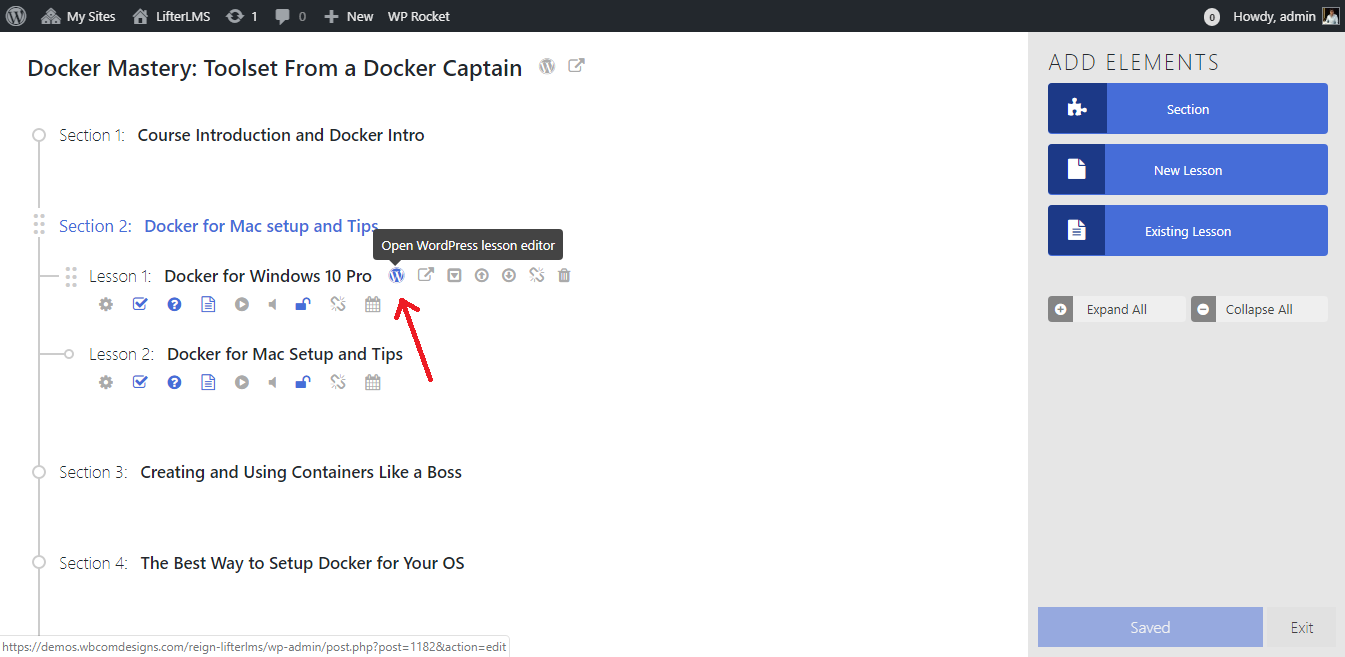
How can I edit the lesson?
You can edit the lesson by clicking on the “Open WordPress Lesson Editor” option. You will get the option once you hover the lesson title.
How can I delete the lesson?
You will get a trash icon to delete the lesson when you hover our the lesson.

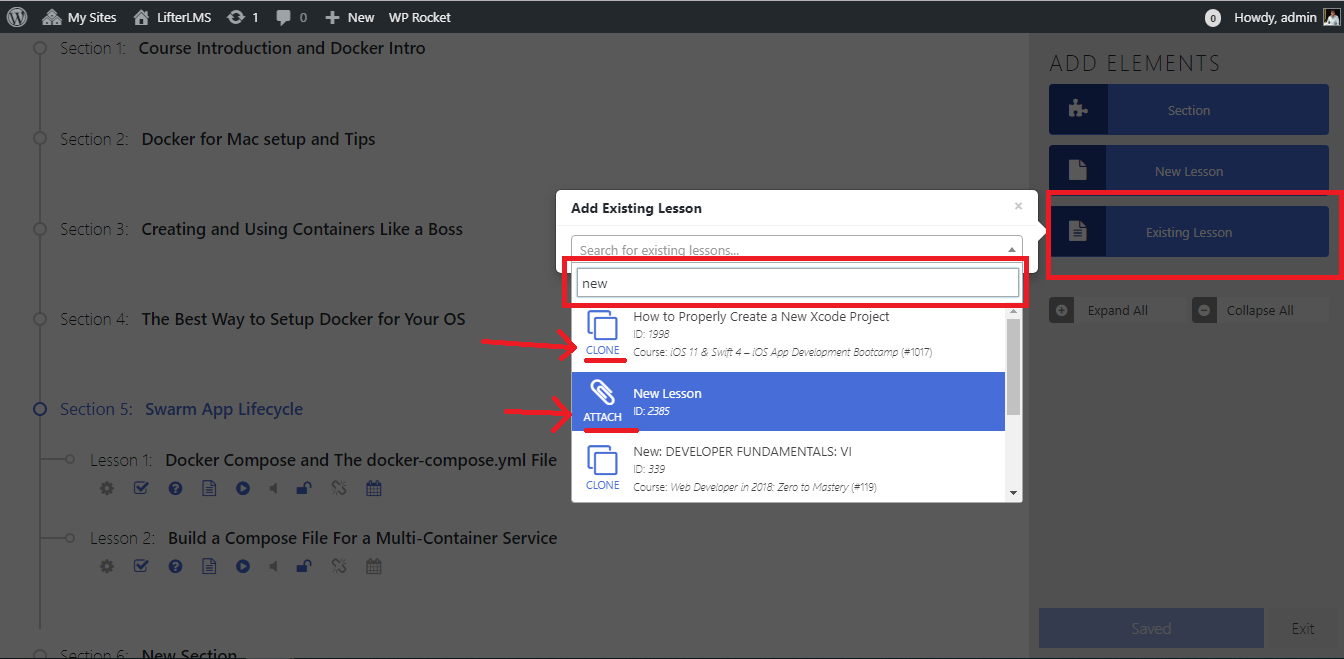
Adding an existing lesson
You can add an existing lesson by clicking on the “Add Existing Lesson” button via Add Elements widget.
By clicking on it you’ll get a search bar from here you can select pre-existing lesson by scrolling or searching by name.
Now you can choose either of the option “clone” or “attach”. Clone duplicates an already attached lesson to a different course. The attach option will add a lesson that is detached from another course.
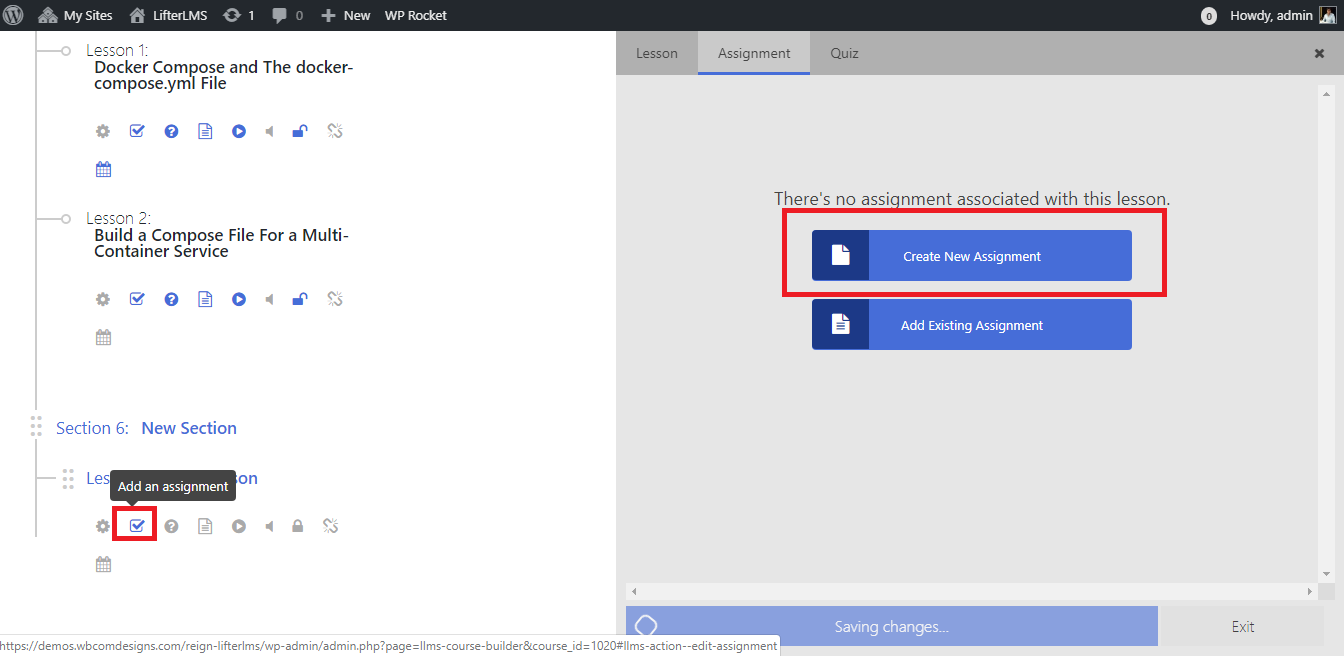
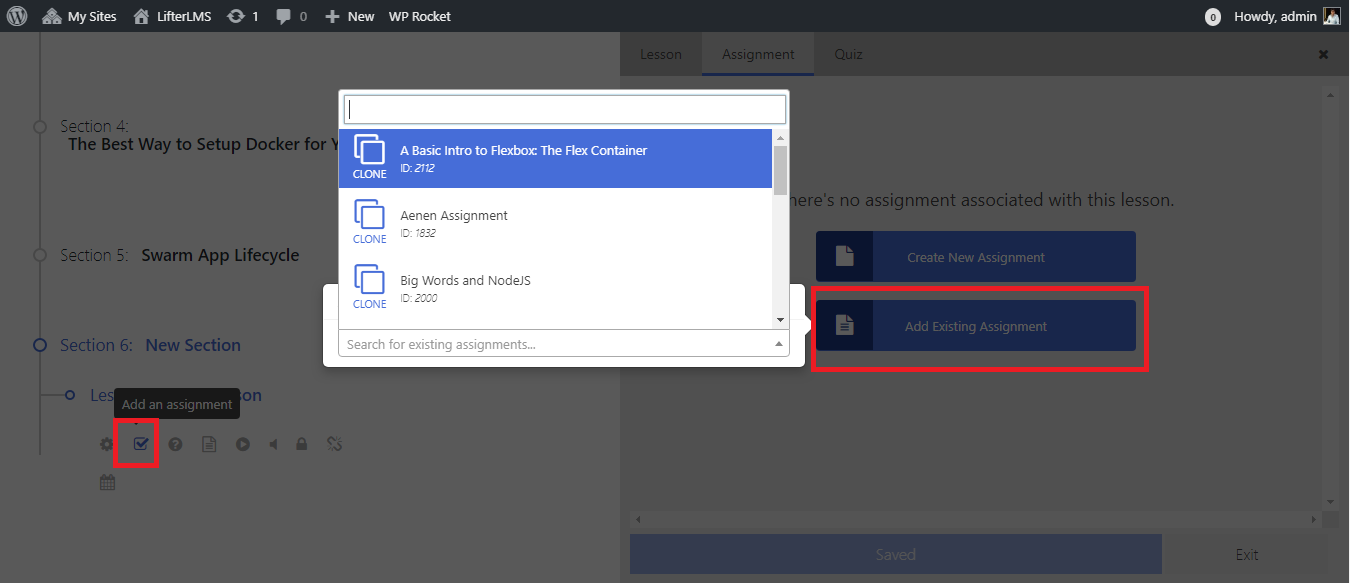
How can I create an Assignment?
You will get an add assignment icon once you hover over the lesson. You will have a “create new assignment” option on the right side of the screen click on it and proceed.
Following are the options you will find here:
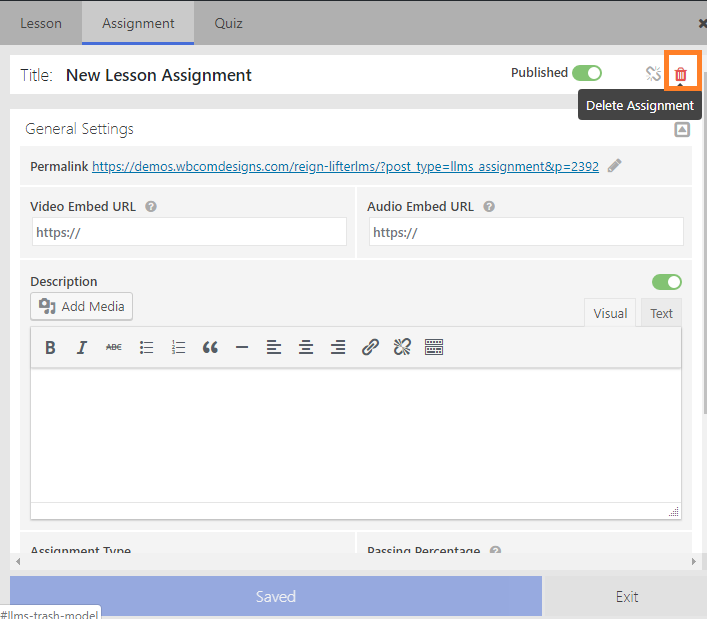
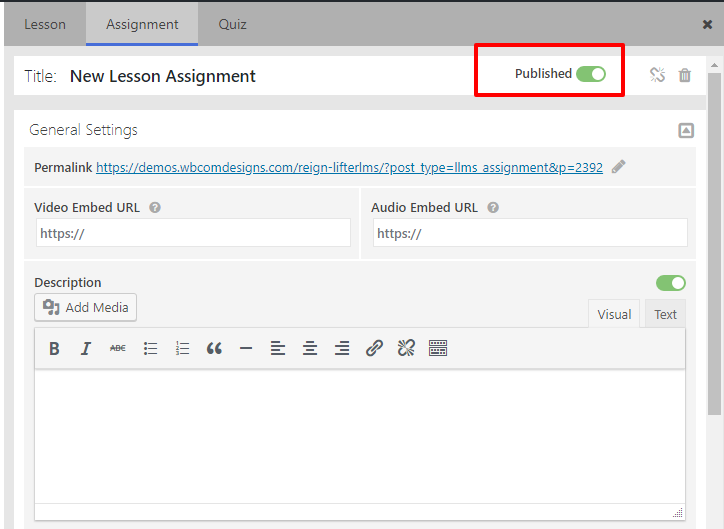
Title – Add/edit the title of the assignment.
General Setting:
Permalink – Allows you to add permalink.
Video Embed URL – Allows you to add Youtube, Vimeo or Wistia video URLs.
Audio Embed URL – Allows you to add a sound cloud or Spotify audio URLs.
Description – Allows you to add assignment description.

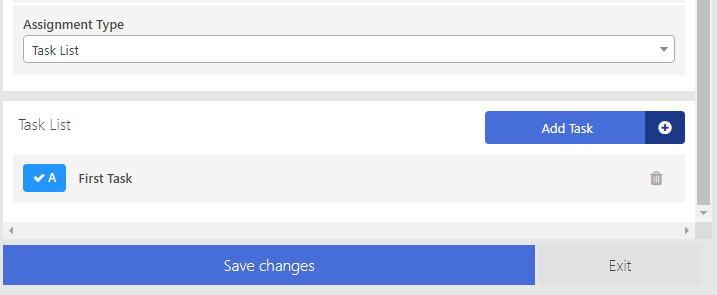
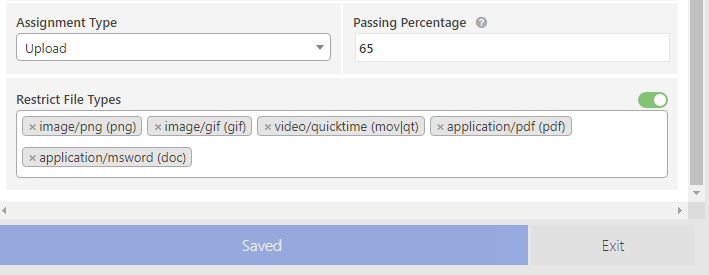
Assignment Type – Allows you to choose among three option Task list, Essay and upload
- Task list – Allows you to add a list of tasks.
- Essay – Allows you to add essay as an assignment on selecting this you can also set passing percentage, minimum and maximum word count.

- Upload – Allows you to upload an assignment. This will also give you the option to set passing percentage and you can also restrict file types.
Don’t forget to publish assignment by enabling the “published” option at the top right.
How can I add an existing assignment?
Navigate to lesson>> hover over it >> click on add assignment >> click on add existing assignment >> select the assignment from dropdown or search by entering a name on the search box.
How can I delete the assignment?
You will get a trash icon at the top right corner on edit assignment screen.