You can add new course by navigating through:
Dashboard >> Courses >> Add Course
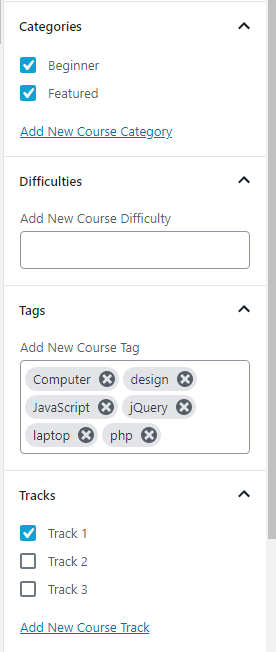
Now from here, you can enter the title and the content of the course. You will also have an option to choose course category, tag and track once you have created the same from:
Dashboard >> Courses >> Categories/tags/tracks
Let’s give a look at additional course options, they are as follow:
1) Sales Page
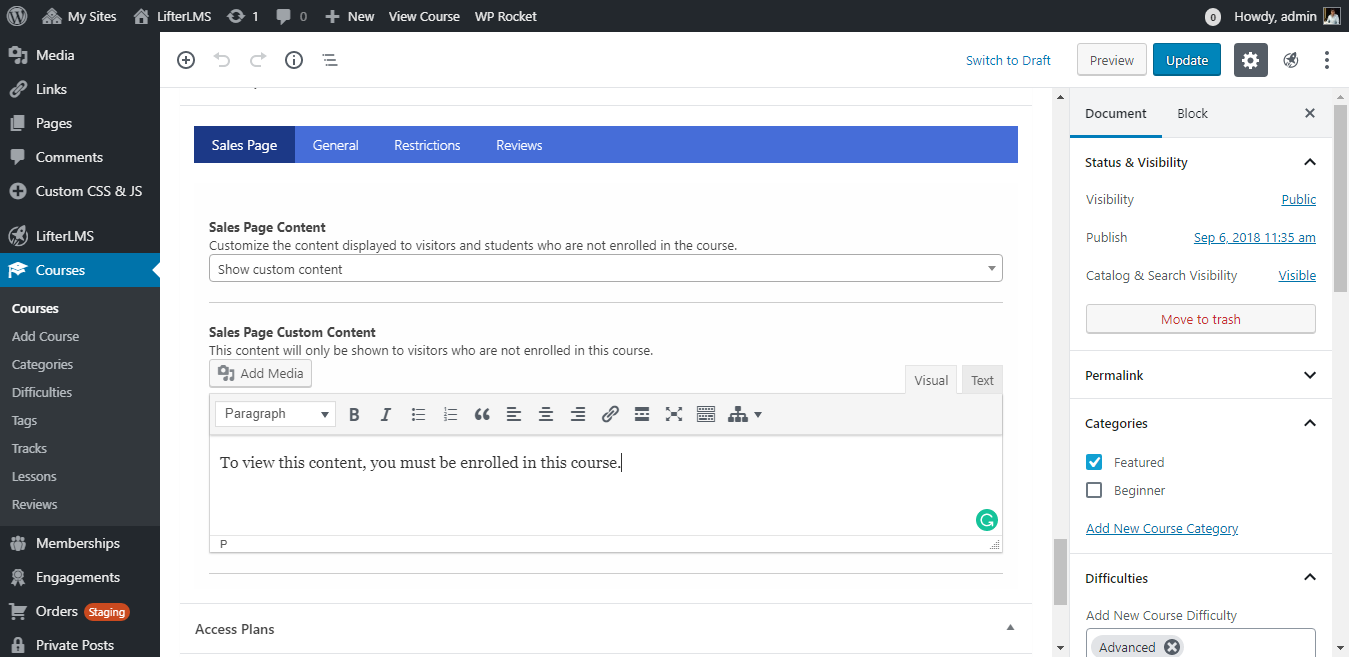
Sales Page Content – Customize the content displayed to visitors and students who are not enrolled in the course. You will have four options here:
Display default course content – It will display the default course content.
Redirect to WordPress page – Allows you to select the page you want to show the visitors/students who are not enrolled in the course.
Redirect to custom URL – Allows you to enter custom URL where you want the visitors/students to be redirected.
Show custom content – Allows you to enter custom content.
2) General
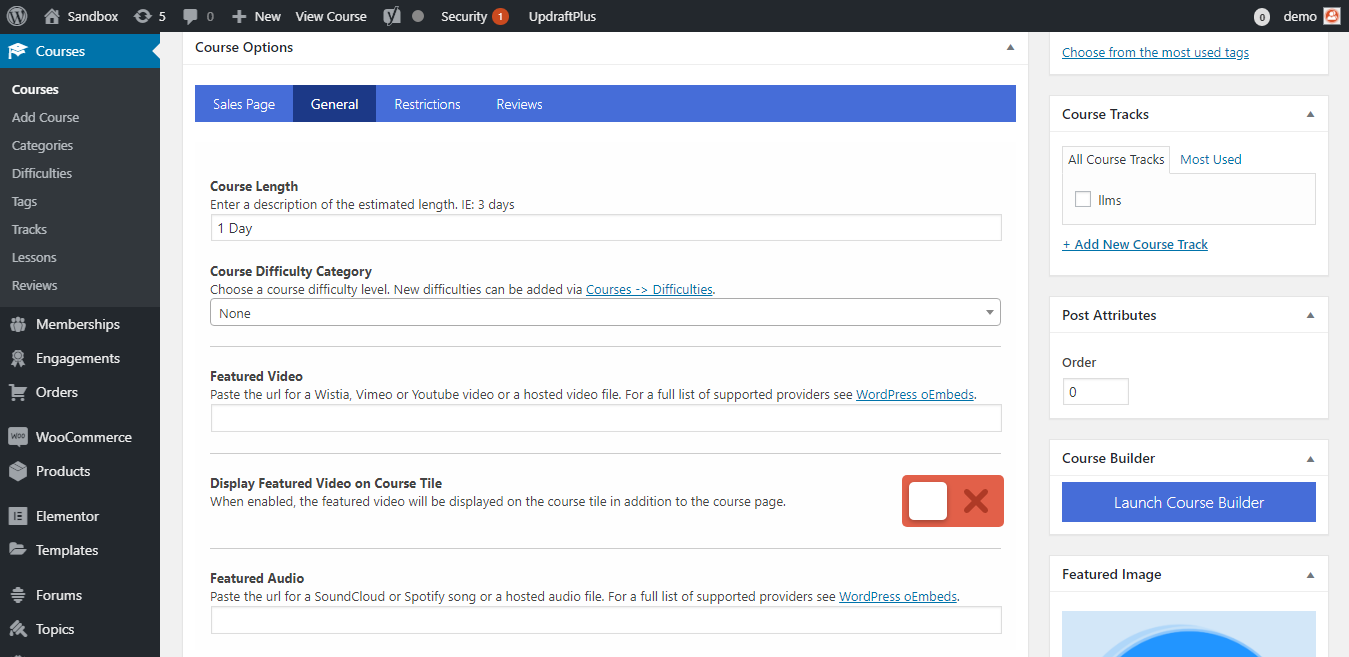
Course Length – Enter a description of the estimated length. IE: 3 days
Course Difficulty Category – Choose a course difficulty level if you want your courses into levels. New difficulties can be added via Courses >> Difficulties.
Featured Video – Paste the URL for a Wistia, Vimeo or Youtube video or a hosted video file. For a full list of supported providers see WordPress oEmbeds.
Display Featured Video on Course Tile – When enabled, the featured video will be displayed on the course tile in addition to the course page.
Featured Audio – Paste the URL for a SoundCloud or Spotify song or a hosted audio file. For a full list of supported providers see WordPress oEmbeds.
3) Restrictions
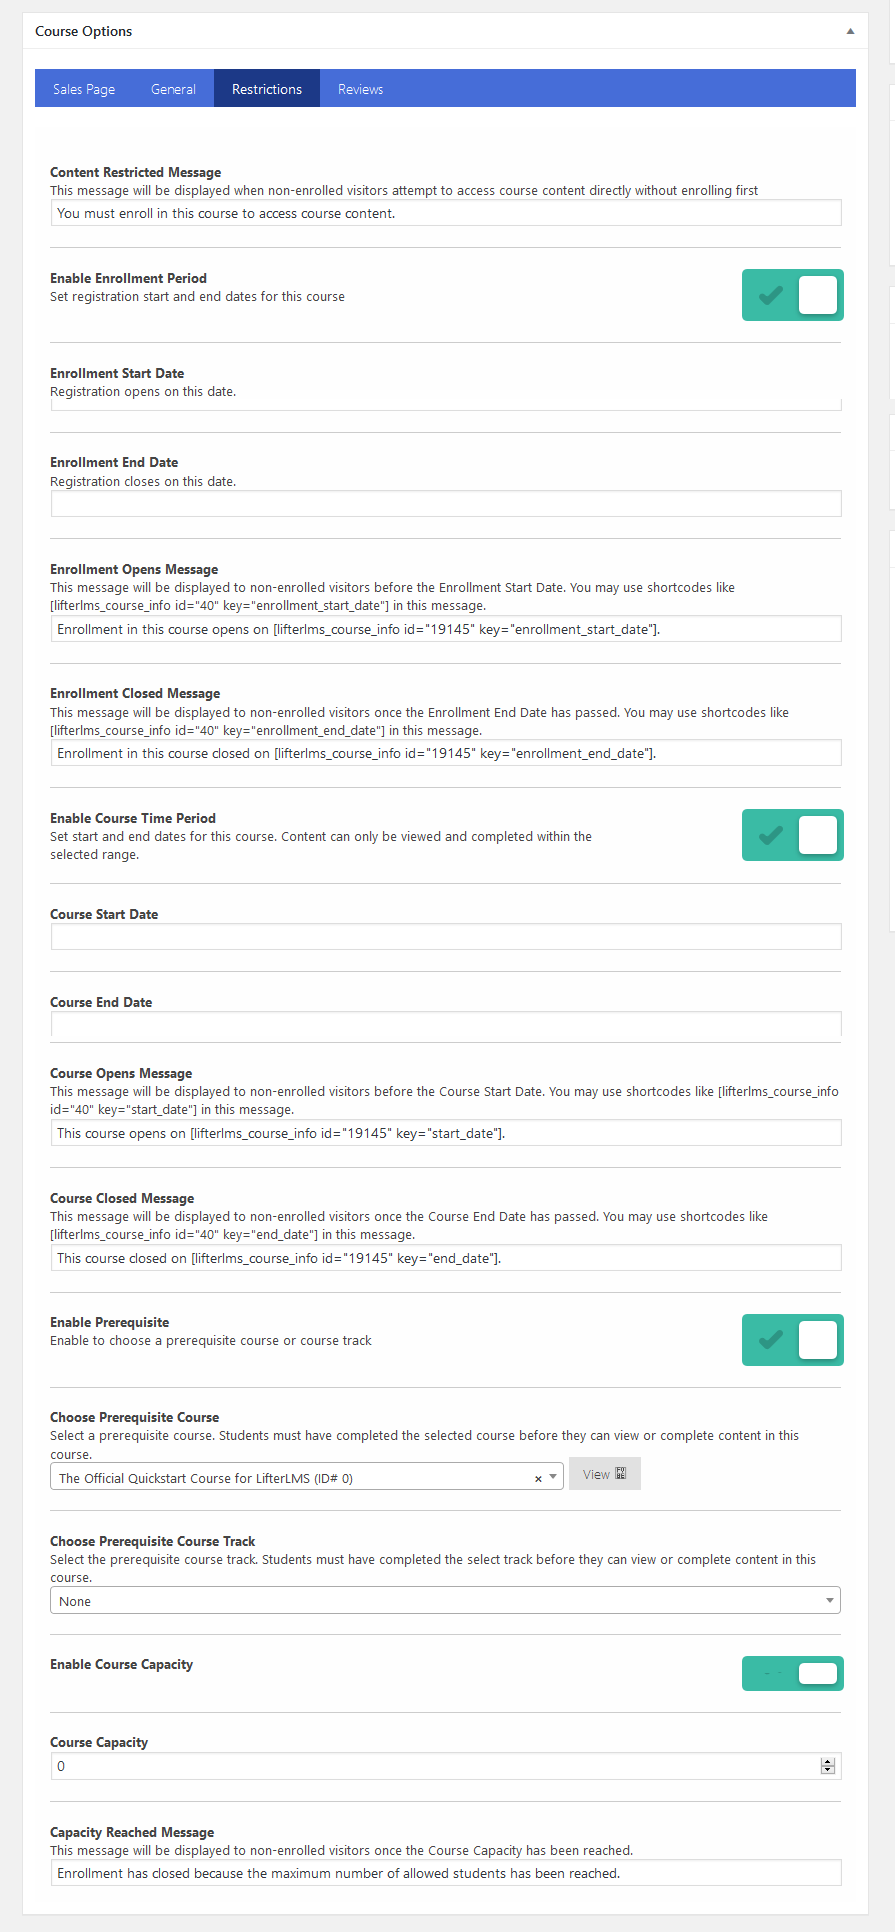
Content Restricted Message – This message will be displayed when non-enrolled visitors attempt to access course content directly without enrolling first
Enable Enrollment Period – Set registration start and end dates for this course.
Enable Course Time Period – Set start and end dates for this course. Content can only be viewed and completed within the selected range.
Enable Prerequisite – Enable to choose a prerequisite course or course track.
Enable Course Capacity – Limit the number of users that can enrol in this course.
4) Reviews
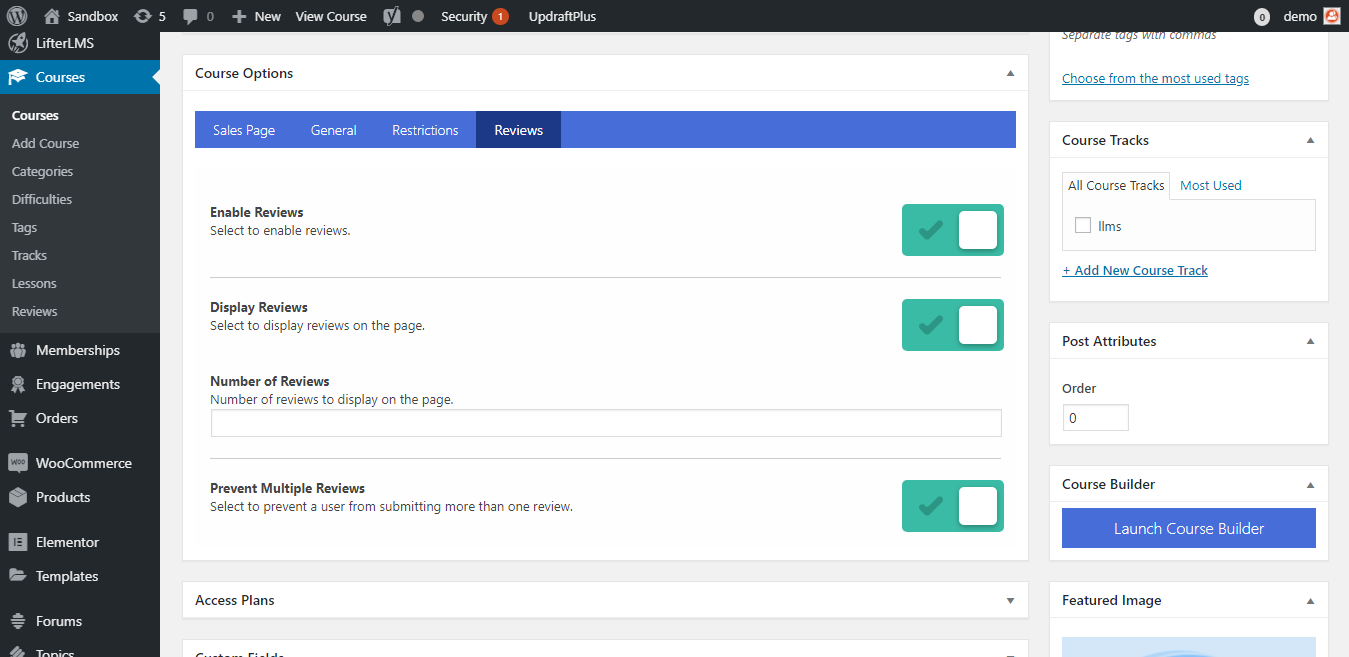
Enable Reviews – Select to enable reviews.
Display Reviews – Select to display reviews on the page.
Prevent Multiple Reviews – Select to prevent a user from submitting more than one review.
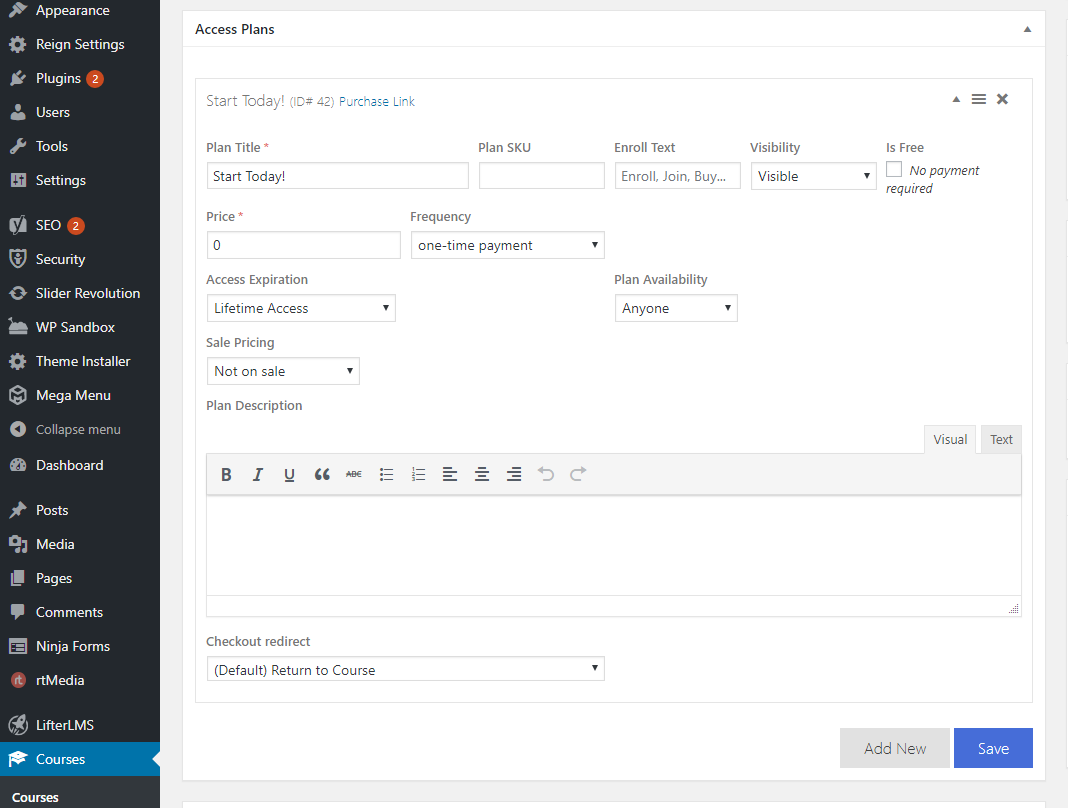
Access Plans – Access plans define the payment options and access time-periods available for this course.
No access plans exist for your course, click “Add New” to get started.
Add a new access plan by clicking on Add New button. You will get the following option to fill:
Plan Title
Plan SKU
Enrol Text
Visibility – Select among visible, hidden and featured.
Is Free – Mark check if the plan is free.
Price
Frequency – Select if it is one time or recurring payment.
Access Expiration
Plan Availability
Sale Pricing
Plan Description
Checkout redirect – select where you want to redirect user, you have three option here:
- Return to course
- Redirect to a WordPress page – Allows you to select a particular page.
- Redirect to a custom URL – Enter the custom URL where you want to redirect.
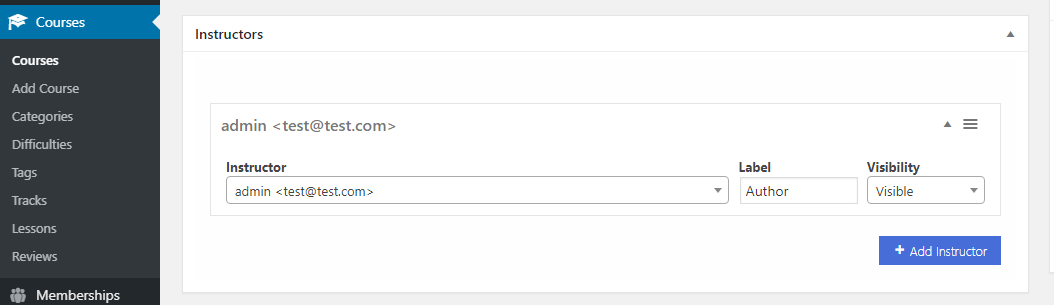
Instructors – Allows you to Manage, modify, edit or add more than one instructors
You have three options:
- Select the instructor
- Enter the label
- Set visibility
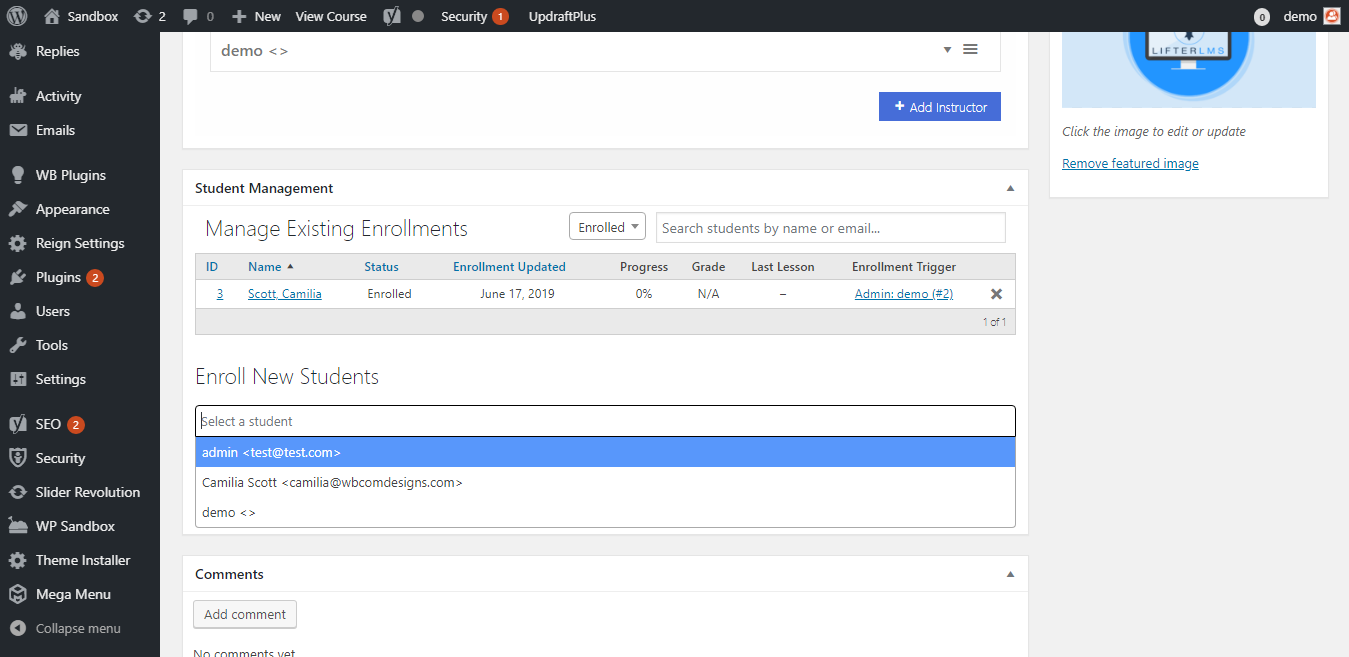
Student Management – Allows you to enroll a new student into the course.