Learndash Dashboards allows you to integrate Zoom meetings in your eLearning website.
To configure the settings, Navigate to WB Plugins > LD Dashboard > Zoom Meetings.
Things we need
While setting up the Zoom meetings, you need the following credentials:
- Credentials of Server to Server OAuth(Account Id, Client Id, Client Secret, User Email). Click here to know how to create Server to Server OAuth App.
- Credentials of Zoom Meeting SDK (Client Id, Client Secret). Click here to know how to create Zoom Meeting SDK App.
You’ll get the following options on this page:
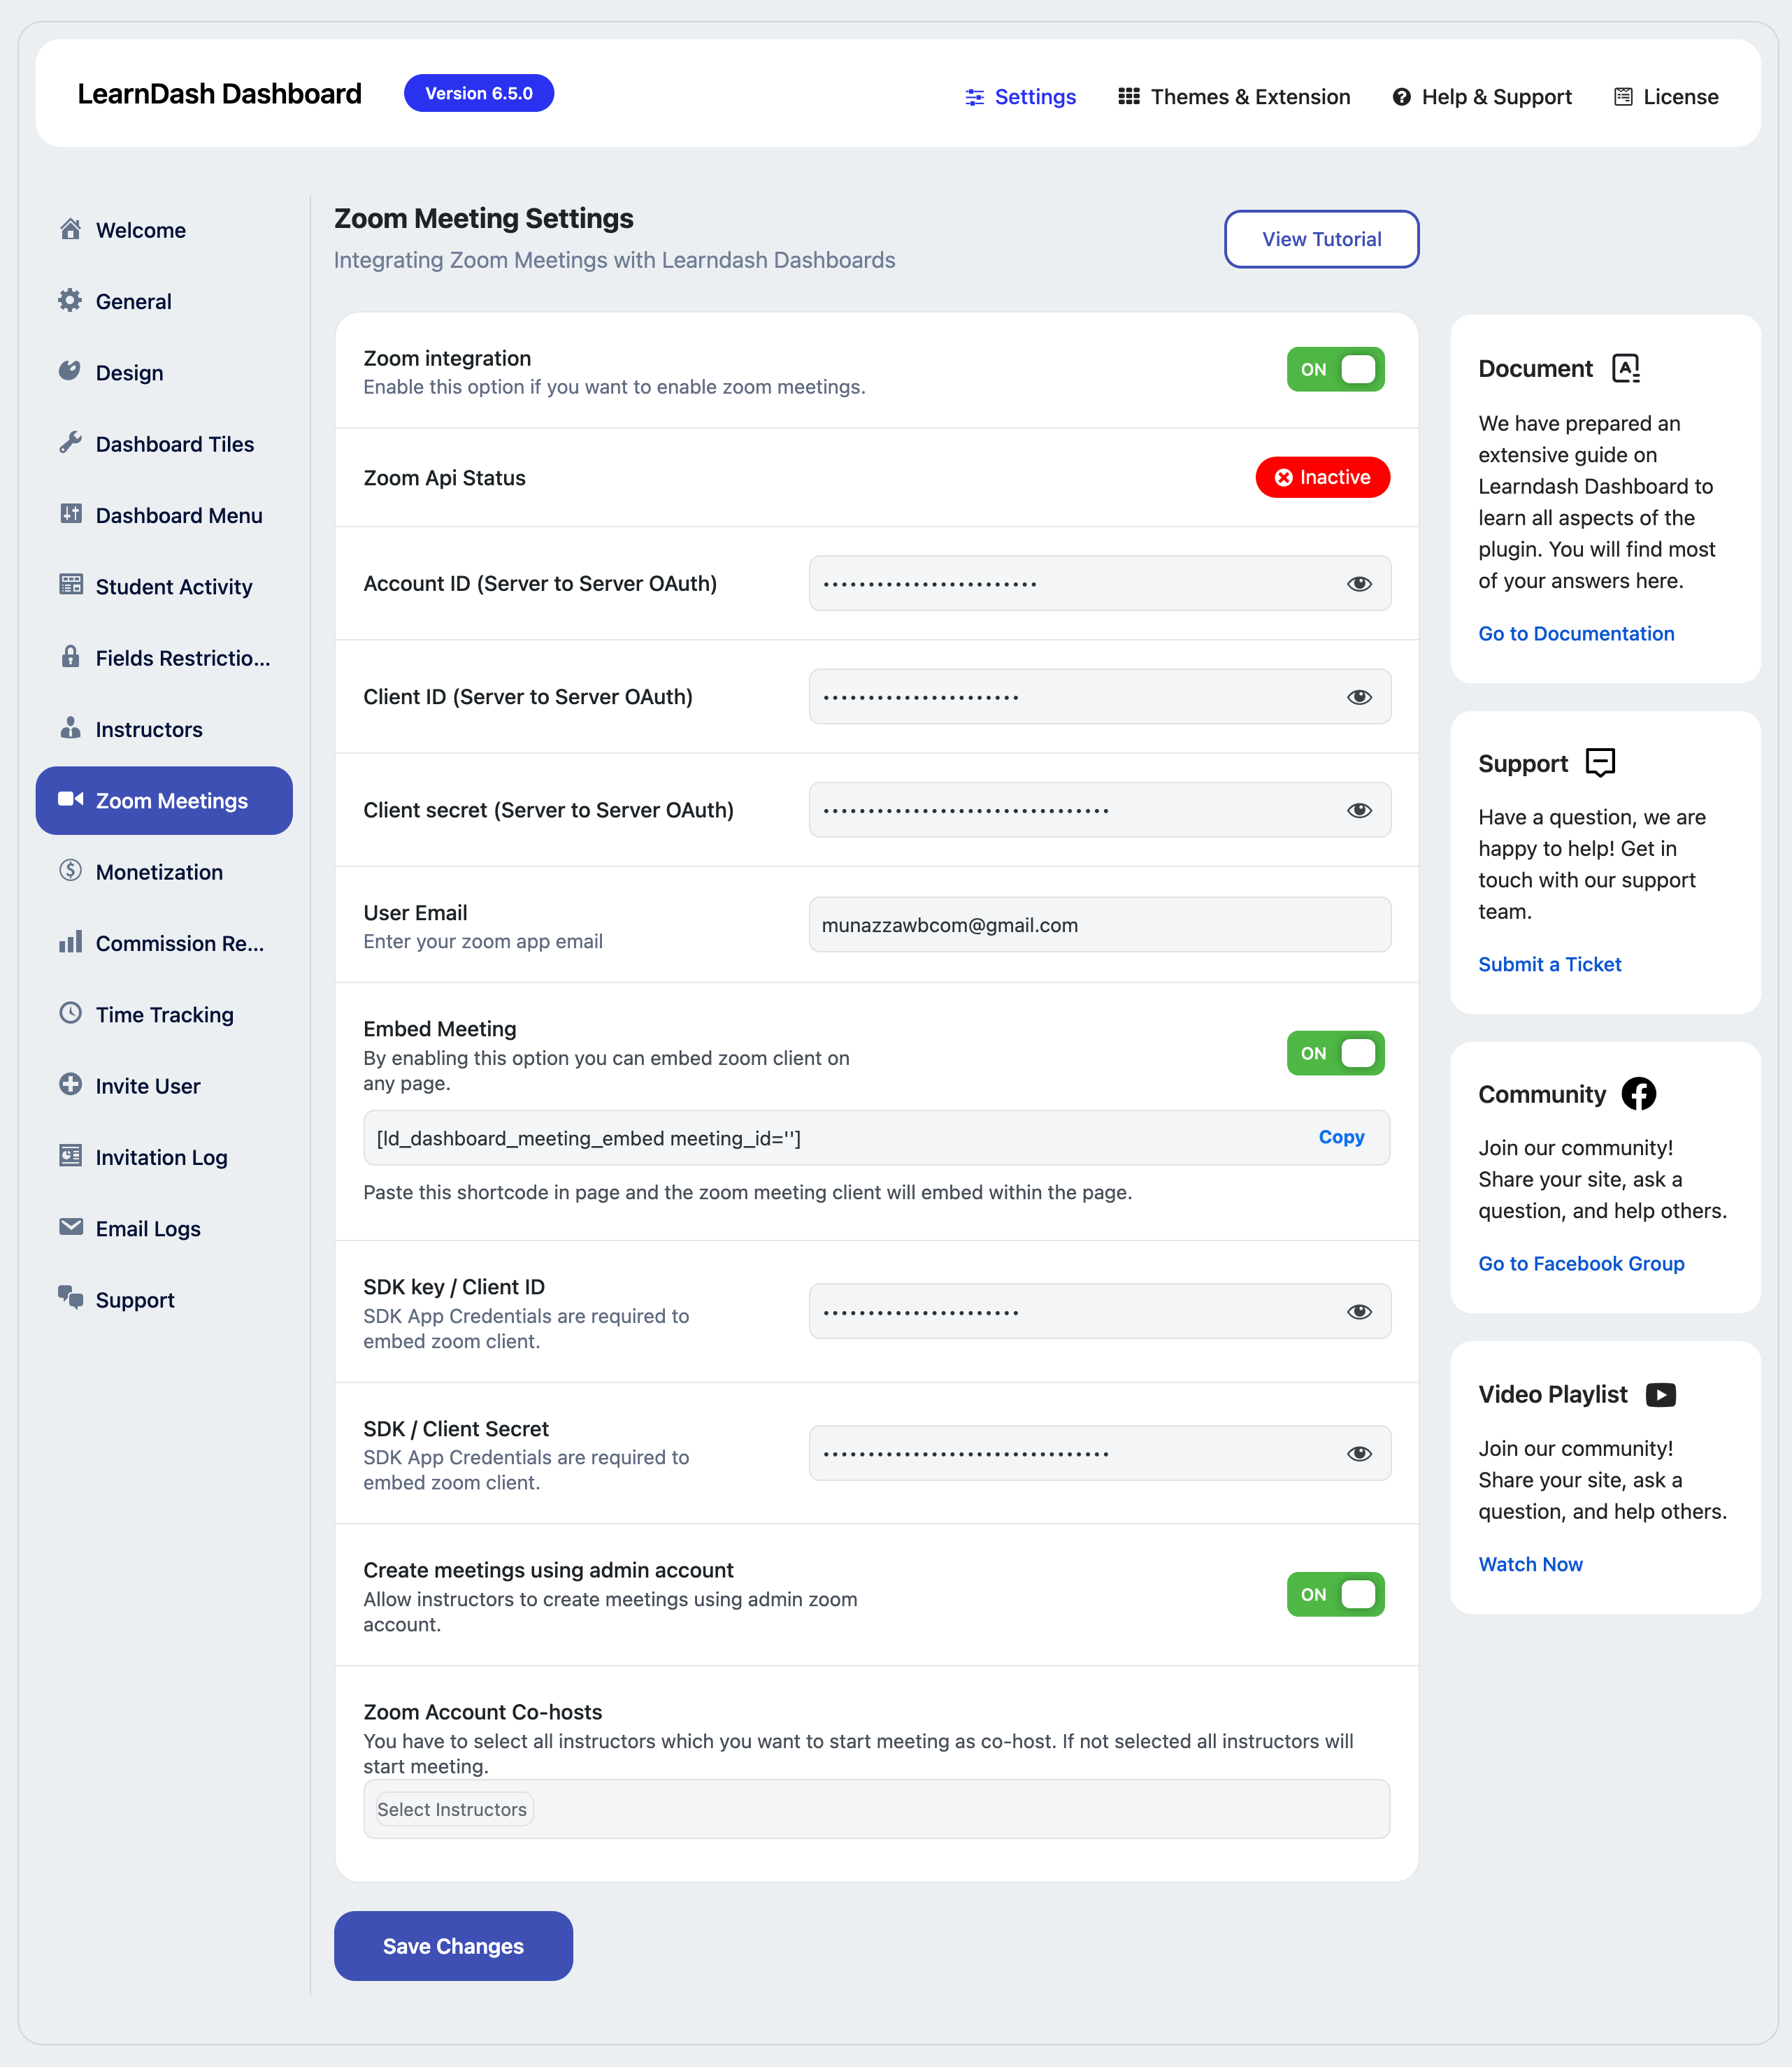
Zoom Integration
Enable this setting if you want to enable the zoom integration on your website.
Zoom Api Status
This field shows the status of entered data. If all the data is entered correctly and matched with your Zoom account, the status will be shown as Active otherwise it will display as inactive.
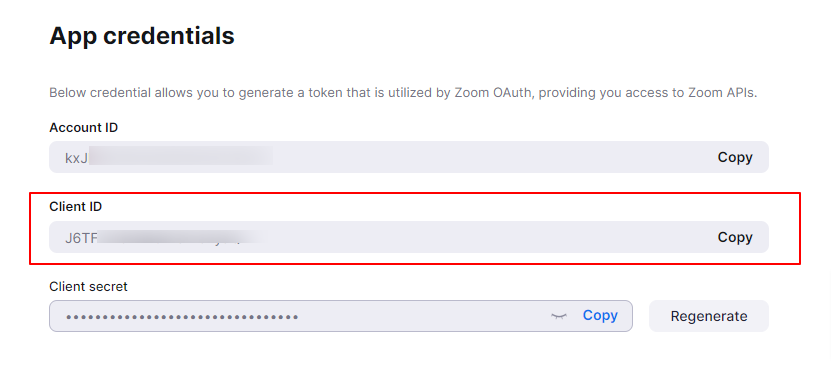
Account ID:
Create your Server-to-Server OAuth app by navigating to your Zoom account > Build > App. Copy the account id from the App Credential page and paste it into Account ID (Server to Server OAuth) field.
Client ID
Copy the client id from the same page and paste it into the Client ID (Server to Server OAuth) field.
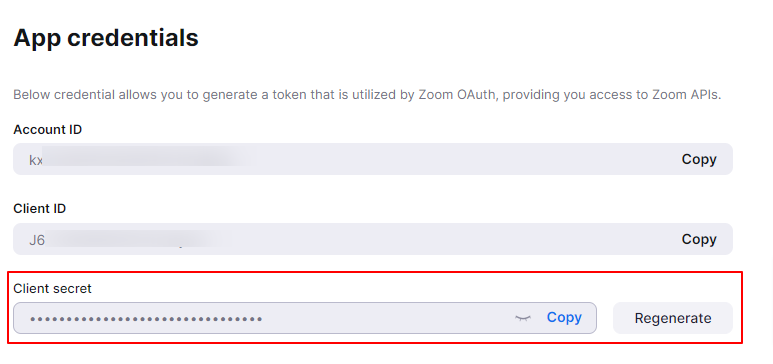
Client Secret
You’ll also find the client’s secret key on the same page. copy it and paste into Client secret (Server to Server OAuth) field.
User Email:
Paste the same email you used while creating the Zoom app.
Embed Meeting
App SDK credentials are required for Zoom Web SDK and embed web meetings in courses, Lessons, Topics, or any WordPress post and pages.View More to know how to create an SDK app.You can now embed the Zoom meeting into your course, lesson, or any custom WordPress post or page using the below shortcode:
[ld_dashboard_meeting_embed meeting_id='']
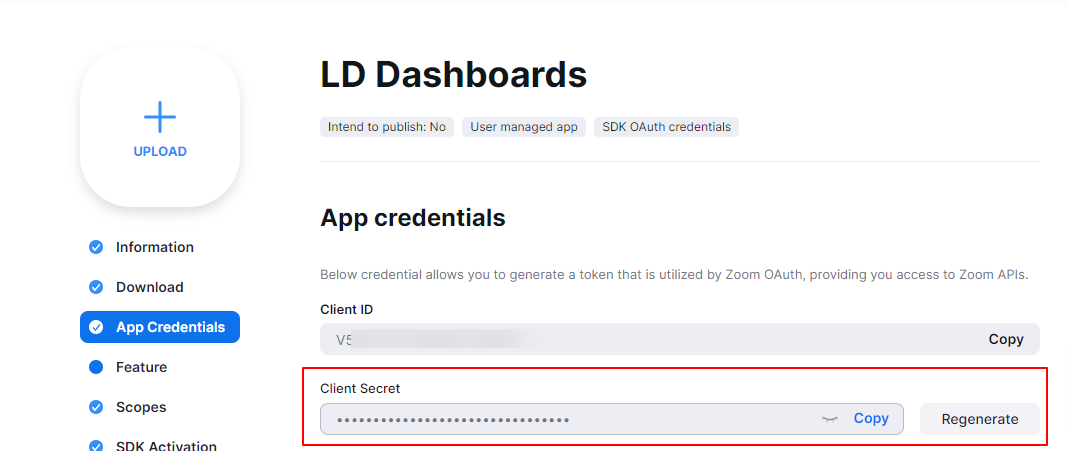
View More to know how to create an SDK app
Once it is created, Go to the App Credentials tab, copy Client ID . and paste it into the SDK key / Client ID field.
Go to the App Credentials tab, copy Client Secret . and paste it into the SDK key / Client Secret field.
Allow instructors to create meetings using an admin Zoom account.
You have to select all instructors which you want to start meeting as co-hosts. If not selected all instructors will start meeting.