Use BuddyPress Profanity plugin to censor content in your community! Easily Censor all the unwanted words in activities, private messages contents by specifying a list of keywords to be filtered.
Flexible options include advanced control over content such as strict/non-strict filtering. Flagged keywords which are embedded in whole words can be ignored.
BuddyPress Profanity Plugin Requires BuddyPress installed on your WordPress site.
Installation
Get The Plugin-
Here is the plugin purchase link. If you have already purchased the plugin, Login to Wbcom Designs go to My Account >> Downloads
Download the latest version of the plugin zip file.
Install Plugin
Upload the “BuddyPress Profanity” plugin to the “/wp-content/plugins/” directory via FTP.
Activate the plugin through the “Plugins” menu. Alternatively, you can use WordPress Plugin installer from Dashboard >> Plugins >> Add New to Upload the plugin zip file. Click install and activate
Setting Up the plugin
To manage the plugin’s setting, navigate to the settings panel:
WordPress Dashboard >> WB plugins >> Profanity
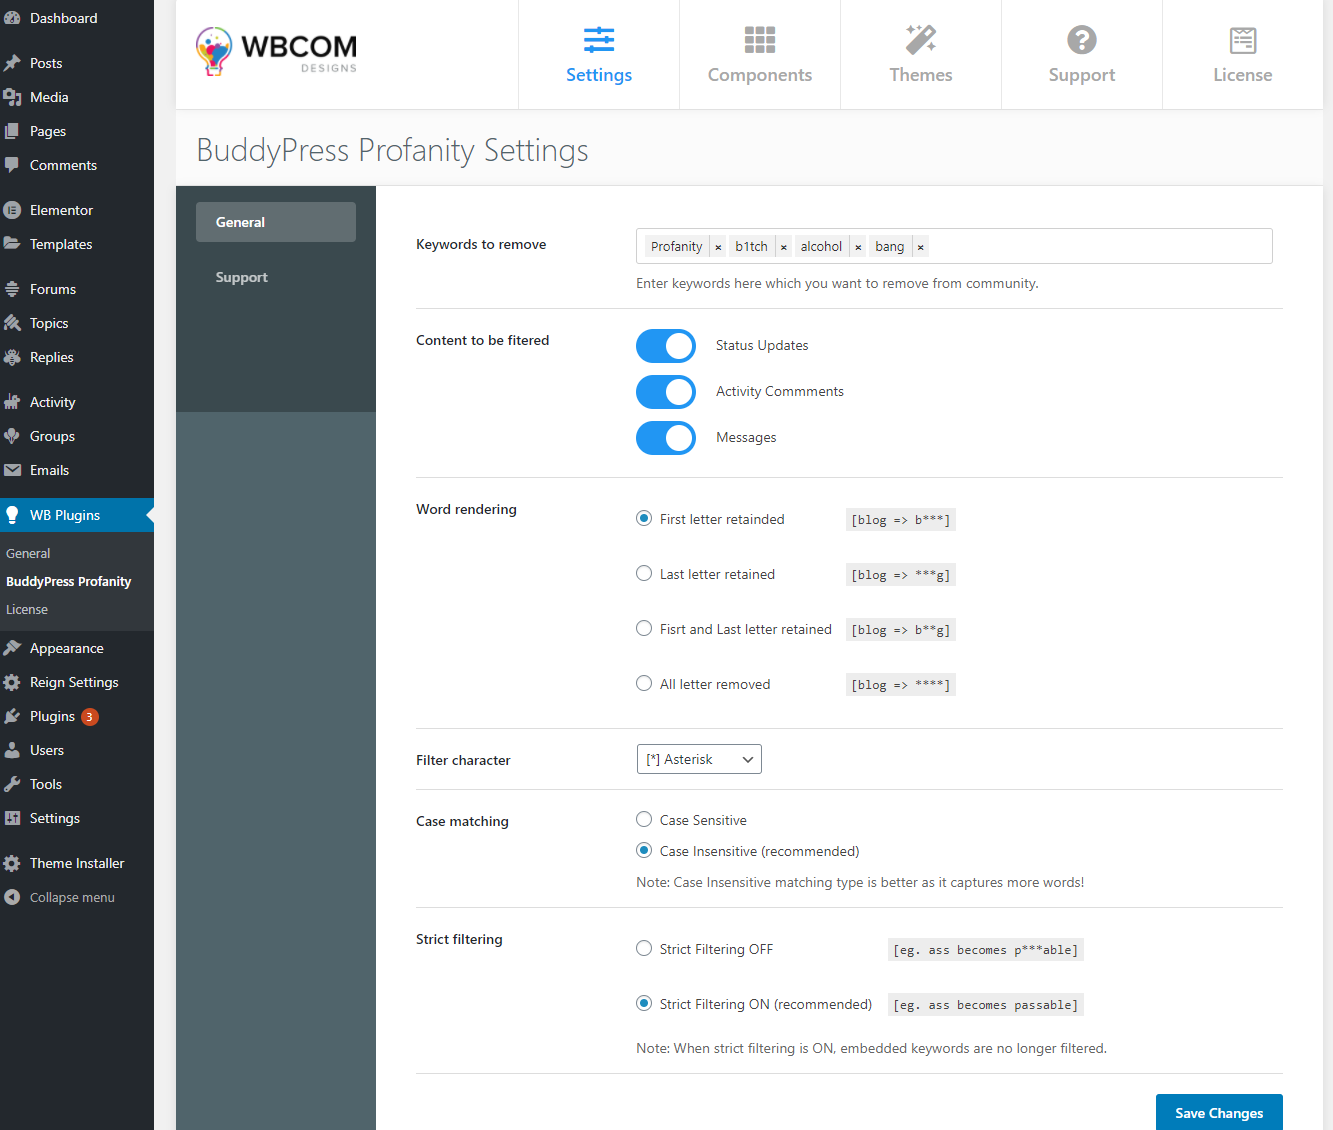
General settings in Profanity Includes
- Allows you to enter keywords which you want to remove from the community.
- Allows you to filter content from:
Status Updates
Activity Comments
Messages - Choose the pattern of how you want to render the restricted words
- Allows you to the filter character
- Select case matching
- ON/OFF strict filtering
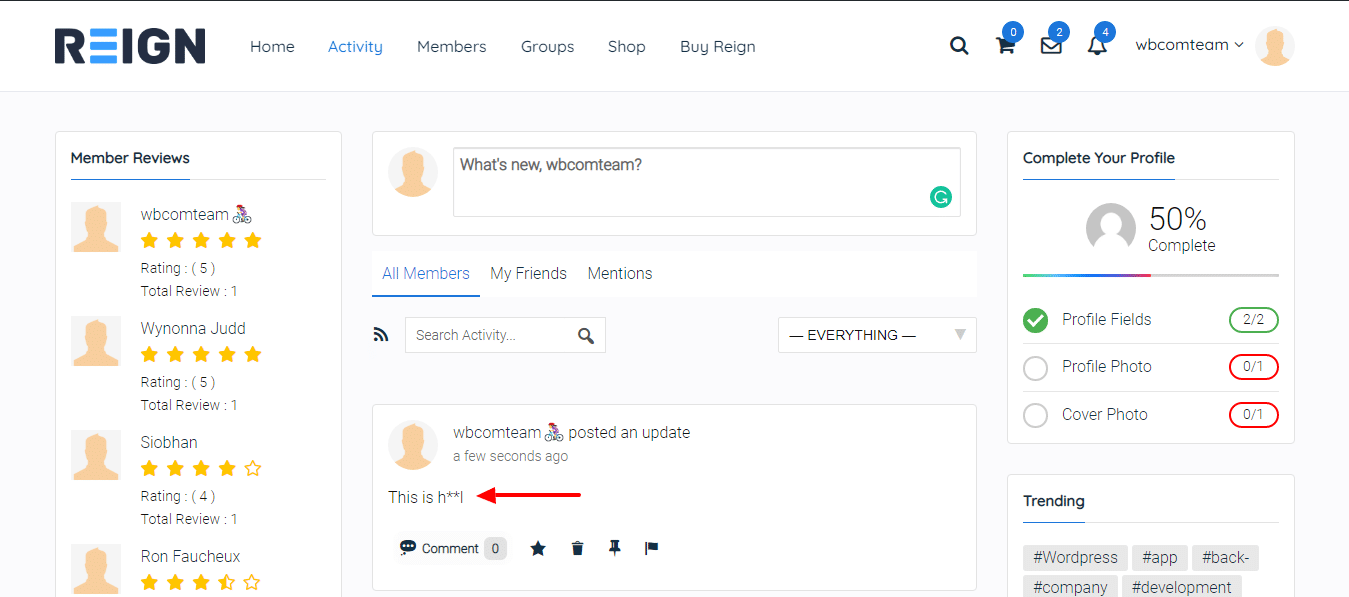
Front End View
BuddyPress Profanity is also compatible with BuddyBoss Platform.