Custom Email Options lets you customize the default WordPress name and email address. With this plugin, you can also send emails using SMTP under SMTP options.
Installing the plugin
Get The Plugin
- Here is the plugin purchase link. If you have already purchased the plugin, Login to Wbcom Designs go to MyAccount << Downloads
- Download the latest version of the plugin zip file.
Install Plugin
- Upload the “Custom Email Options” plugin to the “/wp-content/plugins/” directory via FTP.
- Activate the plugin through the “Plugins” menu. Alternatively, you can use WordPress Plugin installer from Dashboard >> Plugins >> Add New to Upload the plugin zip file. Click install and activate.
Setting up the plugin
To set up the plugin:
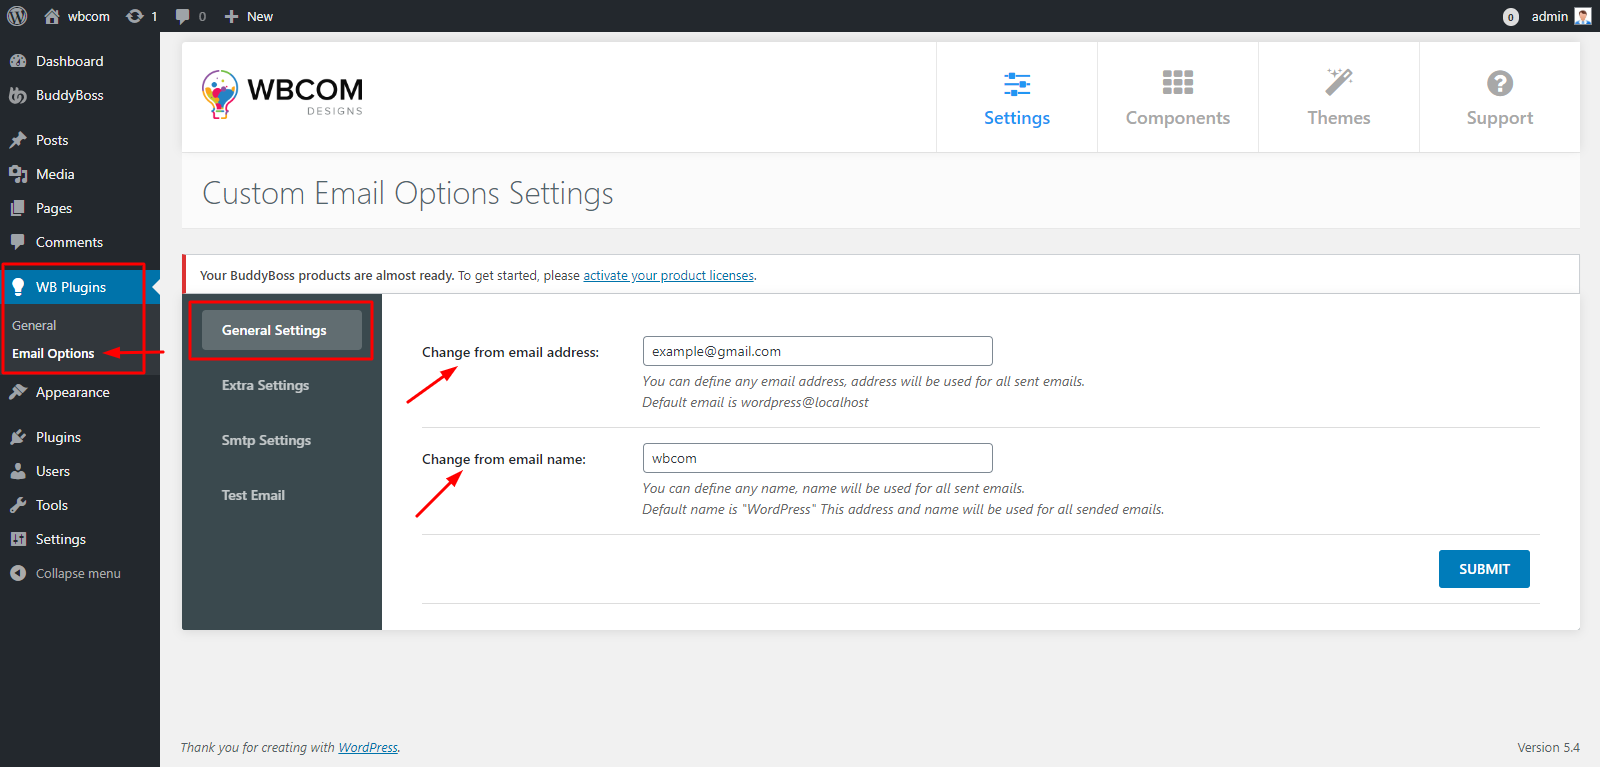
- Navigate to wp-admin > WB Plugins > Email Options. Here In the General Settings Tab, you can change the default email address and name.

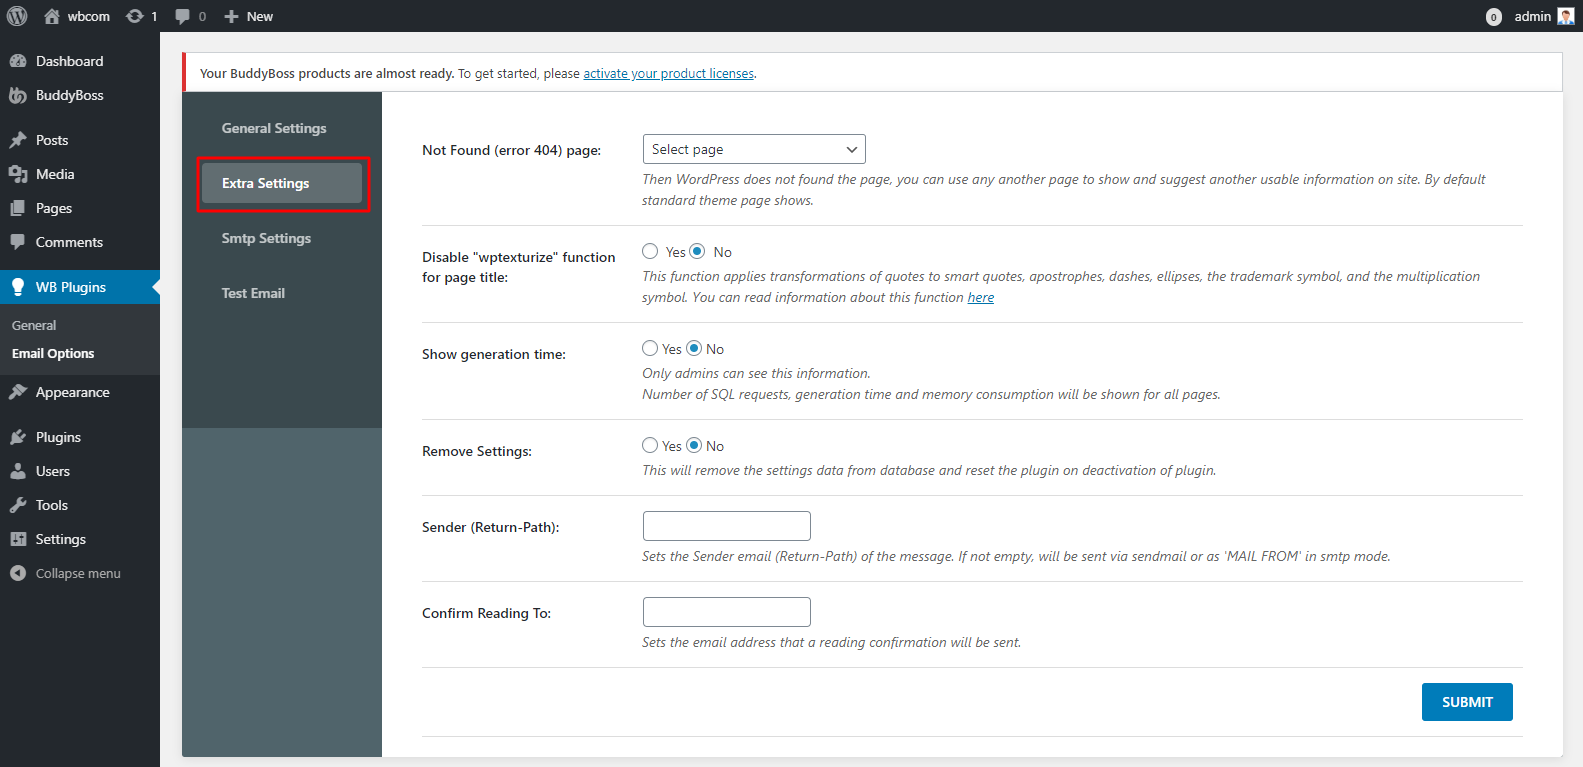
General Settings - In the Extra Settings Tab, there are some other options that you can change and tweak with this plugin, such as you can set Error 404 Page, Remove the plugin settings after deactivation of the plugin, set a Confirm Reading To option.
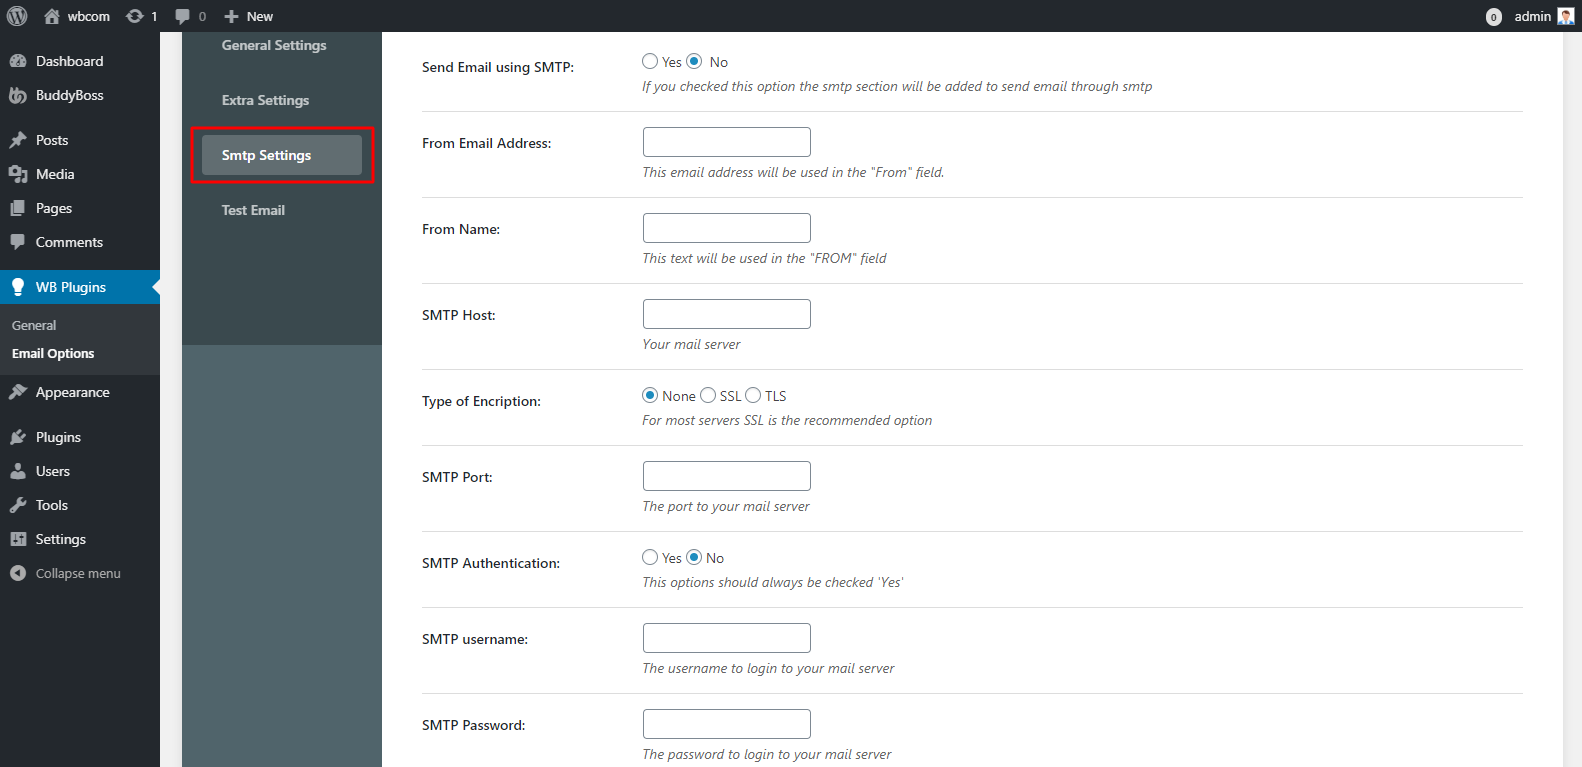
Extra Settings - You can also send your email through SMTP from SMTP Settings Tab. Just set up the SMTP and email information here.
SMTP-Settings - Click Submit to save changes.
Using the plugin
To test the email:
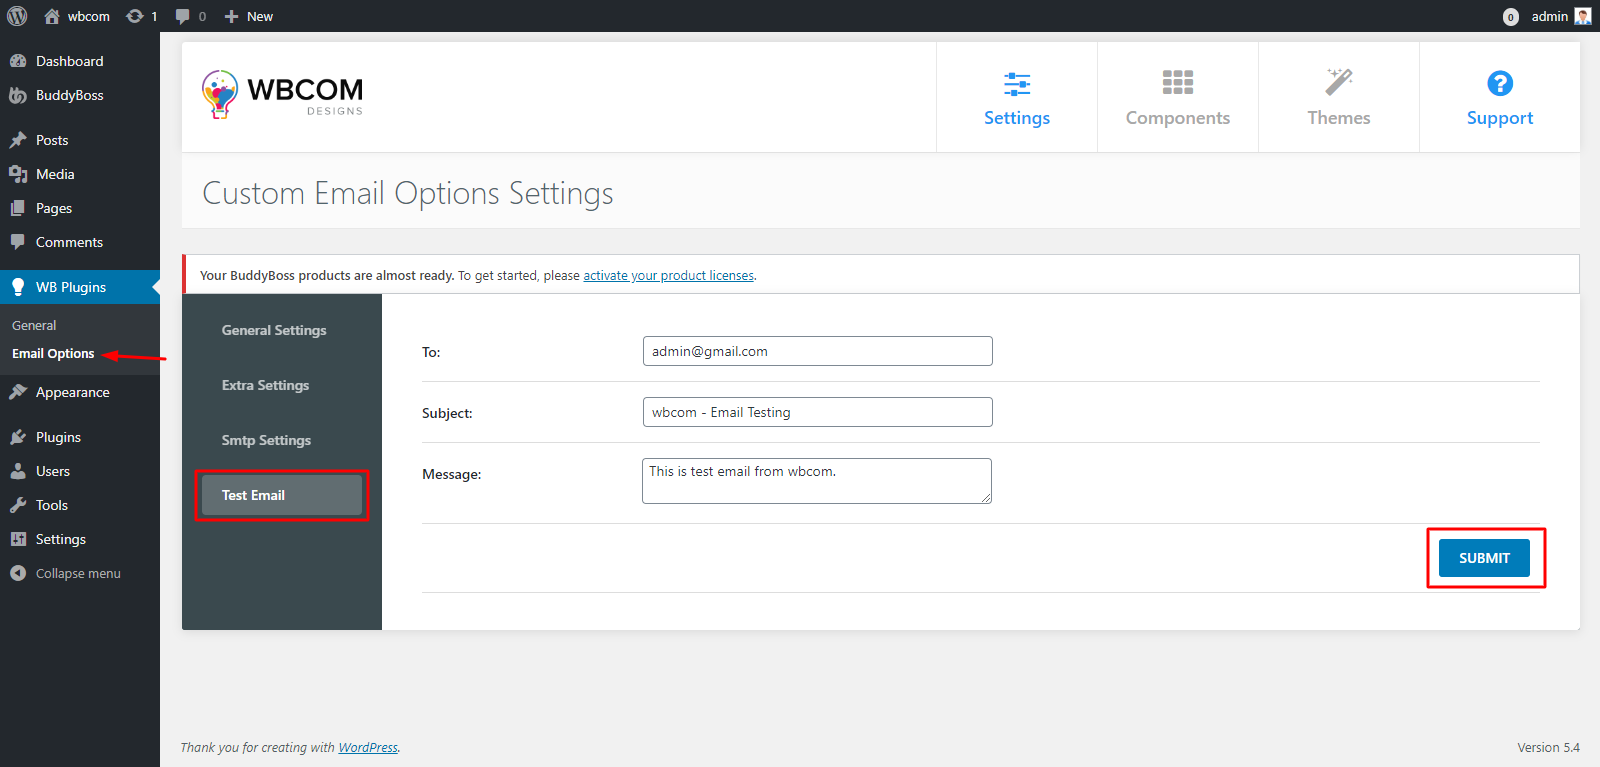
- Navigate to wp-admin > WB Plugins > Email Options > Test Email.
- Fill up the required parameters.
- Click Submit.
Test Email